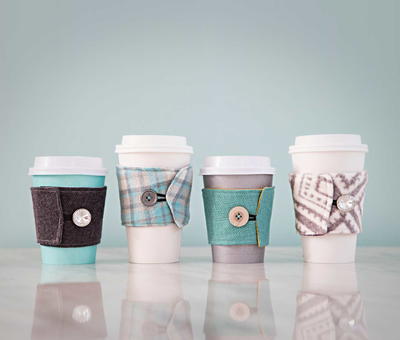
Buttons and Charm DIY Fabric Coffee Sleeves
With this DIY reusable coffee sleeve, you can be both stylish and eco-friendly!

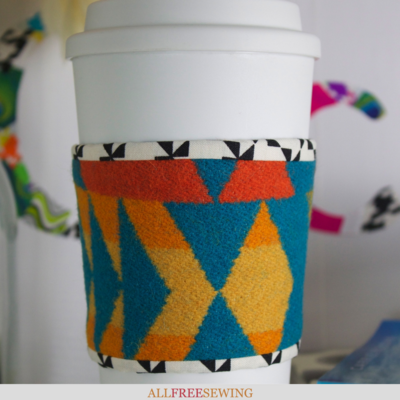
If you're a coffee connoisseur, you know how important the proper coffee accessories to a tasting experience. Now you can be eco-friendly, stylish, and cozy with these Buttons and Charm DIY Fabric Coffee Sleeves!
With a cute button and a thin elastic cord, this reusable coffee cup sleeve pattern has a simple and secure closure. It's a cinch to sew, and is even modeled after an old coffee sleeve for a guaranteed fit. Fabric stabilizer ensures the sleeve is both durable and heat resistant. Customize your giftable coffee accessory with two different fabrics, and you'll never caffeinate yourself without it!
Sign Up For More Free Patterns >>>
Project TypeMake a Project
Time to CompleteUnder an hour
Sewn byMachine

Materials List
- Thread shears (5'')
- Cutting mat (24'' x 36'')
- Two types of coordinating fabric
- Thread to match fabric
- Thin elastic cord
- Fabric stabilizer
- Sewing machine
- Cute button
- Iron
- Pen
- Store-bought or old coffee sleeve
- Rotary cutter (28mm)
- Fabric shears
For a different (but equally adorable) sleeve, check out this version!
>>How to Make a Reusable Coffee Cup Sleeve
Instructions
-
Start by making a pattern for your coffee sleeve. Find an old coffee sleeve and rip it open. Place it down on your fabric and trace around it, making the trace larger by about 3/4” on the top and bottom, and 1” on each side. These additions are made to account for seam allowance and overlapping once you begin sewing.
-
Using the 28mm rotary cutter, follow the lines you drew onto your fabric from the step above and cut out one side of your coffee sleeve. To protect your work surface, make sure you cut on top of the cutting mat.
-
Next, trace the piece of fabric you just cut out on to your second color of fabric. This will leave you with two identical pieces of fabric that will be sewn together to create your reversible coffee cup sleeve.
-
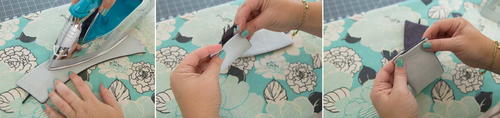
Fabric stabilizer will add stiffness to the sleeve, as well as heat protection for your hand. Trace and cut your fabric piece again over the fabric stabilizer, just like you did in Step 3, but this time go back with your fabric shears and trim it down to about 1/2” inside the sleeve. Then, iron the fabric stabilizer that has been cut to size onto the wrong side of one of your pieces of fabric. Because the fabric stabilizer is so thick, try to avoid sewing on it for folding purposes.
-
Pin both outwardly facing sides of the fabric together. Before you close one end completely, add a little folded piece of thin elastic cord inside. Place the loop facing inside and the free ends facing out. Adhere the free ends with a little tape to hold in place and finish pinning.
-
Sew around the entire rectangle of fabric, using a 3/8” seam allowance. Reinforce the stitch over the elastic cord and at the corners. Don’t sew it completely closed. Instead, leave about two inches open on the end that doesn’t have the elastic cord attached. Snip any excess string using the thread shears.
-
Trim the edges by about 1/4” to help make folding easier and cleaner, being careful not to nick the seams. Then, notch each edge with the fabric shears to help when turning the sleeves out.
-
Turn your coffee sleeve right side out and use a pen to push in the corners. This will help sharpen the look and create crisp corners. You should still have one free edge open.
-
Iron your new coffee sleeve and fold the raw edges of the open seam inside the sleeve, then iron again to help hold them in place inside the sleeve.
-
Add a finishing stitch along the entire outside of the sleeve, closing up the hole you just ironed. Again, snip any excess string. You can either use a contrasting color of thread so that you can see the stitch, or you can choose a matching color of thread to hide the stitching.
-
Adding the button is the final step. Wrap your sleeve around a coffee cup to measure and ensure it fits. Pull the elastic cord out a bit to see where the button should be, then mark the spot with a pen. Sew a button on top of the marked spot.


Want More?
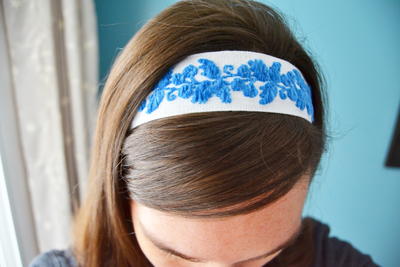
Read NextThe Easiest No Sew Headband