Mid-Century Modern Ottoman

One of the hottest trends in home decor right now is Mid-Century design, with its bold and bright colors and gorgeous geometric designs. If you've been wanting to give your home an easy upgrade, then this Mid-Century Modern Ottoman is the perfect mix of modern and vintage that you've been searching for. This sewing project comes with a printable PDF for your face stencil, as well as a list of step-by-step instructions, so that you don't have to worry about any guesswork. This charming DIY project is the ultimate piece for any vintage junkie, making it a total must-make for pop art enthusiasts. Travel back to the 1960s with this colorful DIY home decor.
Project TypeMake a Project
Time to CompleteWeekend project
Sewn byBoth Hand and Machine

Materials List
- Cushion FoamTM Tuffet Kit by Fairfield
- Bright – Geo Pop Canvas 2
- Free Silhouette Cutting File (see below)
- Silhouette Machine
- Plaid Fabric Paint (Blood Orange, Navy)
- Freezer Paper
- Dritz Sheer Press Cloth
- Orange Piping
- (4) Round Taper Legs
- (4) Top Plate Hardware
- 18″ Wood Circle (the thicker the better!)
- Sky Blue Oly*fun
Making Your Ottoman
Step-by-Step Instructions
-
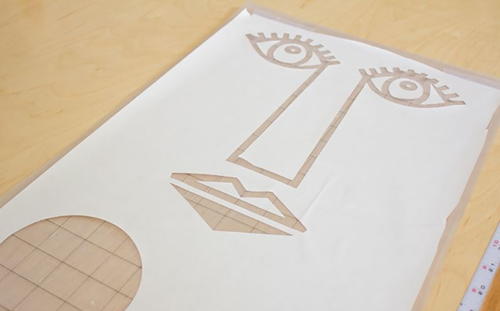
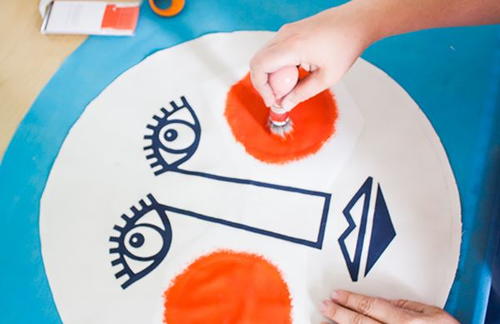
Download the free stencil file. Use freezer paper with your Silhouette to create the stencil. We used a 12″ x 24″ cutting mat and applied the freezer paper glossy side up. Use the basic printer paper setting for cutting. This can also be cut by hand if you do not have a Silhouette.
Click this link to find the free stencil file! -
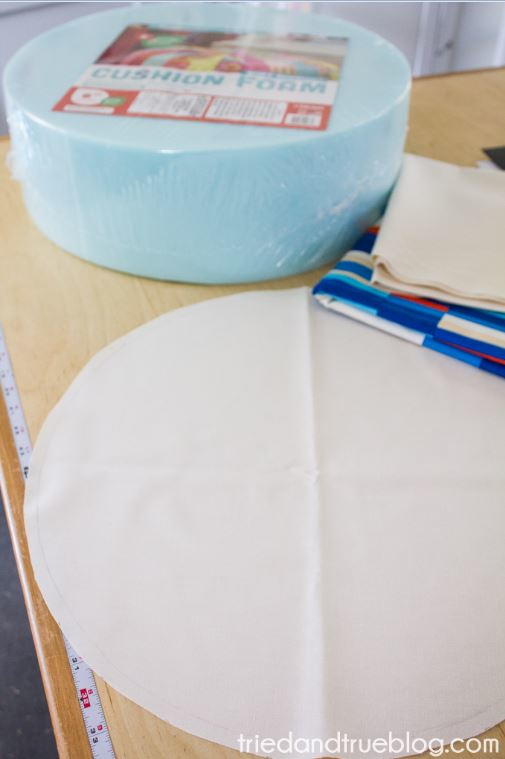
Using the Cushion FoamTM from Fairfield’s Tuffet Kit as a pattern, trace around the circle adding an additional 3/4″ seam allowance, and cut two circles of Natural fabric.
-
Working one section at a time (Face first, then the cheeks), iron the freezer paper stencil in place and begin applying fabric ink. Allow to dry and then carefully remove the stencil. Apply cheeks in same manner. When both paints have dried completely (24 hrs.), iron the fabric ink to set and sew two circles together. Sew orange piping around the inner seam.
-
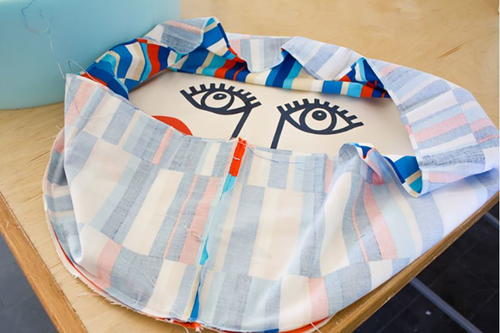
Cut a 56 2/3″ x 10″ strip of coordinating fabric. Sew ends together (1/4″ seam), pin around the sewn-together circle panels, and sew in place.
-
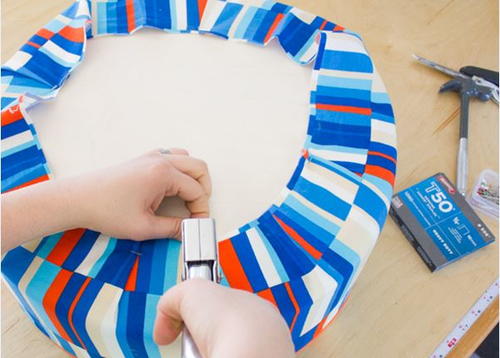
Turn ottoman cover right side out and pull over foam cushion. Position wood disc inside of cover and tightly staple the fabric in place.
-
Cover the bottom with a layer of a dark color Oly*fun so that you can’t see the fabric edges underneath.
-
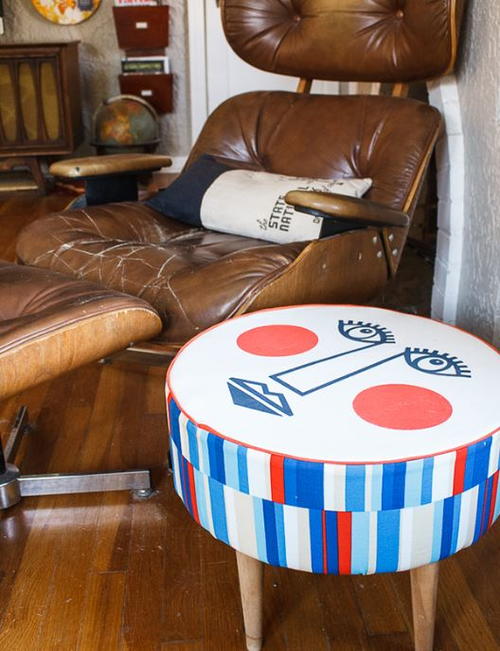
Follow the manufacturer’s instructions for attaching the Top Plate Hardware and Round Taper Legs.
Voilà! You have officially made your very own Mid-Century Modern Ottoman!

Read NextHoliday Reversible Mini Mat
Your Recently Viewed Projects
Thanks for your comment. Don't forget to share!
Polly Esther
Feb 03, 2017
This would be the perfect addition to my living room! I love the bold design.
Report Inappropriate Comment
Are you sure you would like to report this comment? It will be flagged for our moderators to take action.
Thank you for taking the time to improve the content on our site.