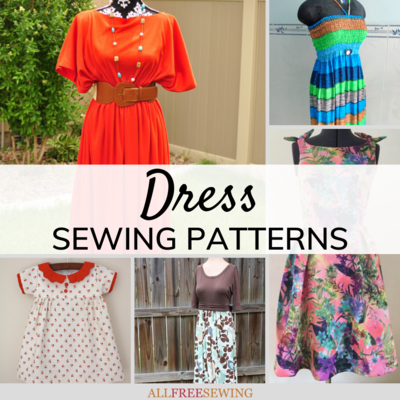
Infinity Bow Wrap
This winter, stay warm and comfy while maintaining your stylish look in the Infinity Bow Wrap. This is the perfect evening wrap sewing pattern to wear to both special occasions and casual events. Go for elegance with this simple sewing project by Angel from Fleece Fun. Find the video tutorial for this project at the bottom of the page.

Materials:
- ¾ yard of minky or micro-fleece (can substitute regular polar fleece or Jersey knit)
(Note: if you are making this in an extra-large size you may need more fabric) - Jersey ball point needle
- Rotary cutter
- Mat
- Measuring tape
- Needle
- Thread
- Pins
- Sewing machine
Instructions:
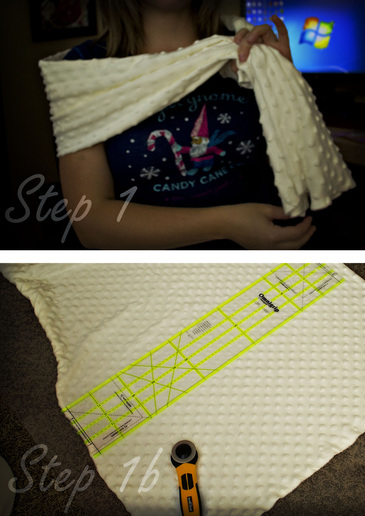
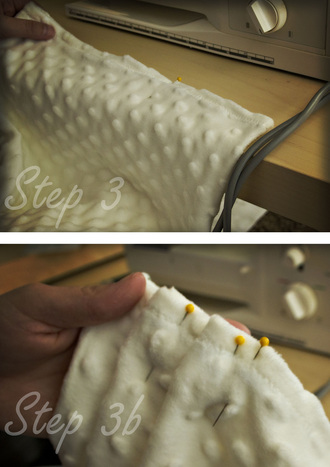
- Take a quick rough measurement: Unfold the cloth so it is its full width (approx. 58 to 60 inches) and wrap around your shoulders. You want the wrap to be snug, so it won’t droop off the shoulders, but not so snug it completely restricts your movement. Mark with a pin. Take to your rotary cutter and matt and cut off the excess. Now taking this excess cut a strip that is 5 inches wide and 9 inches long.|
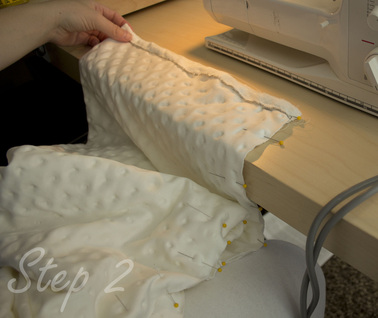
- Begin to Sew: Taking the large piece of fabric (the one that goes around your shoulders) – fold it in over on itself right sides together (so it’s the same length, just half the width) and sew, using a .5 seam allowance all the way down the fabric length. This will make a large tube turn right side out ( so all the soft goodness in on the outside).
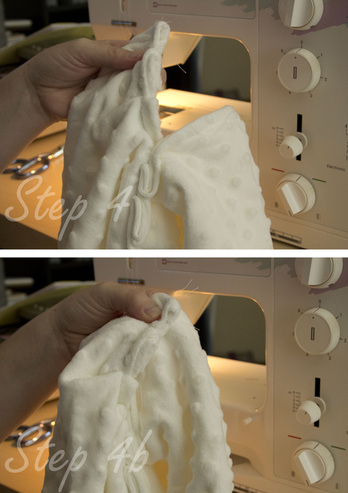
- Gather part of each end: To help with the “bow” look, we’re going to make some pleats (folds) on each end of the scarf. Looking at the end of the scarf mark about 1/3 in of the width. Then (and this doesn’t have to be perfect) make three pleats by folding over the fabric and pinning using 2/3 of the width. (See picture) Repeat on the other side taking care that you do this on the opposite side. You should have the folds on the top on one side and on the bottom on the other. Once you have pinned each side sew the fold in place using a straight stich about .5 from the end of each side. Sew all the way down completely closing the wrap ends.
- Join the ends: Taking the each end and bringing it together, the one side should have pleats and the other should be straight. Pin the pleats on top, each side ( you will “twist the fabric in the middle to make this happen). The overlap should be about 1 inch.
- Then sew, together, through all the layers of cloth (be careful and go slow). This should make the wrap one large circle.
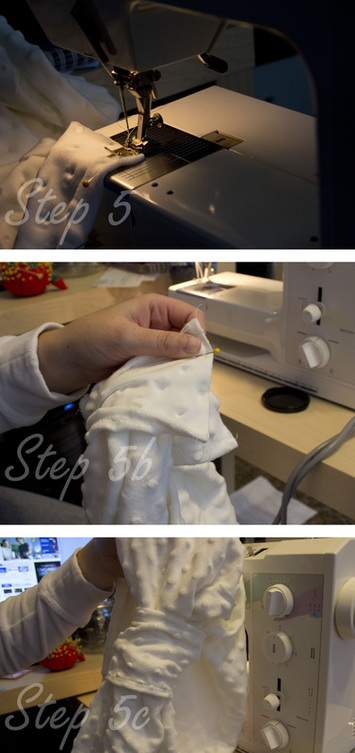
- Wrapping It Up: Taking the 5x9 piece of fabric turn under the edges .5 inches and using a zig zag stich sew the ends down. Then take the piece and with right sides together wrap it around the wrap – pin the ends together and sew using a .5 seam allowance, taking care to keep all the other fabric out of the way. Turn right side out, slide so that if covers the seam where the wrap ws join and hand stich a few stiches in the back to make the loop stay in place. Finished! You now have a cute wrap, that feels as good as it looks!
Read NextStylish Nursing Cover Tutorial
Your Recently Viewed Projects

Thanks for your comment. Don't forget to share!
grand30 5881817
Mar 18, 2012
I haven't tried to do this yet, but it's beautiful and would look stunning on a bride.
JennyBee1
Nov 30, 2011
@bareladn 2324996, I'm sorry to hear of your trouble. I have two options for you: 1. You can contact the pattern designer directly for help. The designer is specified in the byline. 2. I might also suggest that you try posting your question to our sites Facebook page. It is monitored by the editor and is a great resource for helpful tips and suggestions from our Facebook friends; perhaps they can offer some guidance! Here is the link: http://www.facebook.com/AllFreeSewing --editors of AllFreeSewing
bareladn 2324996
Nov 22, 2011
I'm confused on the pleating part and I think I'm just making it too complicated. So just one side gets the pleats? Because you say bring the pleated side and the straight side together then twist it. Even when I watch the video I don't quite understand this process. Could you maybe explain this a little differently? Thank you Andrea
chrispix1115 80195 61
Dec 07, 2012
Both sides have pleats, so they are matching. On the video, she says it at about 2:25, and written on step 3 as Repeat on the other side.
Report Inappropriate Comment
Are you sure you would like to report this comment? It will be flagged for our moderators to take action.
Thank you for taking the time to improve the content on our site.