How to Make a Superhero Cape
 Kids don't need it to be Halloween to dress up like a superhero. If you know a child with superhero powers (or just one creative imagination), use this child cape pattern.
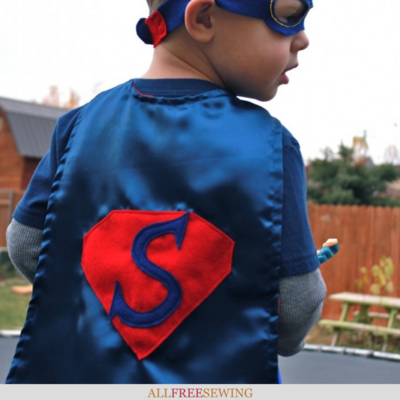
Learn how to make a superhero cape they can run and play in. This free child's cape pattern and video tutorial by Maureen Wilson will show you how to make a cape out of fabric.
You can even personalize the cape by adding their initial to the back. What child wouldn't love to play superhero with the costume to match?
Whether your little one wants to be a superhero for Halloween or feels like wearing a cape any day of the week when there is justice to be had and a community to protect.

Click here for the full how to make a super hero cape video tutorial.

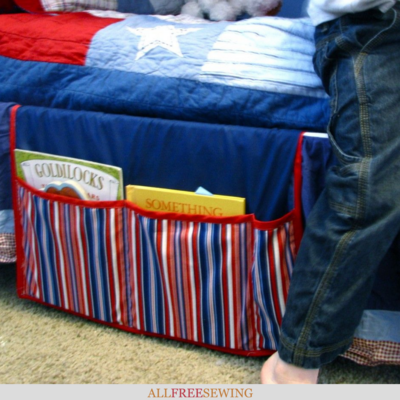
Find instructions for the Superhero Utility Belt and Mask to complete the costume.
Materials:
- 1 yd red costume satin
- 1 yd blue costume satin
- Felt scraps
- Velcro
- Microtex needle (recommended)
- Free cape neck template (see step 1 for link)
- Fabric glue (optional)
Directions:
- Begin by printing off the free cape neck template. (Margins are already included, so don’t scale or resize the pattern.) Cut out the pattern using craft scissors.
- Lay both pieces of fabric together and pin the neck pattern towards the top center. Add extra pins down the length of your fabric to secure the two fabric layers together.
- The length of your cape will depend on the height of your superhero. You’ll want it to come to the middle of the calf. For my preschooler, I measured 24 inches from the bottom of the neck pattern. Add a pin where you want the cape to end.
- Next chalk a line from the end of the pattern down to the pin. Angle this line outward so the cape is flared. Repeat on the other side. Join these with a straight chalk line along the bottom.
- Cut out the cape along the chalk lines and around the neck pattern. Remove the pins and separate the layers.
- Now you can make your symbol for your cape. You might want to use your super kid’s initial. Cut the shapes from felt, then adhere to the back of the cape with fabric glue. I prefer this over pinning since the fabric is so slippery.
- Topstitch to the cape with a 1/8 inch seam.
- Next pin the two cape pieces right sides together. I recommend switching to a fine Microtex needle, since this slippery fabric has a tendency to snag. Sew the pieces together with a 1/2 inch seam. Leave a 4-inch hole along the bottom edge of the cape for turning right side out.
- Clip the corners. Make notches in outward curves and clips on the inward curves, being careful not to snip your stitches.
- Turn the cape right side out. Fold the raw edges of the hole inward, and topstitch shut with a 1/4 inch seam. Continue topstitching all the way around the cape. Since you can’t press this fabric, pause every so often to roll the seam between your fingers to create a crisp edge.
- Finally, we’ll add the Velcro closure on the neck. One piece should go on the red side, and one piece will go on the blue side. I like to make the soft loop side rather long, so that the fit is more adjustable. Sew the Velcro in place.

Find more homemade Halloween costume ideas for kids in this adorable, free eBook! Homemade Halloween Costumes: 11 Kid’s Halloween Costume Ideas is full of ideas to love.
What is your child's favorite superhero? Let us know below in the comments!