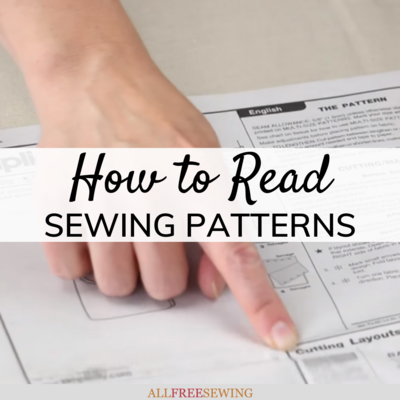
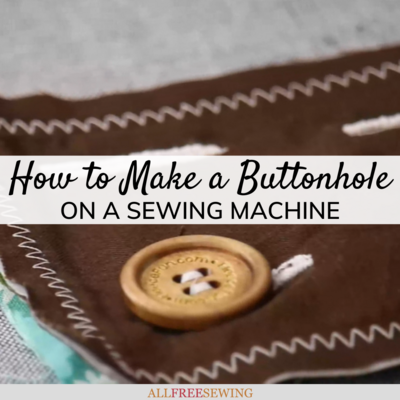
How to Make a Buttonhole on a Sewing Machine
This sewing guide is all about buttonholes for beginners! Learn how to use your sewing machine to make them.

Even experienced sewists may be intimidated by sewing buttonholes. But this sewing machine buttonhole tutorial will wipe those fears away. Sewing buttonholes into your finished project can be a scary task, but it doesn't have to be.
The steps in this tutorial are clear and easy to follow, so you can learn exactly how to accomplish this sewing technique. Sewing buttons is essential for many sewing projects, and once you gain this skill, you'll be able to sew so many more patterns than before.
Once you learn how to sew a buttonhole with a sewing machine, you'll be able to make a larger variety of clothing, bags, and other fabric items with button fasteners. This tutorial is great for beginner sewists or experienced sewists looking for a quick refresher.
Sign Up For More Free Patterns >>>
Skill Level: Easy
Project Type: Learn a Technique
Time to Complete: Under an Hour
Sewn By: Machine
Buttonhole on a Sewing Machine Video Tutorial
Press play on the video below to watch Angel walk you through the process of sewing a buttonhole on a sewing machine. She explains the details so that you can replicate this on any sewing machine with buttonhole capabilities.
More importantly, you'll be able to see the machine in action, which is great if you're a visual learner! Scroll down for our written tutorial.
Sewing Machine Buttonhole Tutorial
Materials Needed
- Fabric/garment/sewing piece
- Buttons
- Fabric marking pencil
- Seam ripper
- Sewing ruler
- Long pins
- Sewing machine (with buttonhole capabilities)
- Strong thread
Before Getting Started: Tips for Beginners
If you've never sewn a buttonhole on a machine before, it's important to practice! Take your machine for a test run on scrap fabric before making the hole on your garment/sewing piece.
Because you only get one chance, it's worth taking the time to understand the process and your machine.
Read through your sewing machine owner's manual. If it has buttonhole feature, there will be instructions on how to proceed.
Keep in mind that your machine could have a manual buttonhole stitching feature or an automatic stitching feature. The process is similar for both but, when it's manual, you'll be doing more of the adjustments as it goes.
How to Sew a Buttonhole With a Sewing Machine:
- Place the button of your choice on the fabric where you want the buttonhole to be. With a ruler, measure the area to assure the button is evenly or correctly spaced on the item.
- With your marking pencil, draw a horizontal line at both the top and bottom of the button. Remove the button.
Note: If your button is a unique shape, measure and mark at the widest part of the button so that the buttonhole will be large enough to fit the button.

- With a ruler or straight edge, connect the two horizontal lines with a vertical line, centered. Again, measure if needed so that your button will be in the correct place.

- Read through your machine's manual if needed and prep your machine for sewing the buttonhole. Attach your buttonhole foot. Also, make sure the tension is at the right level and your thread is correct for your project.
- Sew the buttonhole using your machine's buttonhole feature (manual or automatic).
Note: Depending on the type of fabric you are using, a stabilizer might be helpful to keep the buttonhole straight and in the correct place.

- Remove the fabric with the sewn buttonhole from the machine. Place a long pin at each end of the "opening" of the buttonhole (bar tacks). This will help keep you from ripping past the bar tacks.

- Using a seam ripper or similar sewing notion, rip open the stitches to open the buttonhole.

- If you haven't, it's time to sew your button on the other side and test out your new buttonhole!
P.S. Watch this video on YouTube here.
Want More?
How to Sew a Buttonhole By Hand >>
What other sewing techniques do you want to learn?
Let us know in the comment section below!
Your Recently Viewed Projects
Thanks for your comment. Don't forget to share!
dekan1 6386240
Jun 09, 2017
I have an older machine without an automatic buttonhole feature. This video was of no help to me.
Weberme
May 05, 2017
I hate making buttonholes even after 40 years but this video has shown a few things I have been doing wrong. It has some good pointers on making the buttonholes turn out better. This is great for a beginner to watch before they start making one. It also has a tutorial too to look over. I think this video may have given me the confidence to try them again.
Report Inappropriate Comment
Are you sure you would like to report this comment? It will be flagged for our moderators to take action.
Thank you for taking the time to improve the content on our site.