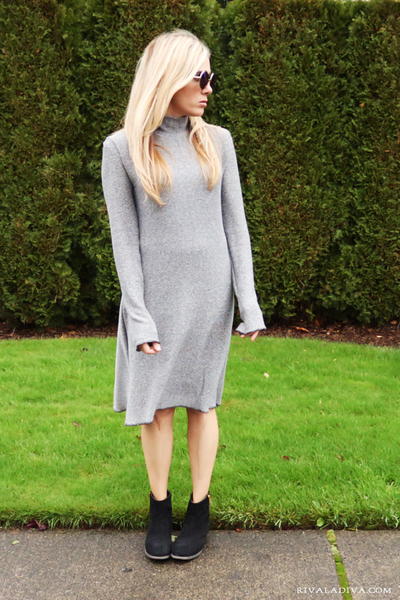
How to Draft a Sweater Dress Pattern
Looking for a good free sweater dress pattern? Why not make your own? Learn how to draft a dress pattern with this page.

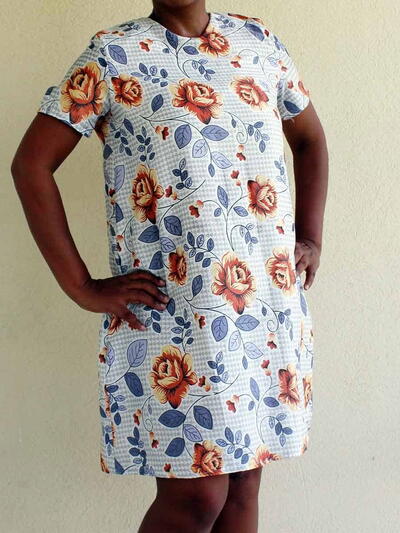
It can be frustrating when your clothes don't fit you exactly the way you'd like them to. This full tutorial, How to Draft a Sweater Dress Pattern, takes you through the necessary measurements and steps to creating your own DIY dress.
Daniela from On the Cutting Floor provides diagrams in this tutorial to help guide you to making your own variation of a dress that can be worn from season to season.
Learn how to draft a pattern that is absolutely customized for your body type with the help of this free tutorial. Here's Daniela:
I am Daniela, and I blog at On the Cutting Floor. I am excited to share with you this drafting tutorial on how to make a sweater dress. If you have visited my blog before, you have noticed that I make free patterns. I love to create modern, feminine pieces that you can wear every day.
Join Sewing It Up For More Free Patterns, Tutorials, & Guides >>
DIY Sweater Dress Sizing and Style Options
I have tried my best to size and grade the pieces from size 4 to 22. However, the standard sizing of the clothing industry only benefits itself: the reality is that there is no standard body, so why would you use a standard pattern? Most of them will need to be adjusted to your own body.
Sometimes certain adjustments will be even more complicated. That is why I wanted to present this drafting tutorial to you. This is an idea that I call, "Your Closet, your fit." I hope you like it and find ways to customize your own to fit your needs.

How to Draft a Sweater Dress Pattern
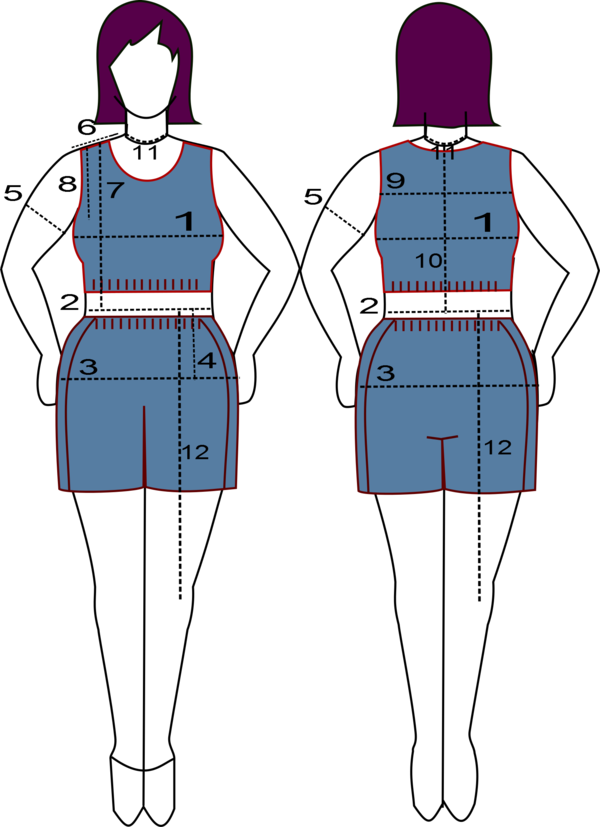
Body Measurements
You will need measurements for:
- Bust
- Waist
- Hips
- Waist to Hips
- Upper Arm
- Shoulder Width
- Shoulder to waist
- Armscye Depth
- Back Width
- Neck to Waist
- Neck
- Waist to knee
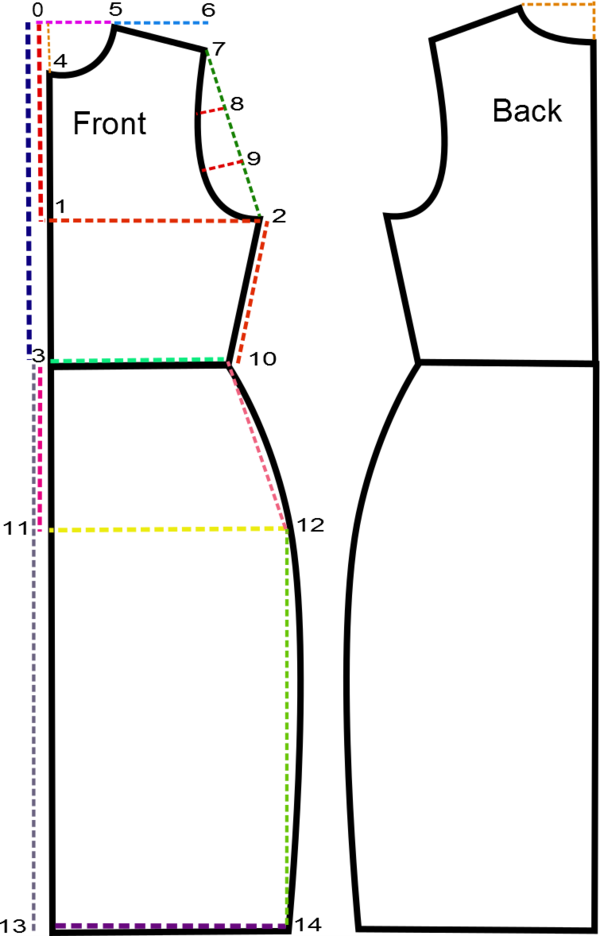
Bodice Measurements
0-1 Measure your armscye (outline of the armhole) depth + 1 inch
1-2 Bust size divide in 4 + 1 inch
0-3 Measure neckline to waistline
0-4 Measure 1/5 of armscye depth
0-5 Measure 1/5 of neckline + 1/8 inch. Round up
5- 6 Shoulder width + 1 inch
6-2 Join on a straight line
Divide it into 3 equal parts. Number 7-87
2-7 Hollow by 1.5 inches
7-8 Hollow by 3/4 inch
8- 6 Hollow by 1/2 inch
3-9 Waistline to Hipline
9-10 Hip measurement divide in 4 + 1
3-11 Waist to Knee length
Square up to number 10
The numbers above correspond to the numbers in the illustration below:
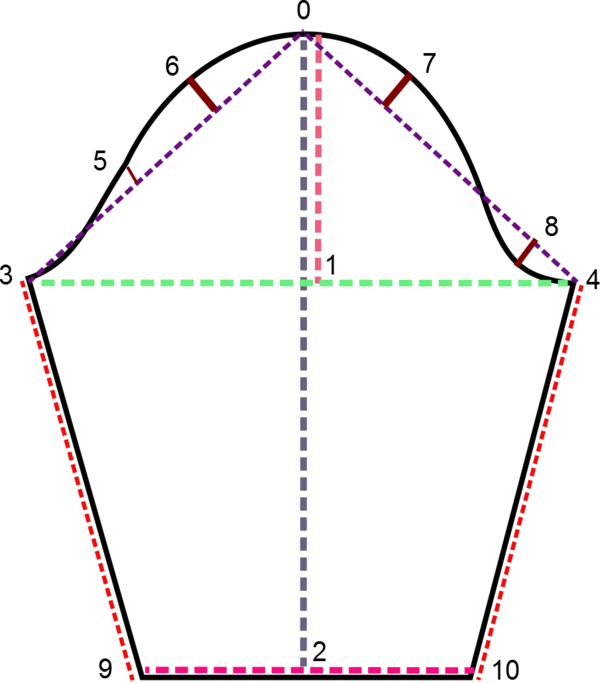
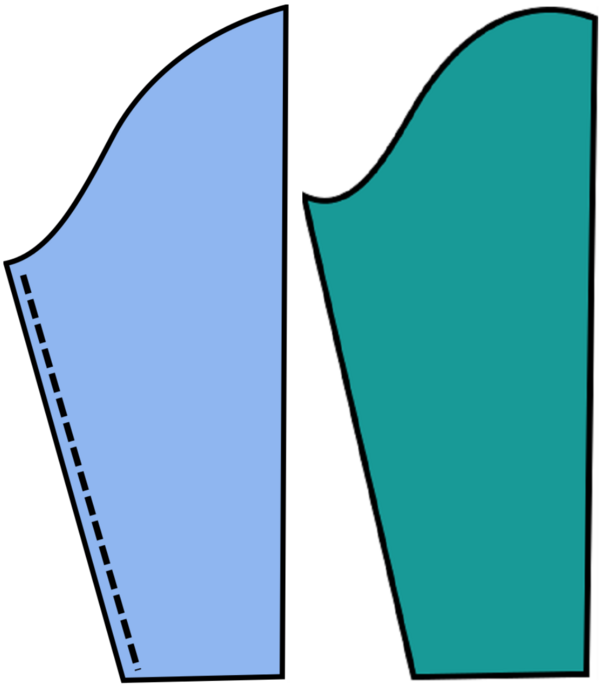
Sleeve Measurements
0-1 1/4 of armscye measurement
0-2 Sleeve length
0-3 half armscye measurement. Divide into 4 equal parts.
4-5-6:
Raise 1/2 inch at 5 and 3/4 inch at number 6
Hollow the curve by 1/2 inch at number 4
Join the lines from 0-3
Repeat on the other side
7-8 Wrist measurement + 1 inch
3-7 Join
Repeat on the other side
*For these pattern pieces, add 1/4 inch seam allowance.
The numbers above correspond to the numbers in the illustration below:
How to Draft a Sweater Dress Pattern: Construction
- Place front and back dress pieces together, right sides facing, and sew along the side.
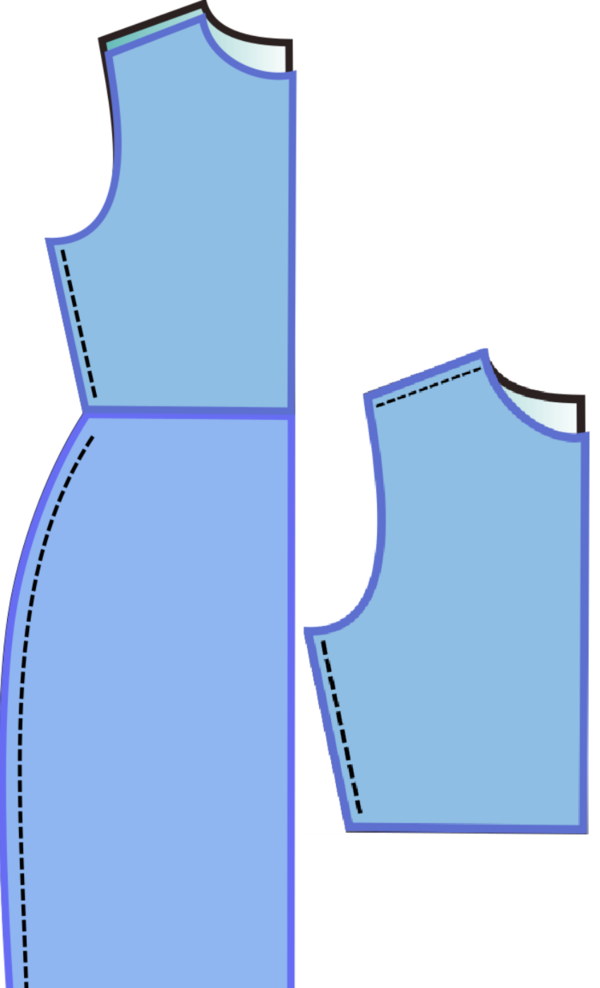
- Fold the sleeves in half, then sew along the side (left side in the image below).
- Turn the sleeve to the right side (right side in the image above).
- Insert the sleeve in the armhole.
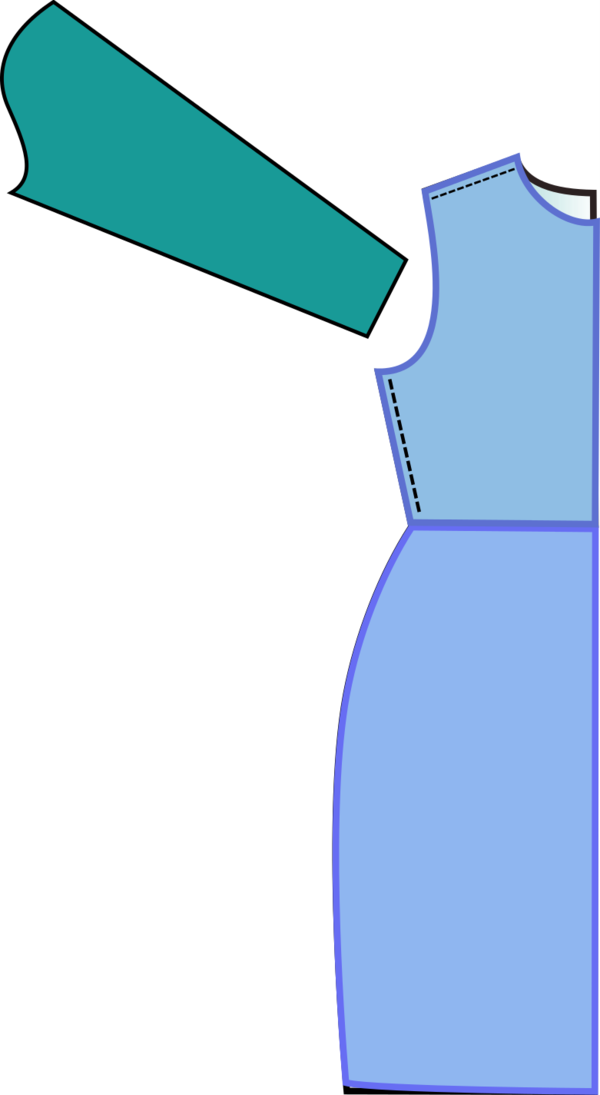
- Pin and sew along the edges.
- Fold the hemline 1 inch and sew along the edge.
- Repeat with the sleeves.
DIY Sweater Dress Neckband
For the neckband, you can get the exact measurement by using your own fabric. Because of the stretch capability of the fabric you are using, the amount needed will vary.
- Measure the neckline.
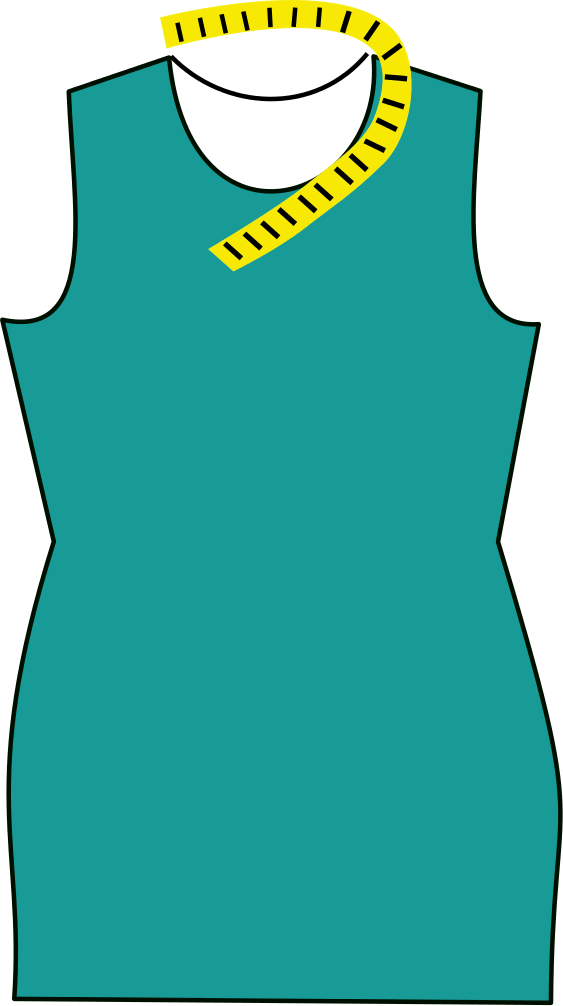
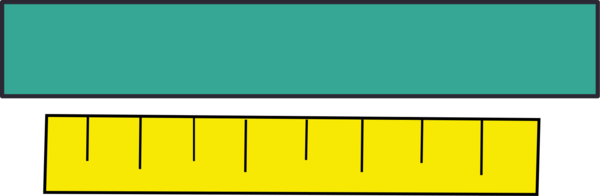
- Cut a piece of fabric with the length of the neckline and 2 ¼ inches wide.
- Stretch your fabric slightly (even if it is stretched, the fabric should not lose its shape) until you get the neckline measurement.
- Fold the neckband lengthwise and sew along the side.

- Fold it widthwise and pin it to the neckline, right sides facing.
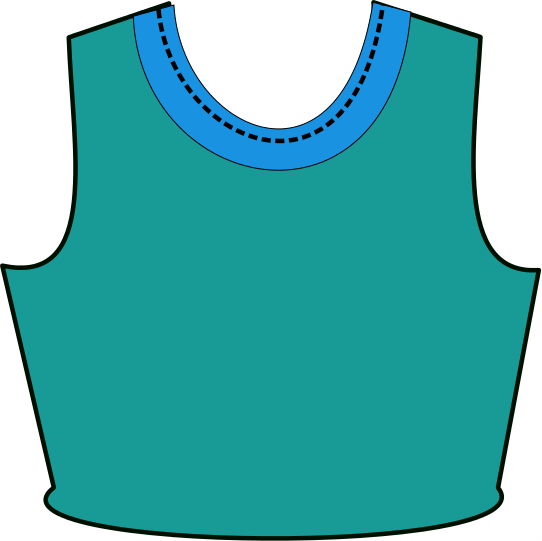
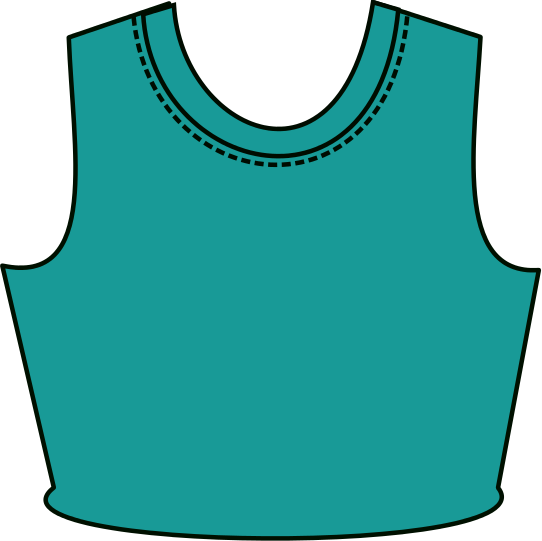
- Turn the neckband to the right side and topstitch the area.
How to Draft a Sweater Dress Pattern: Easy and Beautiful Variations
These are easy variations that you can try with your new pattern.
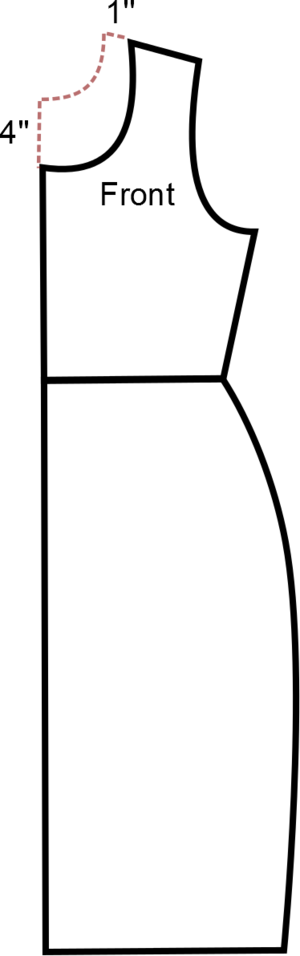
DIY Broad Neck Sweater Dress Pattern

This is the simplest variation to make. It will make your neckline look longer and it will center the attention on one of the body’s thinner areas. Add a fabric flower or bow to make it even more interesting.
In the image below, the dotted red line is the original pattern. The numbers are the reductions made on it.
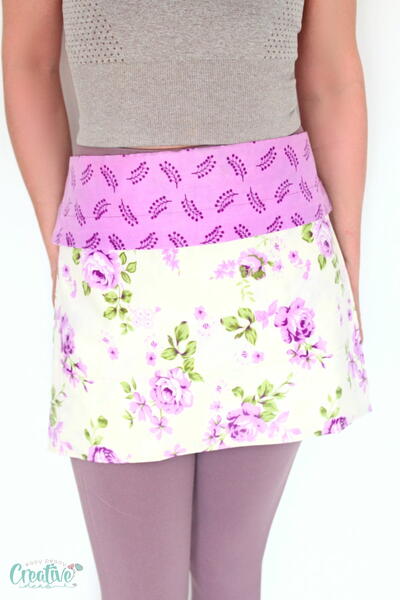
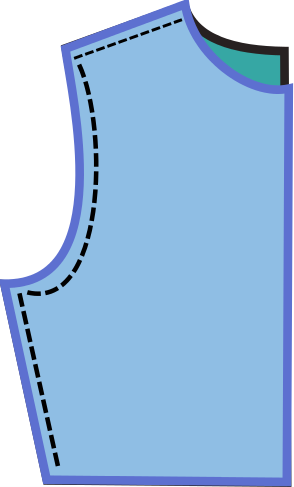
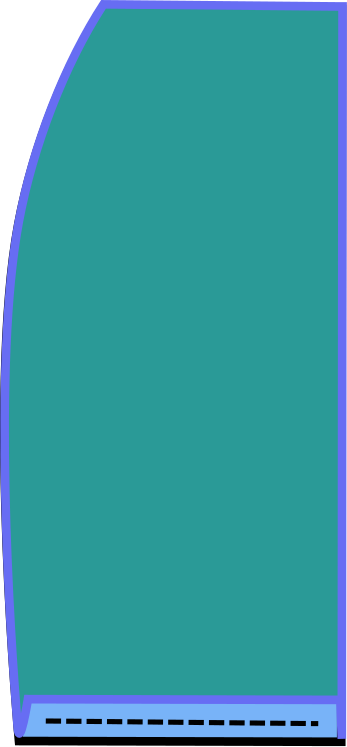
DIY Color Block Dress Pattern
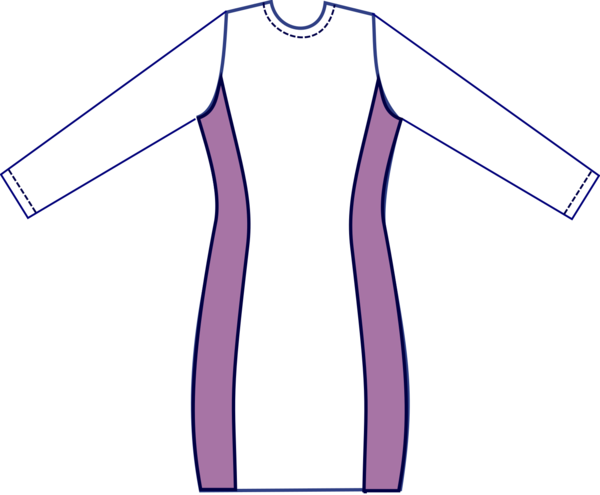
Color block dresses are very popular this season. The best part of this style is that it will create the idea of a thinner waistband. Vertical lines are always positive to elongate the figure, and this is no exception. You might also want to try this dress with the broad neck pattern (my favorite).
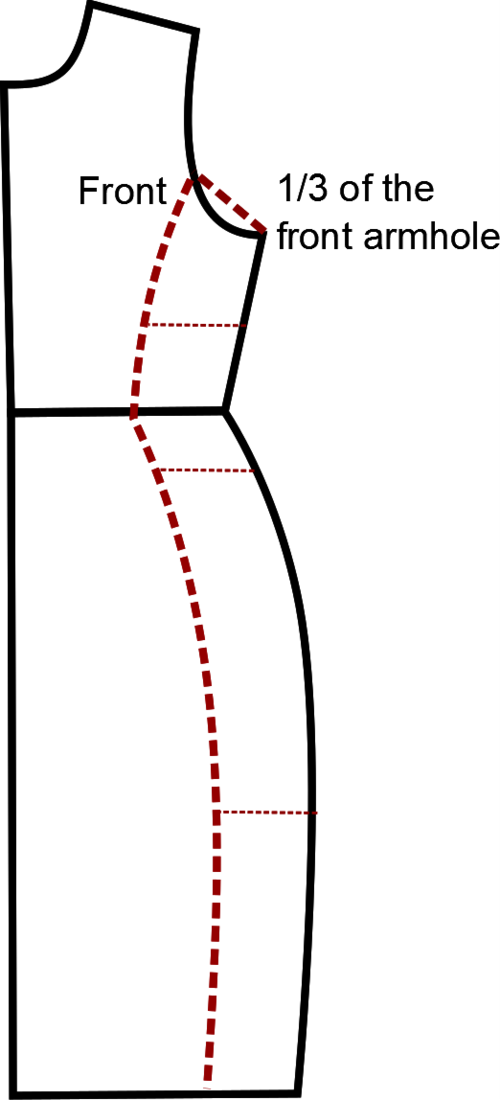
To make this color block sweater dress:
- Mark 1/3 of the front armhole and start creating a line. Keep the same distance from the sides. This will create a waistline and hipline as in the drawing.
- Cut and add 1/4 inch seam allowance to both pieces.
- Repeat on the back.
Want More?
What Are the Different Types of Dresses? >>
What's your favorite dress style?
Let us know in the comments!
Read NextFit and Flare Free Dress Pattern
Your Recently Viewed Projects

Thanks for your comment. Don't forget to share!
nibiki66
Jun 25, 2016
Any chance this could be re-written with metrical measurements...? Please?
coupons28054 64492 78
Jun 28, 2015
the numbers to add up and draft into dress shape have gotten messed up. can you please fix
aguirreanne
Jan 01, 2015
My mom taught me all of this but I've always been daunted. Thank you so much for putting words into pictures. Now I think I can handle it D.
Report Inappropriate Comment
Are you sure you would like to report this comment? It will be flagged for our moderators to take action.
Thank you for taking the time to improve the content on our site.