DIY Phone Case Stand
Learn how to make a phone stand with this clever tutorial. Keep your phone encased and prop it up wherever and whenever you need it!

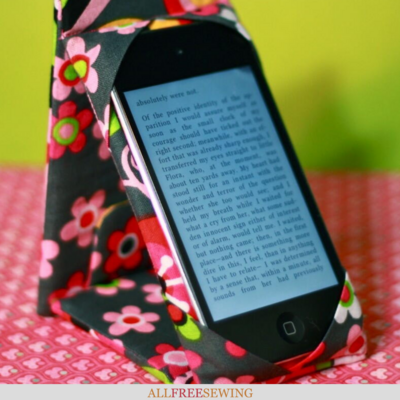
Typical iPod covers or phone cases and stands won't make the cut after you see this DIY Phone Case Stand. Prop up your iPod, iPhone, or Android phone with this DIY gadget cover.
It's padded for protection and even snaps like a wallet. Use your favorite fabric to create an accessory that you'll love to use almost as much as your precious phone.
Not only does this fabulous tutorial show you how to make a phone case but in seconds, becomes a secure stand for on-the-go hands-free viewing.
Let Maureen Wilson lead you through each step in the video tutorial of this project, found along with the written tutorial on this page.
Please note that there are measurements for specific iPods or phones but you will most likely need to measure your own phone or device so that it's exactly what you need.
However, any size can be used with this easy-to-follow (and adjust) tutorial.
Sign Up For More Free Patterns >>


DIY Phone Case Stand
Materials Needed:
1/4 yd outer fabric
1/4 yd inner fabric
1/4 yd thin batting
Chipboard or cardboard
Snaps (set of 2)
Fabric adhesive spray
Sewing machine, thread, needle, iron (and other basic sewing notions)
DIY Phone Case Stand Video Tutorial
If you are a visual learner, then be sure to watch this video to learn how to make a phone stand at home. If not, be sure to keep scrolling for our written tutorial.
DIY Phone Case Stand Written Tutorial
1. First, we’ll cut the inner fabric pieces. This is what will show when your case is opened. All pieces will be cut to the same width: measure the width of your device and add 1 inch. We’re going to cut three pieces.
- The first piece should be the length of your device, + the Thickness of your device, + another 1/2 inch for seams.
- The second piece should measure the length of your device, + a 1/2 inch for seams.
- The final piece should measure half the length of your device, plus the Thickness of your device, + another 1/2 inch for seams.
For an iPod Touch or newer iPhone/Android, cut the pieces to:
3.25 W x 5.75 L
3.25 W x 5.25 L
3.25 W x 4.0 L
As mentioned at the beginning, you most likely need to measure your current phone in order to get the precise measurement needed for your device.
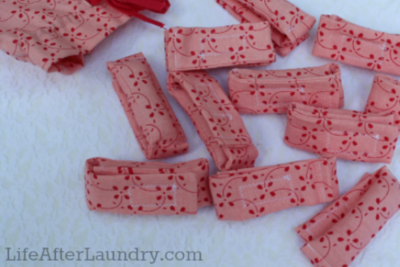
2. Now we’ll make the corner pockets. I’m cutting four 2-inch squares from my outer fabric. If your device is thicker, say close to a half-inch, you may want to cut these larger and make a little pleat when you sew them. Alternately, you could choose to substitute wide elastic here.
3. Fold the squares in half to create triangles and press. Pin one to each corner of the second piece you cut, lining up all the raw edges. Sew along the raw edges of the triangles with a 1/8 inch seam. Right now we’re basically just tacking these down, they’ll be sewn more securely later.
4. Now we’ll sew together our inner fabric pieces. Place one piece on top of your pocket piece, right sides together. Sew along the short edge with a 1/4 inch seam. Then, lay the last inner piece on the other end of the pocket piece, right sides together, and sew with a 1/4 inch seam. So now your pocket piece should be in the middle. Press the seams open.
5. Next we’ll make our tab closure. Cut a 2.5 inch square of each pattern of fabric. Sew together with a 1/4 inch seam, leaving the bottom edge open for turning. I chose to round off my corners. Turn the tab right side out and press.
6. Now we can cut the rectangle of outer fabric. You can skip a lot of calculations if you just lay the sewn inner piece of fabric on top, and cut your outer fabric to the same size.
7. With the sewn inner fabric face up, place the tab along the center edge of the shortest rectangle. It should be pointing inward. Make sure that like patterns are touching.
8. Then lay the outer fabric face down on top of the inner fabric and pin in place. Sew along the three edges with a 1/4 inch seam, leaving the short end without the tab open.
9. Trim the edge of the tab if necessary. Turn right side out and poke out the corners with a blunt tool. Press well.
10. Now we’ll cut the inserts. This gives the case the stability to stand on its own. You can use chipboard or thick cardboard. Trim the chipboard to slightly smaller than your sewn case. You want it to slide in easily, but still be snug.
11. We’re going to cut the chipboard into five pieces. Two pieces will create bindings. Each binding insert should be equal to the thickness of your device. The other three pieces will go inside each rectangle section. You’ll need to leave a little space between each insert to sew a seam.
12. Before inserting, we’ll add some batting to protect the device. Use fabric adhesive spray to add thin batting to each side of the three inserts. (You don’t need to add it to the binding inserts.) It’s a good idea to protect your work area with wrapping paper.
Slide the short insert into the case and work it down to the bottom. If necessary, insert your scissors and smooth down the batting. Topstitch a seam right next to the insert.
13. Next add a binding piece. Slide it down to the seam, then topstitch next to the insert to hold it in place. The seam should be nearly on top of the seam that holds your inner rectangles together.
14. Add the center piece, and topstitch close to the original seam. Add a binding piece, and topstitch right next to it. Finally, add the last insert.
15. Fold the raw edges inward. You could topstitch this shut, but it will look much tidier if you sew the opening by hand with a blind stitch. If it’s done properly, you shouldn’t see your stitches at all.
16. Now we just need to add the snaps. Hand sew the protruding half of the snap to the inside of the tab. Close the case and note where the snap touches, and sew its mate there.
17. Open the case and stand it upright. The short piece with the tab should be on the bottom. The tab should be on the inside of the case. Note where it touches the back, and sew a mate there as well. Visit her site for more.


Want More?
8 Small Sewing Projects for Traveling >>
Do you prefer using your phone or desktop computer for web browsing?
Let us know!
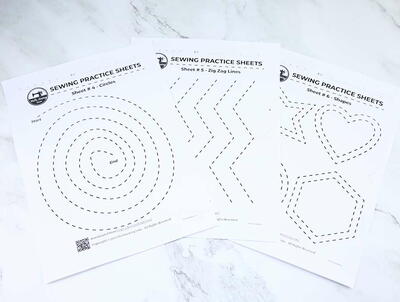
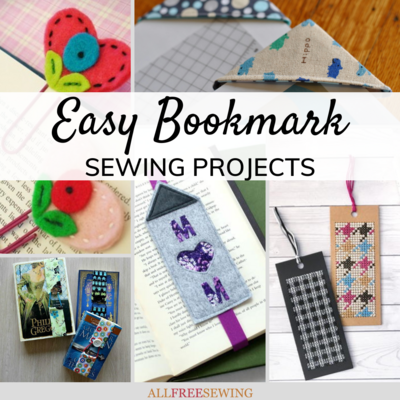
Read Next6 Free Sewing Practice Sheets
Your Recently Viewed Projects
Thanks for your comment. Don't forget to share!
KLC
Jan 03, 2022
The video has been fixed. Sorry for the inconvenience. Hope you enjoy the written and video tutorial here! - KC, Editor of AllFreeSewing
donnapawlak68 8792 188
Mar 09, 2019
I'm with Liza. I've loaded this page several times and no video, please help.
Liza D
Aug 24, 2017
I'm trying to find the online tutorial video for this project but am unable to locate it (at the bottom of the page)? Can anyone help me?
darwoodhurst1 4681 999
Dec 06, 2016
Great idea, going to make them for co-workers as Christmas Gifts.... Thanks
Moressette
Feb 23, 2013
Very portable, did you use cardboard or tin plate for back cover? I will download your pattern and will create my own version, can you see our designs, if this already cool for this iPad or iPhone case?
Report Inappropriate Comment
Are you sure you would like to report this comment? It will be flagged for our moderators to take action.
Thank you for taking the time to improve the content on our site.