How to Make a Bedside Pocket Organizer
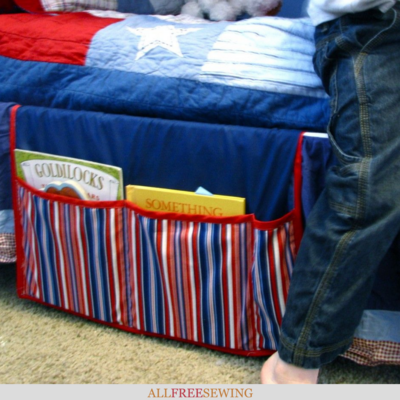
Who can't use more clever storage? This free bedside caddy pattern will help organize your or your child's room while adding a stylish touch.

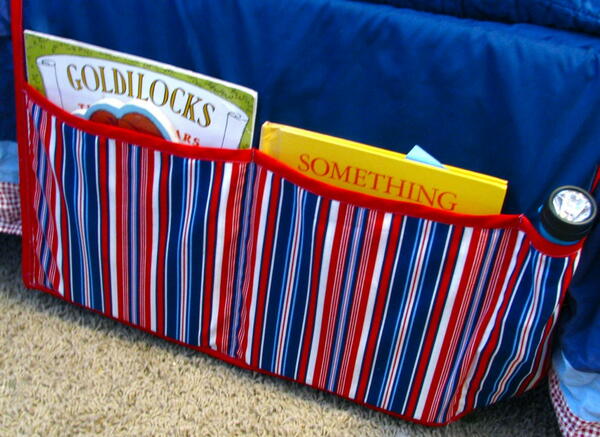
Bedroom storage and organization just got even better! Make a bedside organizer and leave your nightstand uncluttered with books and magazines.
With this tutorial, learn how to make a bedside pocket organizer. This version is an easy sewing project that offers a stylish solution to an untidy child's bedroom (or your own!).
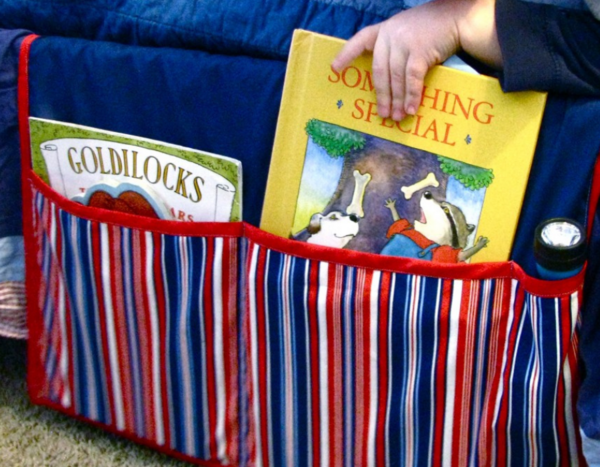
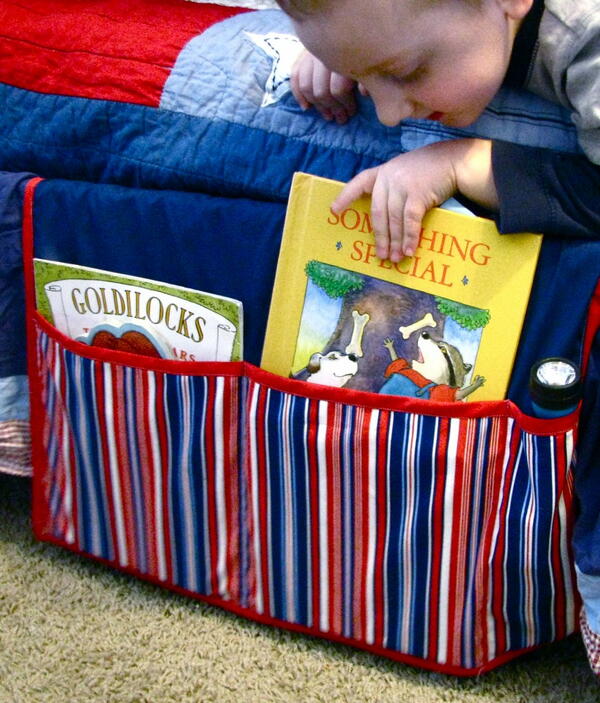
Keep books, a flashlight, or even a sippy cup just a reach away.
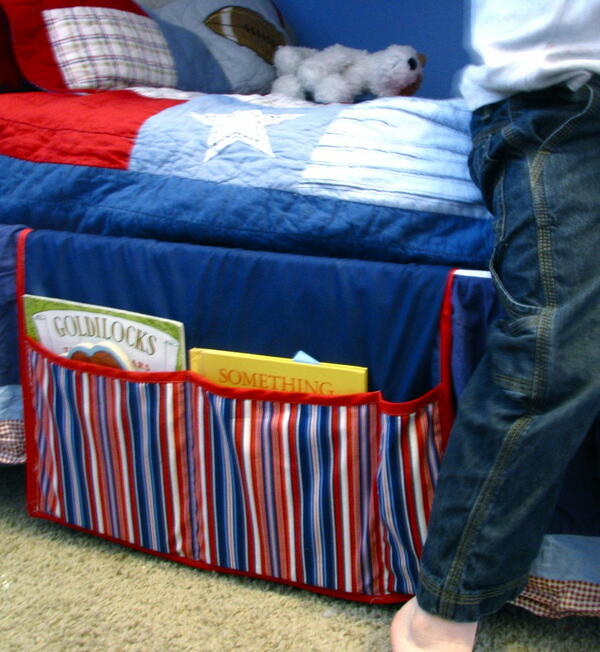
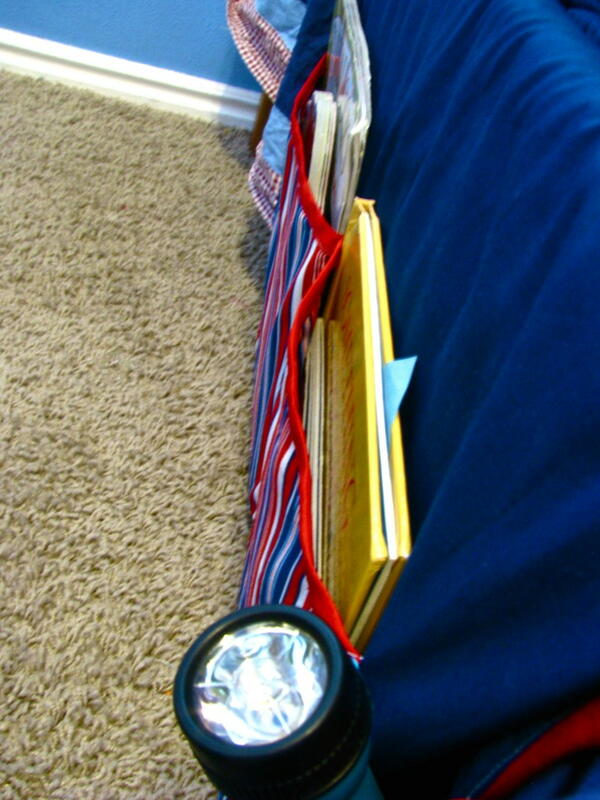
With a flap to keep this organizer securely between your mattress and box spring as well as pockets that can hold a variety of objects, this hanging bedside organizer project is attractive, useful, and discreet.
Plus, it's great for both kids and adults if you change up the fabric choice.
Join sewing designer pro Maureen Wilson as she demonstrates how to create this project with these written instructions followed by a video tutorial for all of you visual learners.
Once you see how to make a bedside caddy for all of your books and magazines, you'll wonder how you ever lived without it.
Sign Up For More Free Patterns
Bedside Pocket Organizer DIY
Skill Level: Easy
Project Type: Make a Project
Time to Complete: In an Evening
Sewn By: Machine
Materials List:
• 2/3 yd background fabric
• 1/4 yd pocket fabric
• 1 pk bias tape, wide double-fold (3 yd)
• Rubber shelf liner
• Sewing machine, needle, thread
How to Make a Bedside Pocket Organizer:
This bedside organizer DIY doesn't take long to make. Follow the instructions below and keep scrolling for the video tutorial at the end. Have fun!
- Begin by removing the selvage from your fabrics. Then iron your fabrics.
- We’ll work on the pockets first. Fold the 1/4 yard of fabric in half. Pin along the short sides to keep the fabric from shifting during the next few steps.
- You’ll need a package of extra wide, double-fold bias tape for this project. We’re going to add this to one long side of the pocket.
- Unfold the tape, and line up one edge of it with the raw edge of your fabric. Pin in place. Snip off the end so it’s the same length as the fabric. Then sew them together, directly on top of that first fold crease.
- Remove the pins. Then, fold the tape over to the back of the fabric. You’re going to sew on top of the bias tape. Sew from the backside of the fabric, because if you sew on top, you might not catch the bias tape underneath.
- Now we’ll work with the larger piece of fabric. Fold it in half as well. If it has a pattern, the pattern should be facing outward. Your pocket should be the same width as your background fabric. If one is slightly smaller due to differences in manufactured sizes, trim off the extra inch or so.
- Lay the pocket piece on top of the background piece. Pin the sides in place to prevent shifting during the next step.
- You can make the pockets whatever width you’d like. Consider what the pockets will hold… newspapers? Eyeglasses? A flashlight? It may be helpful to lay the items down on the fabric so you can decide where to add seams. Mark with pins or a fabric pen. Then sew down the length of the pocket, and remove the pins.
- Now we’ll add bias tape to the other three sides– We won’t add it to the top. Sew the bottom edge first. Stop sewing about a half inch from the end of the fabric. Snip off the bias tape, leaving a tail of about 3 inches.
- I sewed the bias tape onto the right side next. I lined up the edge of the bias tape with the top and cut it to the same length. I left a three-inch tail at the bottom by the pocket.
- Finally, add the bias tape to the last side. You won’t need to leave a tail on this one.
- Now to make the corners and tack down the tails. Fold the tail at a 90-degree angle and fit it on top of the sewn bias tape. Adjust the fabric so that you have a nice mitered corner. Pin in place. You’ll also need to fold under the raw end of the tape. Pin that as well.
- Now we’re going to finish the top edge. This part will actually be tucked under the mattress, so no one will see it. Still, we don’t want it to fray. Fold the top edge down on the back about a half inch. Press in place. Fold another half inch and press again. Sew down the center of the fold.
- Finally, we’re going to add a little rubber shelf liner to the back. This will help keep the book caddy in place when it’s holding a lot of books. I found this roll at a dollar store. Cut a piece to cover the top third of your caddy. Hand sew it in place at the four corners.
Bedside Organizer Video Tutorial:
Want to see this bedside pocket caddy being made? This video walks you through the entire process of making your own small bedside pocket. Don't forget, you can customize it even more if you desire and have the skills.
Want More?
20+ Pocket & Hanging Wall Organizer Patterns >>
What's your favorite thing to do when unwinding and getting ready for sleep?
Let us know in the comments!
Read NextFree Tiered Dress Pattern For Girls
Your Recently Viewed Projects
Thanks for your comment. Don't forget to share!
Weberme
Apr 24, 2018
Oh my gosh. Every kids room or playroom should have one of these beside organizer. This is a great way to keep books and thing kids cannot go to bed without. I like that you can adjust the pockets to what you willbe putting in it. So easy that anyone can make it. You can even use an old sheet to make this organizer. If you have a daybed in your sewing room you can even make one for there. There is a written tutorial and a video too.
Marilyn B
Mar 17, 2017
I made a similar organizer out of fabric like this one, but I ended up using it for an apron, added some ties for around the waist and a loop of fabric at the top to put over the neck. It was an apron for housecleaning, where you put your cleaning bottles, dust cloths and squeegee in the pockets! We made a similar one for a friend who gardens, with the pockets for a little digger, seeds, gloves, etc. so,practical,and it was a big hit! Thanks for sharing!
M Altenberg
Feb 17, 2017
This is a very handy thing for your child to have. I would love to make one of these for both kid's bedrooms. Like this easy project.
cobayley 8269378
Dec 31, 2016
why on earth don't you have a way to print the pattern. There are so many ads on this page, that I cannot even get the pattern copied.
SiteEditorAshley
Jan 03, 2017
Hi cobayley, this is a video tutorial for how to make a bedside organizer and does not include a pattern. Sorry for any confusion!
Weberme
Jun 15, 2016
This is a great video and it was done very nicely. Covered all steps and made them very clear. This is a good video for a beginer too. I have got to make some of these organizers for all the bedrooms in the house because they are a super great idea to keep things organized. My grand daughter loves reading at night and will love putting her book in this. I will let them pick out their fabric and sewing I will go. How many are in your house?
hparkersd
May 24, 2015
The YouTube link is http//youtu.be/NeLenPdJAJo . The one on this page doesn't seem to work.
essemsween 9550010
Dec 03, 2013
Really love the idea, you made it very clear in the tutorial but, that music as nice as it is, is too loud, and totally distracting, you find yourself straining to follow the verse when it dims rather than following the instructions. If you make another ( & if it's not too difficult to edit this one) you should choose music without words and have it as background only. I almost turned off the tutorial because of the soundtrack and that's a shame because you gave clear and precise instructions for a very good idea.
katieadderleybutle r 2703239
May 28, 2013
Excellent presentation easy to view and steps was easy to follow.
Shambavi
May 10, 2013
Made 2 in last 3 days. The videotutorial was better than instructions on paper. I made my own dimensions . thanks once again. want to send a pic but can't locate an id.
rtn1946 4278209
Apr 03, 2013
My late sister made me a smaller version of this out of placemats and I love it!
brendajane
Mar 20, 2013
Thank you for your great tutorial. Really Cute and Very helpful. I could not rate it because The video window was in the way. The rating box opens up behind the videos for some reason. I will put my rating here. Rated 5: Mybe Admin will put it in for me. I have this happen on the patterns with Videos, rating box tries to hid on me.
Cindydillinger4 97 28861
Jan 07, 2013
Great tutorial, can't wait to make a couple of these for gifts. Thank you for sharing I'm a beginner sewer and this is easy enough for me.
gmamasews 2133476
Dec 19, 2012
Hi My name is Loretta Davis and I wanted to make a homemade gift for my great grandchildren. I showed my granddaughter this picture of your Bed Organizer and she said YES, Please make this for them so their books and stuff will be off the floor. So I proceeded to make 6 of them and I absolutely love the way they have all turned out! I thank you so much for putting this out there. I am sure the kids will love them.
gmamasews 2133476
Dec 18, 2012
Maureen-OMG I love the Bedside Organizer! I showed it to my granddaughter and Ineeded to make one for all the great grand kids. So I made 6 of them. This is one of their Xmas gifts this year and I loved all the instructions-it was so easy to make. Thank you so much!! Loretta Davis I make Barbie and Ken Fashions and go to craft shows and I also love what I do. I make most of my own patterns also, I have been sewing since I was 12, on a treadle machine no less. Now I am 73 and boy have I made the stuff in all my years gone by.
BeckySue
May 24, 2016
That's a great idea to make them as Christmas gifts! But first I need to make one for myself! I have all these little things on my nightstand that keep falling off and get pushed way back in the corner under my bed. For me, once it's there, it's lost for several months!
cocoherb 9488290
Oct 25, 2012
If sewing the shelf liner is difficult, put a strip of waxed paper between the presser foot and the liner. This will allow the machine to move along smoothly. The paper can easily be torn off after you're done sewing.
Victoria T
Sep 29, 2012
Excellent instructions. Not wanting to sound ungrateful for the FREE instructions, but I have to agree about the music. Sorry :( But, music aside, EXCELLENT instructions and EXCELLENT VIDEO. Thank you!
rock003 9832036
Sep 29, 2012
I made one of these, and I absolutely love it! I made a pocket for my laptop, my kindle, and a small one to fit myphone or the laptop power cords.
joycehargrove 4746 096
Apr 23, 2012
AWESOME! what a great gift idea. I will change mine to add tissue holder and remotes IE, fan, heater, light, tv, etc. You know all the important remotes Thanks so much
pgh phyl
Mar 31, 2012
i watched your book cover video; you are a good instructor; voice is great; once again, the music was distracting; had to turn the voice off. please stick to sewing video and not music. thank you ; beautiful work; pgh. phyl
pgh phyl
Mar 31, 2012
great video; music was very distracting; couldnt decide whether i wanted to sew or get up and dance; nix the music next time. phg. phyl
JennyBee1
Sep 08, 2011
@maybelledd 0511679, All of our projects are user-submitted and we unfortunately only received a video tutorial for this project. We suggest contacting the original designer for more guidance. You can find her name in the byline of this project. --Editor of AllFreeSewing
maybelledd 0511679
Sep 08, 2011
I would like to have the actual pattern not a tutorial. It is hard to watch and do at the same time.
eruthk 1039033
Aug 15, 2011
This looks like it would be very handy. A great place to stick a package of Kleenex and above all my glasses!
Report Inappropriate Comment
Are you sure you would like to report this comment? It will be flagged for our moderators to take action.
Thank you for taking the time to improve the content on our site.