Kid-Friendly Felt Monster Patterns
Kids can make their own sewn DIY monster friend! Not only will you find monster pattern printables but a how-to for sewing them up!

Felt projects are ideal for kids because it is a material that is super easy to work with and cheap to purchase.
These Kid-Friendly Felt Monster Patterns are not only fun felt projects but they are easy sewing projects. If your child wants to learn how to sew or just getting started, felt monsters are the perfect patterns to try out.
Not only are we going to share our play on stuffed animal patterns but this stuffed monster tutorial has a whopping 10+ free felt monster templates to download and print. To make it easier, you can use one of our simple templates but we highly encourage creating your own, too!
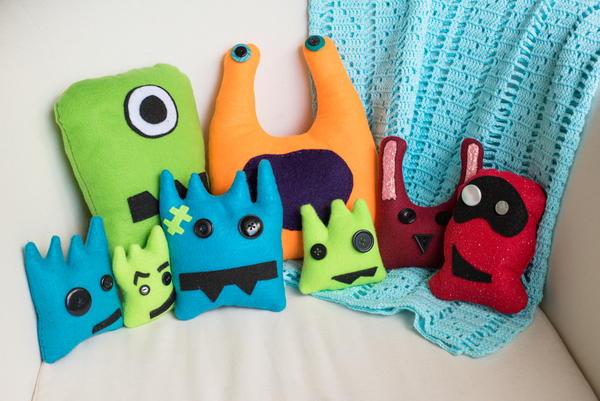
We love these kid-friendly monsters for a lot of reasons. Far from scary, these cute monster sewing patterns are perfect for anyone in your life.
Not only are they a fun project for the kids but we guarantee adults will get a kick out of making their own monster as well.
PS: This article is part of our National Sewing Month Celebration! Check it out here + enter to win our 5 free giveaways worth more than $1,000!
Sign Up For More Free Patterns >>>
Felt Monster Patterns
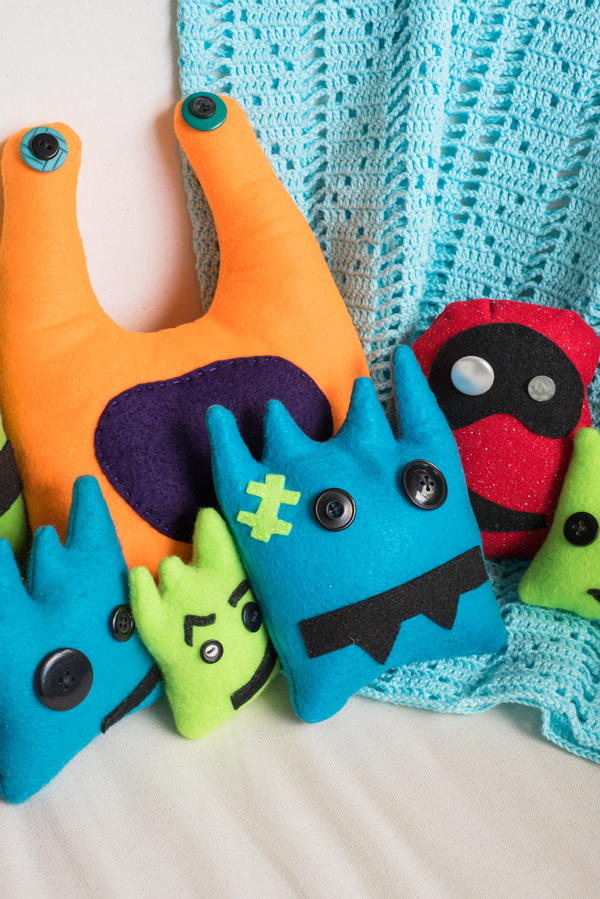
One of the biggest benefits of these felt monster patterns is that they allow for so much creativity and variety. The monster you make is your own creation, so you can choose your own felt colors, faces, and materials. Use buttons, ribbons, jewels, appliques, and more to make a felt monster that is truly one-of-a-kind.
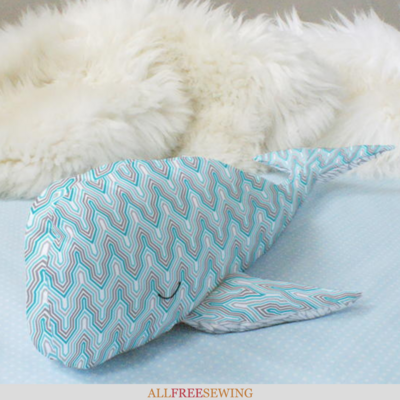
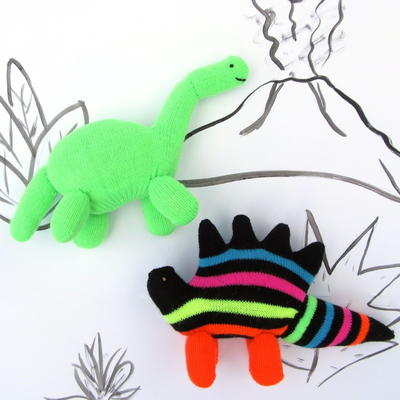
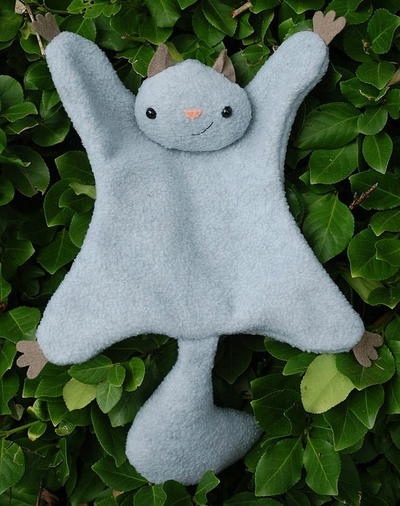
Alternatively, you can even use other similar materials, such as fleece or faux fur, to create a different type of monster. Because there are so many options, we are sharing the basic tutorial but you can use it to make any of the monsters.
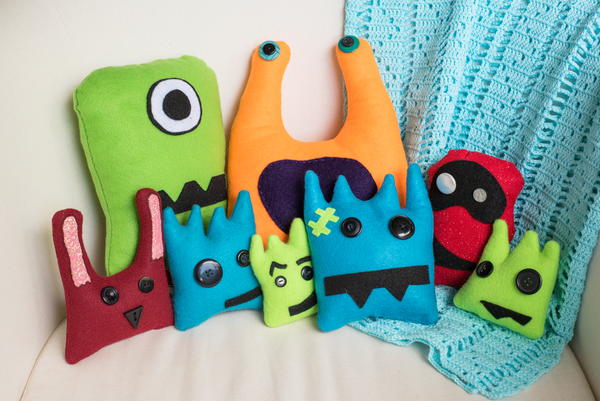
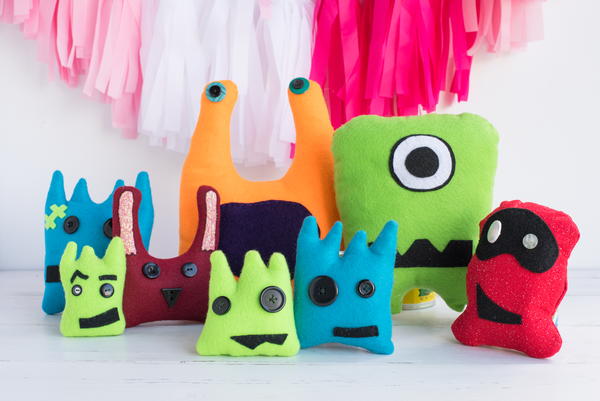
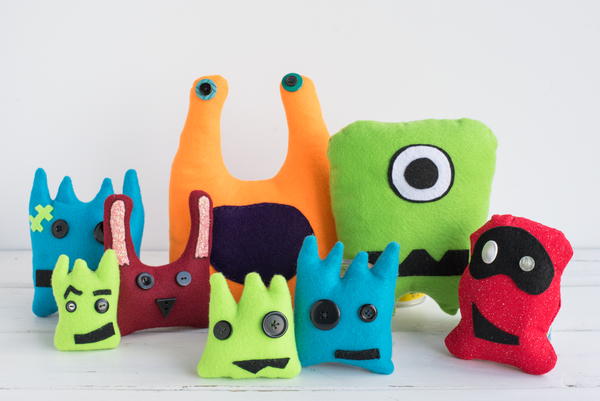
As you will see by the pictures at end of the tutorial, these felt monster patterns are only a hint of all the wild things you can do.
The following tutorial explains how to sew a felt monster by hand sewing. To speed up the process, you can easily sew the main stuffed monster shape with a machine and add the additional pieces by hand before or after. Choose the method that you're comfortable with to make your monsters.
Project Type: Make a Project
Time to Complete: Under an hour
Sewn by: Hand or Machine
Skill Level: Beginner
Materials Needed:
- 2+ felt pieces of desired colors (9" x 12" or similar sizes work well for this project)
- Needle (Sharps or embroidery - should have a small point but it is dependent on the type of thread you are using)
- Thread or embroidery floss (matching the felt color or contrasting color for accents or texture)
- Fiberfill (this tutorial uses Poly-fil but any appropriate "stuffed animal" filling material can be used)
- Scissors (for fabric and paper)
- Paper and writing utensil for original templates OR printer for printing provided templates
- Templates (see next section for free PDFs to download and print)
- Straight pins
- Optional: Buttons, jewels, sequins, appliques, fabric markers (disappearing ink and for decoration), or other accessories
Tips:
- New to hand sewing? Learn how to start a hand stitch.
- You can skip the paper template stage by using a disappearing fabric marker and drawing the main pattern directly on the felt and then cutting it.
- You can either plan out the details of your monster before getting started or wing it as you go. To plan it out, you can draw with markers on the paper template. Draw the eyes, nose, mouth, note the accessories or colors you want to use, and more. That way, you can check your guide as you sew.
- Use any type of stitch you want for your monster or multiple stitches to develop more depth. The tutorial below will suggest a short straight stitch for sewing the two main pieces together because it is one of the most simple stitches but you can choose to use whichever you're most comfortable with. Some of the most popular for stuffed animals are the backstitch, blanket stitch, chain stitch, or stem stitch.
- If making a monster for a small child, do not use anything that could be a choking hazard, such as buttons. Use fabric for all the embellishments and sew it up using a strong stitch.
Monster Pattern Printable Templates
We have 10+ different monster patterns to print plus a page of accessories. You can download the full 11 page PDF of all the templates here or choose individual templates by clicking the links you find below.
Note: All of these templates are 8.5 x 11 inches, the standard paper size. In the printing options for the PDF, you can choose to enlarge or shrink the monster template to match the size you desire.
How to Print the PDF:
Printing this is as easy as 1-2-3! If you're not familiar with printing PDFs, here's the step-by-step, along with a few tips.
- Click the colored buttons you see on this page that read, "Click Here to Download This Template" or "Click Here to Download This Template - Small" or "Click Here to Download This Template - Large".
- Find and open the PDF.
Pro tip: You may see the download appear at the bottom of your browser window, and you can open it from there. Or check wherever your downloads are set to save to (the Downloads folder is often a default location).
- Click the "Print File" button, choose the printer, choose how many copies you want, make any additional adjustments needed for personal preference, and click the "Print" button.
- Grab your printout and supplies needed, then you'll be ready to make your own DIY felt monsters!
Please leave a comment on this page if you are having issues and need help. We will assist!
Felt Monster Template #1 & #2
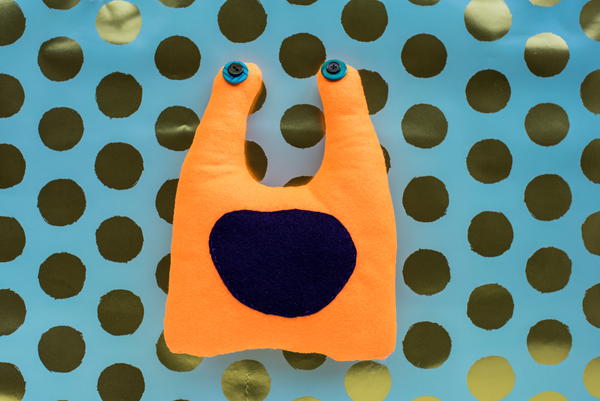
This template has two ears or anteannae up above the rectangular body. You can download the small or large version below.

Felt Monster Template #3
This template has two shorter ears or anteannae up above the rectangular body. You can download it below.

Felt Monster Template #4 & #5
This template has some fun even spikes above the rectangular body. You can download the small or large version below.

Felt Monster Template #6 & #7
This template has three random spikes above the rectangular body. You can download the small or large version below.

Felt Monster Template #8
This template has a rounded and curved body. You can download it below.

Felt Monster Template #9
This template also has a rounded and curved body but comes to a point at the top. You can download it below.

Felt Monster Template #10
This template features two smaller monsters. One has a rectangular body with spikes at the top and the other is a slightly curvier shape with two bumps at the top. You can download it below.

Felt Monster Features and Accessories Template
This template featuring eyes, noses, mouths, arms, legs, and more facial features and body accessories. You can download it below.


How to Make a Felt Monster:
- Gather all of your materials.
Print out or draw your monster template. Then cut out the template.

- Using straight pins, pin the template to one of the felt pieces. Cut around the template to create your monster shape.
Alternatively, you can trace the template on the felt using a disappearing ink marking pen for fabric.
Repeat with a second felt piece of the same color.


- Remove the paper template. Decorate the front and back of your monster as desired. For the face, you can cut and sew on pieces of felt or other fabric for eyes, mouths, and so forth.
Using buttons for eyes is also a great idea, which is what this tutorial shows (learn how to sew buttons). You can add spots, clothing, or whatever you wish to make your monster unique.
Note: Do not use buttons or other small embellishments if giving the monster to a small child!
Also, some features are better added at the end, such as extra arms, legs, 3D pieces of clothing, or anything that would prevent sewing around the edge of the shape.

- Once you have added all the features desired to your monster, you are ready to sew the back and front together. Using straight pins, hold the two felt pieces together so that the shapes match up (outside pieces, the front and back of the monster, facing each other).
Note: As you sew, you may need/want to adjust or remove the pins as they can be a hindrance.

- Thread your needle with matching colored-thread or embroidery floss (doubled for strength) and sew nearly* all the way around the monster, leaving a 3/16" to 1/4" seam allowance.
*It's important that you leave an opening on a side of the monster for turning it out and filling it with fiberfill. The opening you leave should be roughly 1.5 to 3 inches wide, depending on the size of your monster.
It needs to be large enough to turn the felt piece inside out and then stuff. It's best to create this opening on a relatively straight side, wherever that may be (usually the bottom or side). This tutorial leaves the bottom open because it is straight and the least noticeable place for closing stitches.


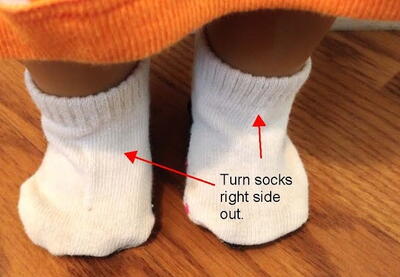
- Knot and tie off the thread once you have finished sewing around the monster (leaving the opening). With your hands, carefully use the opening to turn the fabric inside out.
If needed, use a blunt, long, cylindrical object (like a closed pen or crochet hook) to fully push any sections of felt that aren't turning out. Many fiberfill bags come with a wooden tool for this reason and to help stuff.


- Stuff your monster. You can use the cylindrical tool to help stuff the more difficult areas of the monster, such as spikes. Keep an eye out for underfilling and overfilling. It should not sag in any place (unless that's the desired look) and it should not be too full so that the seams are being pushed apart.


- Sew up the opening. You can use an invisible/ladder stitch to do this so that it does not show. To do this, thread your needle and knot. Slightly fold over the felt edges and secure the thread at the end of the opening near the last seam you did by hiding it in that inside fold.
Sew by moving the needle and thread through the inside of the folds, holding on to keep it from unfolding. Finish, knot, and cut the excess thread.


- Fluff up your monster, add finishing touches or embellishments, and you're done...almost!

- Name and get to know your new monster friend. Here are a few more examples:
Want More?
15 Hand Sewing Projects for 10 Year Olds >>>
What would you name your monster?
Your Recently Viewed Projects
Thanks for your comment. Don't forget to share!
Mistress of All Ev il
Sep 26, 2018
These are all so cute. I can't believe how easy they are and my friends should now be worried because I'm about to make A TON. Literally... all I care about right now.
Report Inappropriate Comment
Are you sure you would like to report this comment? It will be flagged for our moderators to take action.
Thank you for taking the time to improve the content on our site.