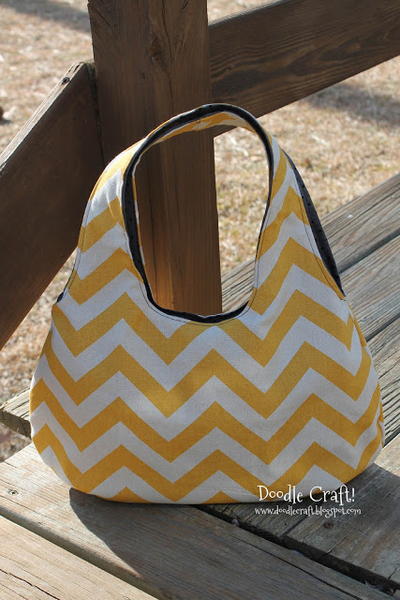
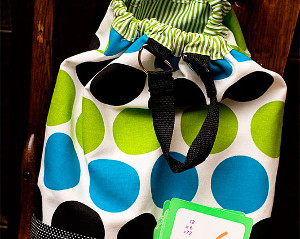
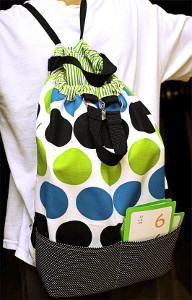
Darling Drawstring Backpack
Whether you're looking at a full course load or you know someone who is, this Darling Drawstring Backpack from Kendra McCracken for Fiskars is a sewing bag tutorial you'll want to check out. Take a few minutes to browse through instructions on how to make a backpack. You'll undoubtedly use tips from this tutorial in future projects. Work with nylon strapping, loops, and lining to make a backpack that is totally unique and absolutely adorable. Get in the groove of school or life with this beautiful backpack pattern.
Materials:
- 1/2 yard each of 2 coordinating fabrics
- Four 1 1/2 inch D rings
- Two 5/8 inch swivel hooks
- Four 1 inch (or 1/2 inch) D rings
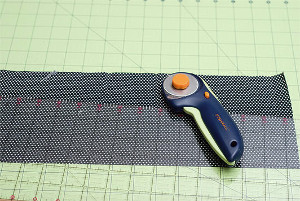
- 72 inches of 1/2 inch nylon strapping
- 26 inches of 1 inch nylon strapping
- Rotary Cutter
- Cutting Mat
- Ruler
Instructions:
-
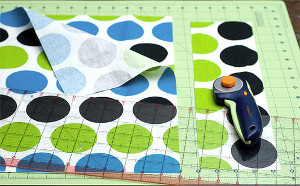
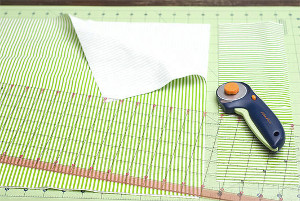
Using the 45 mm Comfort Grip Rotary Cutter, the 18 inch x 24 inch Cutting Mat, and the 3.5 inch x 18 inch Acrylic Ruler, cut (2) 15 inch wide x 16 inch tall panels for the front and back of the bag.
-
From the same material, cut a 15 inch wide x 4 1/4 inch panel for the bottom of the bag.
-
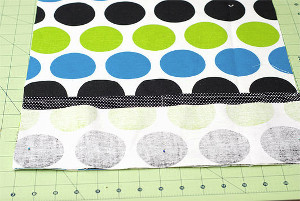
Also cut (2) 15 inch wide x 16 inch tall panels from a contrasting fabric for the lining. Cut a 15 inch wide x 4 1/4 inch panel for the bottom of the lining.

-
For the drawstring casing, cut (2) 28 3/4 inch wide x 2 inch tall strips from the same fabric used for the lining.
-
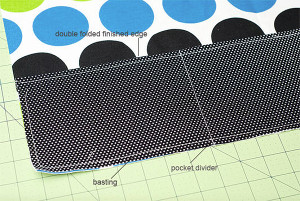
If you want to add the optional pocket to the front of the bag, cut a 15 inch wide x 6 inch tall panel. Fold and iron one long edge over 1/4 inch. Fold and iron again to create a nice, finished edge. Stitch this double-folded edge down.
-
Lay the pocket (wrong side down) on the front panel (right side up) and pin in place. Baste (this is just a long stitch) along both sides and the bottom. Create a divided pocket by stitching down the center of the pocket. Be sure to first change your stitch length back to a shorter one.
-
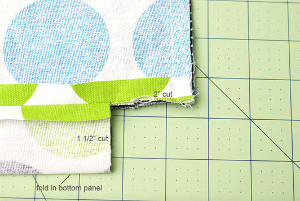
Line one long edge of the bottom panel (the 15 inch x 4 1/4 inch piece) with the bottom of the front panel, right sides together, and pin. Stitch these together.
-
Line the other long edge of the bottom panel with the bottom of the back panel, right sides together, and pin. Stitch these together. Iron your seams open flat.
-
You now have one long panel with a narrow section sewn in the center.
-
Fold this panel in half, right sides together, matching the tops of the front and back panels. The fold will go through the middle of the bottom panel. Stitch the 2 sides from the top of the bag to the bottom.
-
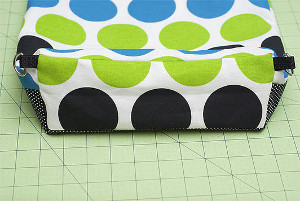
Cut a 2 inch (from the side parallel to the seam) by 1 1/2 inch (from the bottom to the seam) square from each side of the bottom of the folded panel. Cut through both layers of fabric.

-
Fold the bottom of the bag so the fold in the center of it meets with the side seams.
-
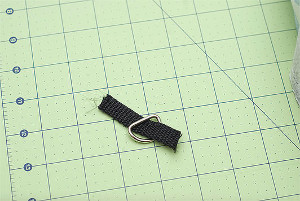
Fold a 2 inch length of 1/2 inch wide nylon strapping in half to create a loop. Place a small (1/4 inch) D ring in the loop.
-
Pin the loop between the layers of fabric you pinned together in the last step. The loop (and ring) will need to be on what is, right now, the inside of the bag and it needs to be placed close to the end of this opening that will be the back side of the backpack. Pin the layers, with the nylon loop sandwiched between, together. Repeat the last step for the other side of the backpack. If you look down inside the bag (right sides of the fabric are still together), you should see 2 nylon strap loops with a D ring in each one sticking out between the layers of fabric.
-
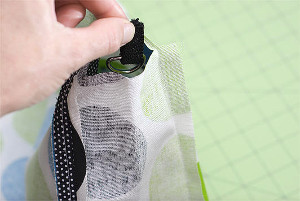
Stitch along the pinned layers of fabric, making sure the nylon strapping loops get picked up in the stitching. Reinforce this seam by stitching a second time.
-
Using the lining material, follow all of the above steps again starting from the step after adding a pocket. Adding the loops and D rings will make the back pack reversible.
-
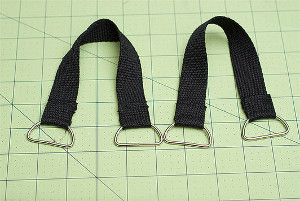
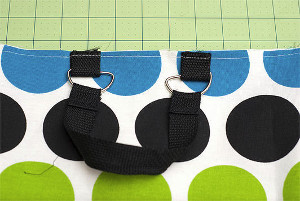
To make handles for the backpack to be carried like a book bag, begin by cutting (2) 8 inch lengths of 1 inch wide nylon strapping. Fold a 2 3/4 inch piece of nylon strapping in half around the curved side of a D ring and fold the ends under 1/4 inch. Catch one end of the 8 inch nylon strap between the ends. Stitch a square around the perimeter of the part above the D ring. Repeat these steps for the other end of the nylon strap.
-
Fold a 2 3/4 inch piece of 1 inch nylon strapping around the straight end of the D rings and stitch the ends together.
-
Create a second handle for the back side of the bag.
-
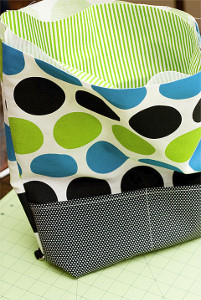
Turn the front/back of the back pack inside out so the right sides of the fabric are now facing out. The bottom will look like this.
-
Slip the lining, still right sides together, down inside this. The nylon loops with the small D rings should be toward the back side of the back pack.
-
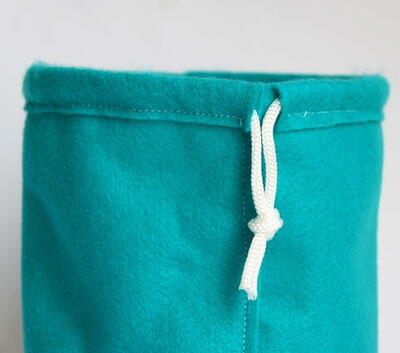
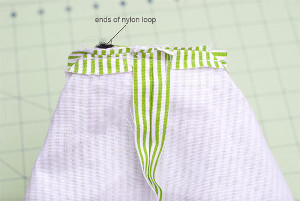
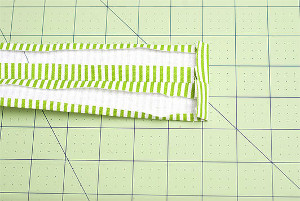
To create the casing for the drawstring, place the two 28 3/4 inch strips of fabric together and stitch along one long edge. Iron the seam open.
-
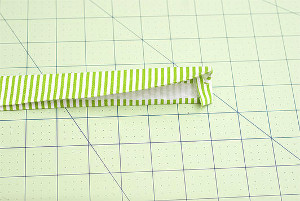
Iron the long, raw edges of the fabric in 1/4 inch toward the center seam of the strip.
-
Iron the ends in 3/4" and stitch close to the fold.
-
Fold the long strip in half, wrong sides together, along the long seam and iron. Taking time to make sure the open edges match up will make completing the casing much easier.
-
Measuring 4 1/2 inches from each side of the bag, pin a handle so the edges of the tabs line up with the top edge of the bag. Do this for both the front and back of the bag.

-
Pin the casing to the top edge of the bag placing the unstitched edges 1/2 inch down from the top edge of the bag. Use lots of pins to prevent the layers from shifting and the edges of the casing being missed.
-
Top stitch along the bottom edge of the drawstring casing. It's possible that when you approach the opposite end, you'll see that the casing is too long. The stitching in the end can be removed, the end refolded as needed, and stitched again.
-
Thread a 64 inch length of 1/2 inch nylon strapping through the drawstring casing. Loop each end around the D ring of a swivel hook and stitch to hold. Since there are small D rings in both the outside and the lining, the swivel hook allows for quick and easy reversibility of the back pack!
-
Repeat the last step for the other side of the backpack. If you look down inside the bag (right sides of the fabric are still together), you should see 2 nylon strap loops with a D ring in each one sticking out between the layers of fabric.
Your Recently Viewed Projects

Thanks for your comment. Don't forget to share!
posie219 7239679
Aug 11, 2013
It's time for going back to school. I know my granddaughter would love one of these!
fanseananc 8333544
Aug 11, 2013
I think these instructions are confusing. I don't get the part where you cut the little corners out. Or how you "fold the bottom to the side seams" when they are perpendicular. After that I am completely lost with the D-ring applications. I guess this is over my head. It's such a cute bag. Why does it have to be so confusing?
Report Inappropriate Comment
Are you sure you would like to report this comment? It will be flagged for our moderators to take action.
Thank you for taking the time to improve the content on our site.