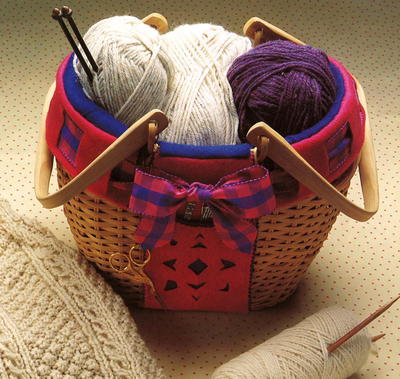
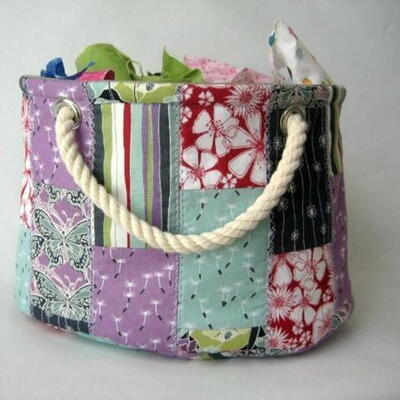
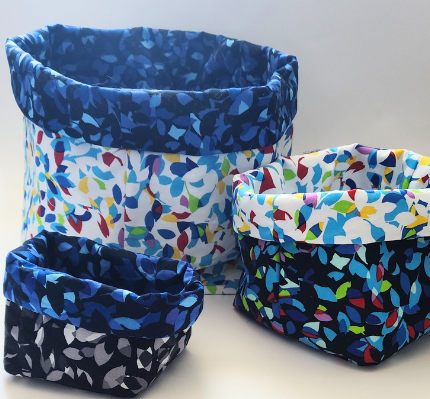
Cozy Knitting Basket Pattern

Every crafter needs a place to store their knitting supplies, and this Cozy Knitting Basket Pattern will let you create the perfect yarn storage solution for your needs. This DIY storage idea will let you keep your yarn organized and out of the way, ready for when you need it. Plus, this darling basket will look lovely in any crafting space, so you won't have to worry about yarn cluttering up your house. With this helpful organizer, it's easy to set aside your current project; you can keep your yarn neat and tidy, and you won't lose track of your skeins of yarn anymore. Simplify your life with this DIY organizer.
Project TypeMake a Project
Sewn byMachine

Materials List
- Felt in two colors: 1 yard for lining and ½ yard for collar/pocket
- 1½ yards of 1½"-wide ribbon in complementary color or print
- ½ yard of satin cording
- Brown kraft paper for pattern making
- Dressmaker’s marking pen with fine point
- Embroidery scissors to tuck into basket pocket
- Paper scissors, fabric scissors, pinking shears
- Sewing machine
- Sewing threads to match felt colors
- Straight pins
Instructions:
Note: It’s unlikely that you’ll find a basket with the exact dimensions or shape as the one shown. Therefore, adjust the length of the collar and pockets to fit your basket.
-
To make patterns for basket liner, measure circumference of basket at widest part; measure height. Using marker, draw rectangular pattern of these dimensions on kraft paper; label pattern “side lining.” Outline basket bottom on kraft paper; label pattern “bottom lining.” Cut out patterns.
-
To make lining, pin patterns to lining felt. Cut out lining pieces, adding a ¼" seam allowance.
-
Place side lining inside basket and pin darts to shape to fit interior. Remove lining and baste side seam. Pin bottom lining to lower edge of side lining. Place lining inside basket, adjust pins so bottom fits; remove and baste bottom seam and side darts. Using a ¼" seam allowance, machine stitch side seam; trim excess. Machine stitch darts and bottom seam; trim.
-
To make collar pattern and collar, measure basket rim from handle base to opposite base of same handle on one side of basket; this is length of one-half of collar. With marker, draw a rectangle on kraft paper 4" high x length of half-collar; label pattern “collar” and cut out. Pin pattern to collar/pocket felt. Cut out felt half-collar ¼" from edge of pattern to allow for seam allowance. Repeat to make second half-collar.
-
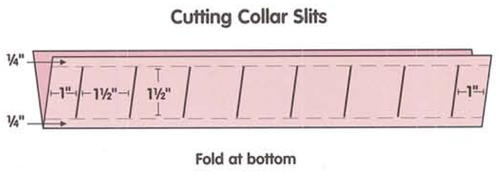
To make slits in collar for weaving ribbon, fold one collar piece in half lengthwise. With fold on bottom, use marker to lightly draw a line ¼" above fold and ¼" below edge; lightly draw a 1½" vertical line 1" in from each end. Beginning on end line and ¼" bottom line, mark an even number of 1½" vertical slits equidistant across collar (slits as shown are 1½" apart). Cut slits with fabric scissors, through one layer of felt only, cutting last slit on opposite end line (see illustration below). Trim ends of collar with pinking shears. Measure, mark, and cut second collar piece.
-
To make pocket pattern and pocket, measure the short distance along rim between the two handles; this is width of pocket. Determine length of pocket by measuring distance from rim to 1½" from bottom of basket; double this measurement. Using marker, draw a rectangle on kraft paper the width of pocket x doubled length; cut out pattern. Pin pattern to collar/pocket felt. Cut out felt pocket piece; pink along edges. Repeat to make second pocket piece.
-
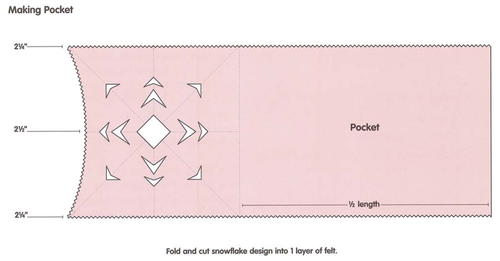
To cut curved edge of pocket front, lay out one pocket. Measure and mark halfway down the strip (for later placement of curved pocket edge). On each side edge, measure up and mark 2¼" from bottom of strip. In center, measure up and mark 2½" from bottom of strip (see pocket illustration). Using pinking shears, cut a gentle curve between these marks. In same manner, measure, mark, and cut second pocket piece.
-
To cut pocket front snowflake design, fold curved pocket edge up to halfway mark made in step 7. Mark the fold; this section with the curved edge is the pocket front. Fold this section into quarters. Folding folds tightly and using sharp scissors, cut out tiny triangles on quarter folds to make snowflake design; unfold and press. Cut out a scrap of lining felt the same size and shape as pocket front. Place behind snowflake and thread tack. In same manner, cut and line second pocket.
-
Fold curved edge of pocket front up to halfway mark, snowflake facing you. Machine stitch seams of pocket ⅛" from edge on both sides.
-
To sew collars and pockets to basket lining, insert lining into basket, seam side against basket. Fold one collar piece in half lengthwise, place inside lining, slits facing lining. Align top edges; pin together from handle base to handle base. In same manner, pin second collar piece to lining on opposite side. Pin pockets to lining, snowflake facing lining, between handles on opposite sides of basket. Remove lining and baste rim seam all around; remove pins. Machine stitch rim seam, attaching collars and pockets to lining. Trim any excess felt at seam allowance.
-
Placing lining in basket, adjust collars and pockets to align properly with handles. Fold collars and pockets over rim to outside of basket.
-
To finish, beginning at basket front, weave ribbon through slits in collar all around basket. Tie bow in front. Fold bow tails into a V on wrong side of ribbon; glue or thread tack to hold in place. Tie embroidery scissors to end of satin cord, tie other end of cord to basket handle. Tuck scissors into pocket.
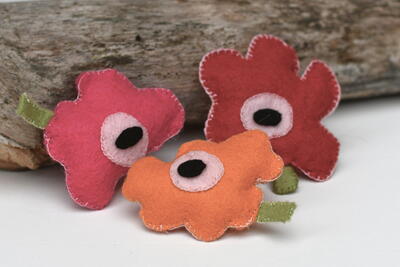
Read NextMagic Felt DIY Basket