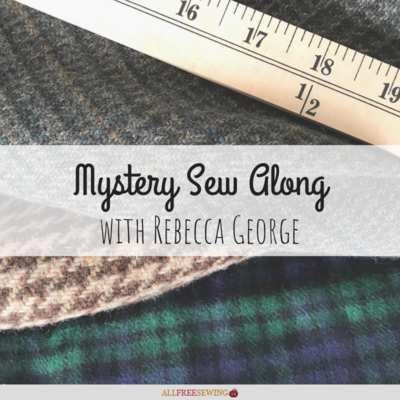
September 2023 Mystery Sew Along
Make a fun new project for fall! Join now for free!

Welcome one and all to our Mystery Sew Along in honor of National Sewing Month! With this fun event, we'll release the instructions for a mystery pattern over 4 weeks. By the end of the month, you'll have sewn a brand new (and awesome!) pattern.
We've joined forces with the incredibly talented Rebecca George from Purple and Lime to bring you this sew along, so you know the finished project is going to be something stylish and practical. But here's the twist- you won't know what you're sewing right away! Looking for a hint? It's an item that's PERFECT for fall!
Our mystery sew along is not one to miss. Join us every Wednesday for each exciting new installment of an exclusive pattern by the amazingly talented Rebecca George.
How do I join? In order to be updated with the latest set of instructions every week, make sure that you're subscribed to the Sewing It Up newsletter from AllFreeSewing, and keep an eye on your inbox! We'll be sure to send you an email each week to bring you the next step in the sew along.
Now, we're turning things over to our designer, Rebecca George! Welcome, Rebecca, we can't wait to sew along with you!
Looking for fun fall-themed home decor that is sewn by hand? Then this National Sewing Month Sew Along is perfect for you!
Over the next four weeks you’ll prepare the materials and supplies, cut out strips of fabric, and sew and braid them together before the final step. Then in Week 4 you’ll find out what the exact project is to complete this sewing mystery.
It sounds fun and it will be, so follow along for all of the steps!
Week 1: September 13th
Let’s begin with the materials and supplies you’ll need for this Mystery Sew Along!
Materials Used:
- plaid and / or houndstooth wool blend fabric (approximately 1/2 yard total will be used)
- fabric scissors
- small scissors
- hand-sewing needle
- all-purpose thread (in similar colors)
- embroidery hoop (the inside ring shape of a 10” (inch) across hoop)
- binder clip or similar (to temporarily connect fabric to table)
- thimble (recommended)


When choosing the fabrics to use for this project there is a lot of flexibility. I worked with 3 different wool blends, but pick whatever you have or prefer for a rustic look. As long as the materials have some colors in common they should look fun contrasting when mixed together! It’s also a great way to use up extra material you might have around the studio.
Start by laying out the fabrics on your work surface. They need to be cut into very long strips that are approximately 1.5” (inches) wide. The pieces shouldn’t be shorter than about 3’ (feet) long. This process can be done with fabric scissors or with a rotary fabric cutter and cutting mat. In total I cut out 10 strips of each fabric to use (but wound up only using 3 of each pattern). It’s better have extra strips cut out in case you need to add on at the end.


Week 2: September 20th
Now that all of the fabric strips are cut out we can get to hand-sewing!
Pair up a strip of each fabric (3 at a time) at the ends. Using a hand-sewing needle and matching thread color, make a few stitches at the end going through each layer. Secure all of the layers together on the end, then knot and cut off the thread. A fabric I used was slightly longer than the others- that’s okay! Repeat this to create 3 sets of strips.
Be sure to check out the video below to see a demonstration of this step, plus some other hand sewing advice.
See you next week!


Week 3: SEPTEMBER 27TH
Welcome back to the autumn-themed Mystery Sew Along! This week we will be braiding each of the 3 sets of fabric strips. I used a large binder clip to attach the ends of the fabric to my table, but you may choose to use a weight or another type of clamp. Go with whatever will keep it steady so you can braid evenly.

Each set should be braided at a medium tension and consistently braided. Dont make them too tight or too loose. The texture of each fabric should still show through! At the end of each set use the hand needle and thread to secure the braid together. Each braid wound up being about 3’ (feet) long when finished, and I left the extra fabric length at the end. This may vary a bit based on the exact fabric and tension you use.


Week 4: OCTOBER 4TH
By now you might have guessed that we are making a fall wreath! This is the perfect adornment for your front door or an interior wall. For the final steps we will connect the 3 braid sets together to fully wrap the embroidery hoop ring.
Lay 2 braids flat together on a work surface. Sew them by hand with a needle and thread so that the ends are connected. Continue on so that the entire length of the braids are attached and form a panel. Repeat this to add the third braid on the side (in a row). The stitches can be large and don’t have to be perfect because this will be on the inside of the fabric. The braids should all remain relatively flat.
Check out the video above to see this technique step-by-step!


Once all 3 braid sets are connected the whole panel can be sewn onto the hoop. Starting at the top, sew the short ends together by hand so that they are secure. Keep sewing it closed along the whole length until the wooden ring is totally covered. If the braid panel isn’t long enough to disguise the whole embroidery hoop then create another by repeating the process.
Use the excess lengths of fabric to create a hanging loop at the top, or if you don’t have extra on the ends simply tie on a scrap! Place your wreath on a nail or wreath hook to display. Thanks for participating in this year’s Sew Along!


Thanks for joining us! We hope you can sew along with us again soon.
Read NextDIY Reusable Dryer Sheets