January 2024 Mystery Sew Along
New year, new upcycled project! Join now for free!
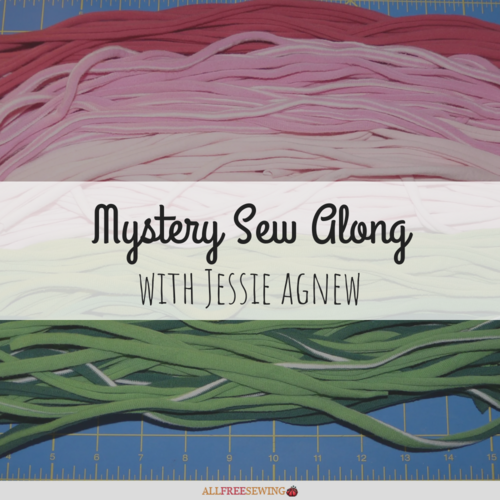
Welcome one and all to our Mystery Sew Along to kick off 2024! With this fun event, we'll release the instructions for a mystery pattern over 4 weeks. By the end of the month, you'll have sewn a brand new (and awesome!) pattern.
We've joined forces with the incredibly talented Jessie Agnew from I Am Sew Crazy to bring you this sew along, so you know the finished project is going to be something stylish and practical. But here's the twist- you won't know what you're sewing right away! Looking for a hint? It's an ingenious upcycle!
Our mystery sew along is not one to miss. Join us every Wednesday for each exciting new installment of the pattern.
How do I join? In order to be updated with the latest set of instructions every week, make sure that you're subscribed to the Sewing It Up newsletter from AllFreeSewing, and keep an eye on your inbox! We'll be sure to send you an email each week to bring you the next step in the sew along.
Week 1: January 10th
Hi there, I'm Jessie from iamsewcrazy.com here to introduce a new mystery sew-along! It's a fun upcycled project that gives new life to some old t-shirts. We will be making this project in 4 different steps, and the technique is very beginner-friendly.
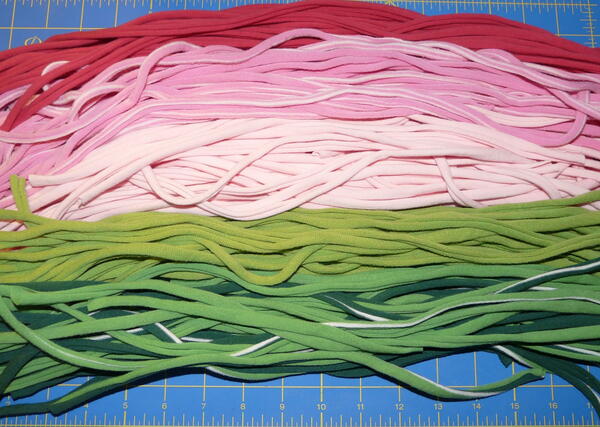
For the first week, we need to gather up some old t-shirts. My project used 6 shirts, but since t-shirt sizes vary so much, I recommend using 8 shirts to make sure you have enough fabric. The shirts should be made of natural fibers, so check the tags to make sure they are made of cotton, rayon, viscose, bamboo, modal, etc. The colors of all the shirts should coordinate with each other, but it's okay if they are stained, ripped, or have designs on them.
Using a rotary cutter (if you have one) or a pair of scissors, cut off the hems of the shirts and discard them. Slice the shirts crosswise into 1" strips. Avoid the sleeves, damaged areas of the shirt, and printed designs. Typically you can still use the back of the shirt even if the front is printed.

Pull on the strips until they roll up into noodle shapes, and then snip the side seams off of each piece.

You should have a whole pile of t-shirt noodles in different colors. Hang on to them until next week, when we will go over step 2 of the mystery sew-along. See you then!

Week 2: January 17th
Hi again! It's Jessie from iamsewcrazy.com with week 2 of our mystery sew-along. Last week we took some old t-shirts and turned them into fabric noodles for our project. This week we will be working with woven fabric to complete the next step.
Choose 1 yard of quilting cotton or another woven cotton fabric of similar weight. The fabric should coordinate with the colors of t-shirts you have chosen.
Fold the fabric in half so that there are 2 layers, and cut a rectangle that is 18" by 30". Keep the layers together, and fold them in half so that the folded pieces measure 18" by 15". Cut a gentle curve from about halfway down the 18" edge to the bottom of the fold, so that when the two layers are unfolded you have a shape as shown in the diagram. The exact angle of the curve isn't important, as long as the fabric pieces are symmetrical from side to side, and the 2 layers of fabric are identical.

With right sides together, sew the 2 layers together around the edges using a 3/4" seam allowance. Leave a 4" opening on one of the straight sides for turning. Backstitch at the beginning and end of the opening.
Clip notches out of the curved edge as shown. Press the fabric, then turn right side out. Press again.
Sew the opening closed from the right side, sewing ¼" away from the folded edge of the fabric. (Don't worry; the stitches you use to close the opening won't be visible on the finished project.)
Meet me back here next week when we start assembling our project! Can you guess what it is?

Week 3: January 24th
Hi again, it's Jessie from iamsewcrazy.com, back with week 3 of our mystery sew-along! It's time to start assembling our project, so grab the mysterious shape you made last week and the fabric noodles we made out of t-shirts in week 1.
Set up your machine using a good quality all-purpose thread and a denim needle (size 16). Use a triple stitch (also known as a straight stretch stitch) if your machine has one. A triple stitch takes two stitches forward and one stitch backwards, so it makes a very durable line of stitches and is a great choice for a heavy-duty project like this. If your machine doesn't have a triple stitch, it's okay to use a straight stitch with a fairly short stitch length.
Since we will be sewing through thick material, a walking foot is helpful if you have one. You may also need to reduce the pressure on your presser foot. Watch the accompanying video for some more tips on how to sew through thick materials and multiple layers of fabric!
Starting at the 30" side, mark lines on one side of your woven fabric shape that are ½" apart.
Lay a row of fabric noodles along the 30" edge of your woven fabric, working with a few inches at a time. Mix up the colors of the noodles so that they form a nice arrangement, and sew along the marked line. Catch the end of each noodle as you sew, and backtack and the beginning and end of your stitching line.


Sew along the next marked line, forming the fabric noodles into 2" long loops and sewing over them again as you go. See the accompanying video for a demonstration of the sewing technique.


Can you guess what we're making? It's a bath mat!
Continue sewing down all of the marked lines on the woven fabric, adding new noodles as each piece runs short. You can form stripes with the colors, or mix the noodles up so that you have a random pattern. I chose to mix them up and cross the noodles over each other to randomize the pattern, but of course it's up to you!
When you have sewn along the last marked line, you are through with week 3! I'll be back again next week to show you how to finish off the project.

Week 4: January 31st
Hi again! It's Jessie from iamsewcrazy.com, here to show you how to finish the bath mat we've been working on. We are almost done! Just a couple more steps and we will have a comfortable, durable bath mat that's perfect to absorb water after a shower or give as a gift.
If you've been following along for the first 3 weeks, you should have a base of woven fabric that's covered with fabric loops made out of t-shirt strips.
The next thing we need to do is cut through all of the loops, right at the very top of each loop. This is to give the bath mat a uniform texture, so that you can't tell where new pieces were added. But it also makes the mat more comfortable, because loops of fabric tend to snag on your toes!
If you have any rogue noodles that are a bit too long, trim them down a little as well. When the bath mat looks fun and fuzzy and the same height all over, you're done trimming!

The last step is optional, but it makes the mat stay put on your floor. Add some silicone caulk on the back side of the mat, smearing it into the fabric as you apply it. You can apply it in patterns, swirls, or random dots. Let the caulk cure completely before flipping the mat over. (Check the tube of caulk to see how long it takes to cure.)

Now put it in place in front of your tub or shower. Doesn't it look amazing? And it's even better that it was made out of old t-shirts that were ready for a new life.
You can machine-wash your bath mat when it gets dirty, using hot water and the heavy-duty cycle. You can also throw it in the dryer on the cotton setting. Enjoy!


Thanks for joining us! We'll see you for the next Sew Along!
Read NextDIY Reusable Dryer Sheets