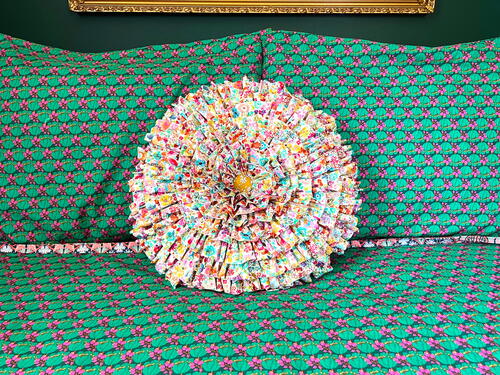
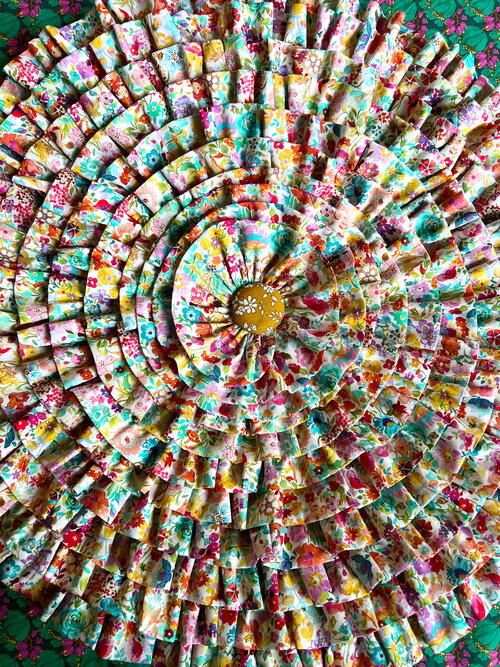
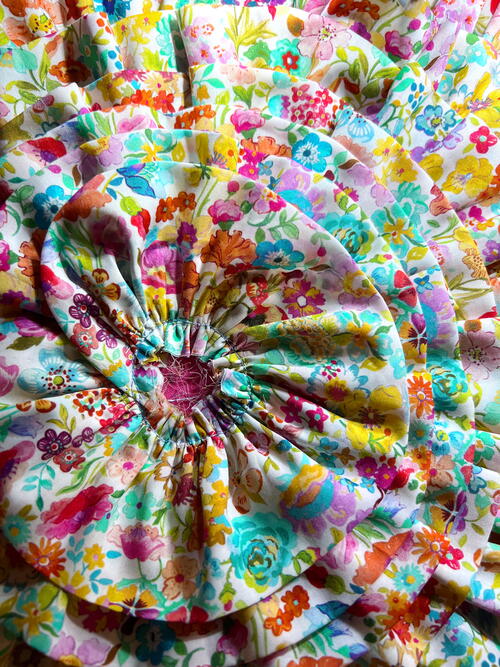
Gathered Flower Pillow

Hi there! Its Meredith of Olivia Jane Handcrafted, and I recently had the chance to show off Janome’s Gathering Foot in the Presser Feet Face Off. I made a pillow with a double-ruffle edge that was created with this foot, and I received several messages asking for the math behind the gathering. I thought a project using this foot would be the perfect thing to show you how you can use the Gathering Foot for any number of projects, but the project I’m showcasing today is a super elevated round ruffle pillow. Its over the top and truly a stunner!
Time: 3-4 hours
Finished Size: 18” round pillow

Materials List
- Janome Gathering Foot (there are different versions suitable for different machines)
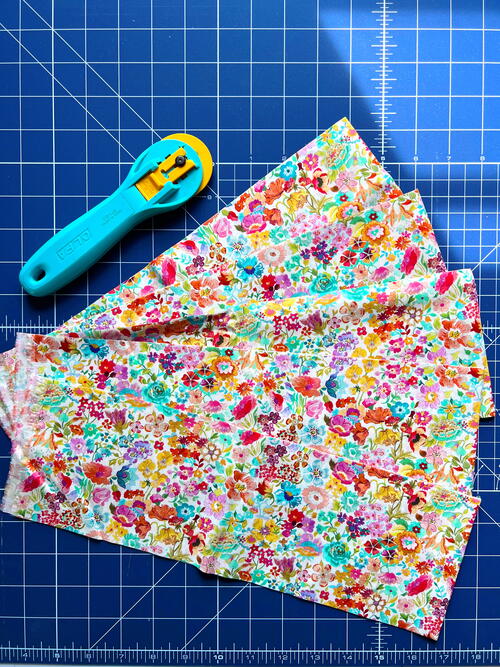
- 2 yards Liberty lawn (alternatively, 2.5+ yards 44” fabric)
- 1/2 yard quilting cotton (will be visible on back of pillow)
- 12 oz bag of fiber fill
- Covered button or whatever you’d like at the center of the pillow
- Needle and thread for stitching button and closing up pillow
- Pencil or marking tool and ruler
INSTRUCTIONS
Before we get into the main project, I’m going to show you how to do a little gathering math. I promise its not hard, but planning ahead will ensure you don’t come up short on a project!
To find the percentage of shrinkage that occurs when the fabric is gathered, you must test out the fabric you are going to use for your project because different weights and stitch lengths and tension will absolutely change the degree of gathering. I should have used the identical fabric I used for the project that will be showcased after this, but I’ll go over the differences when we get there.
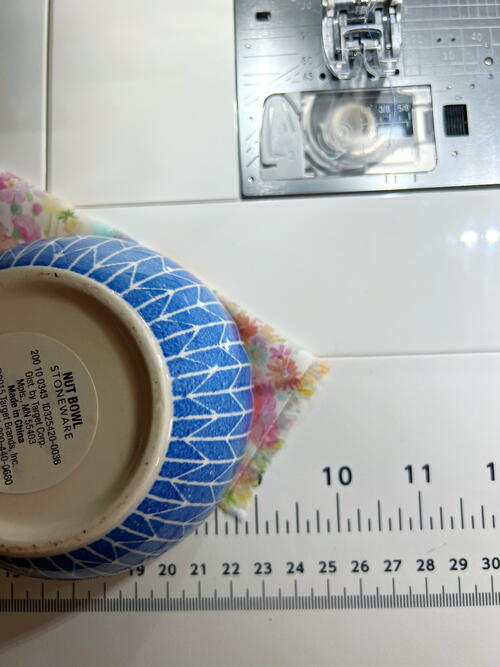
Test fabric:
We will be using 4.5” wide fabric that is folded over and pressed. Test a strip 4.5x10” (folded over) with the following settings: Stitch Length 4.0 and Tension 7.0
My fabric gathered down to 4.2” from 10” so I know that 4.2/10=.42 and, yes, you do need to measure exactly here because we are going to have so much length, that if I were to round it down to only 4, I would have a huge discrepancy. So measure accurately when you are testing!
-
To make this pillow, I know I will need 285.69” of gathered length, so I need 680.2” inches of fabric to gather because: 285.69/.42=680.2” If you have a different percentage, divide 285.69 by that number to determine the length you will need, and remember round up when you cut. All of the cutting measurements you see below are based on the exact pillow that I made.
-
Cut:
• If using Liberty lawn, cut 13 4.5xWOF (width of fabric) strips
• If using 44” fabric, cut 16 4.5xWOF strips
• From quilting cotton, cut 2 18” squares
Prepare the pillow
-
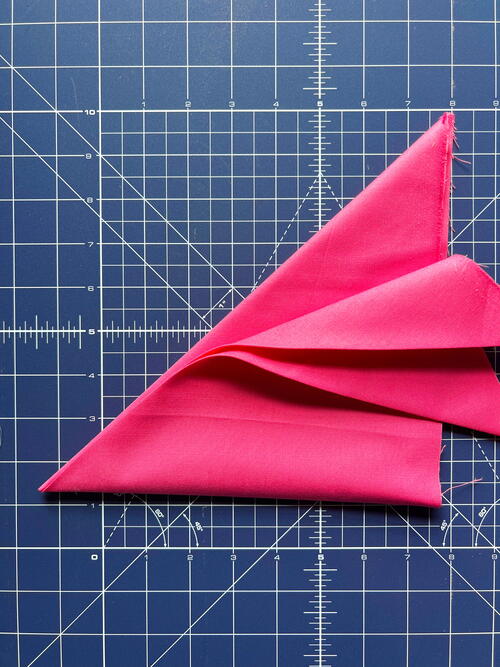
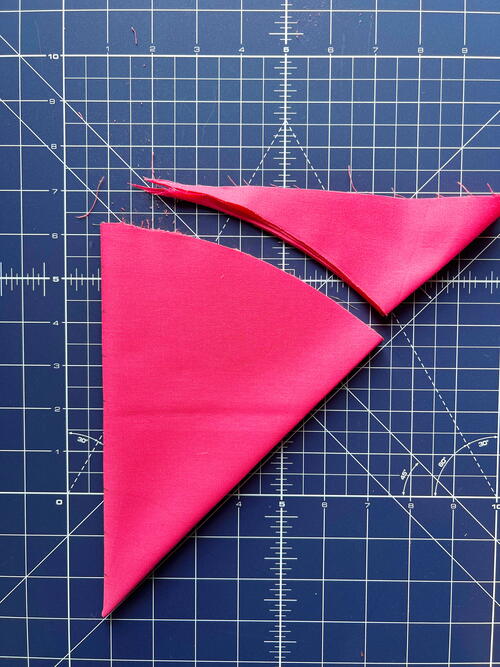
I don’t have a 18” circle template, but its easy to cut circles with just a few tricks! Fold your fabric in half and press. Fold in half again and press. And finally, fold again so that it looks like right triangle and press.
-
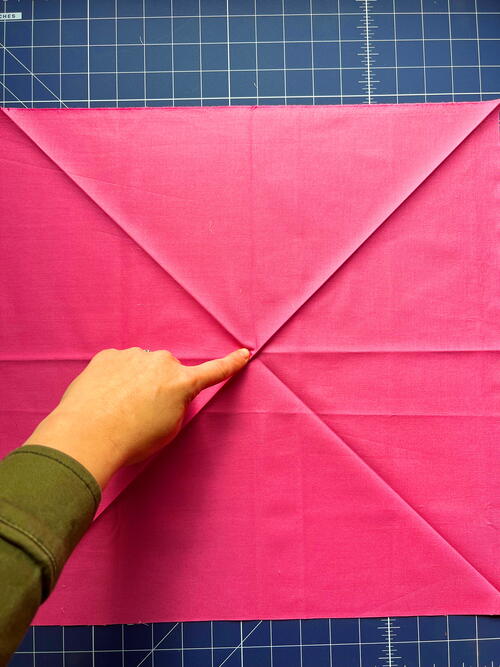
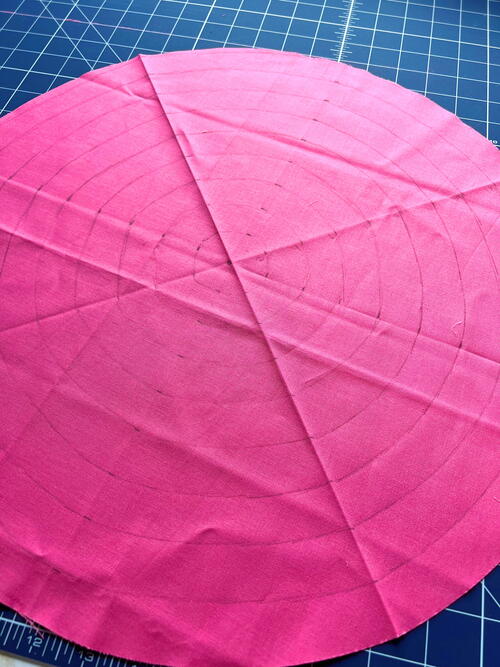
Open and you will have a clearly visible center point and 8 equal sections. Mark the center point using a pencil. Using your ruler, line it up along each crease and mark each 1” away from the center. On the creases that reach each corner, only mark out to 9” from the center on each.
-
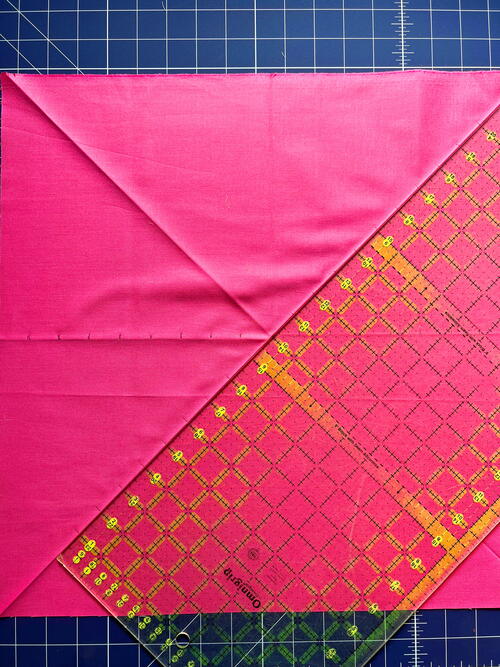
Refold the fabric down to the right triangle with the pencil marks visible. Using a plate or something round and large enough to reach, line up the rounded edge with the 9” tick marks you made and trace the rounded edge with a pencil. Take a peek to make sure it looks right and that everything is lined up. If it is, take your rotary cutter and cut along that rounded line. When you open your fabric, you should have a perfect circle. Use this circle as a template to cut out the second circle which will be used for the back of the pillow.
-
You can use your plate or bowl for this next part, or you can just eyeball it. Beginning with the 8 marks right outside the center dot, lightly mark out the circle. It should have a 2” diameter. Do the same with the dots another inch out, which will form a 4” circle. Continue to do this all the way out to the edge because we will use these circles as a stitching guide when we attach the ruffle. Set aside.
Helpful hint: when calculating circumference of a circle, remember πd (3.14 x diameter). I have already done this for you on this project.
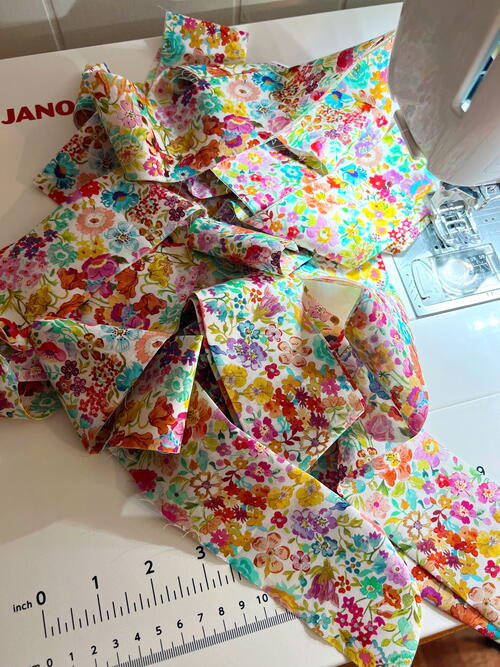
Prepare the strips:
-
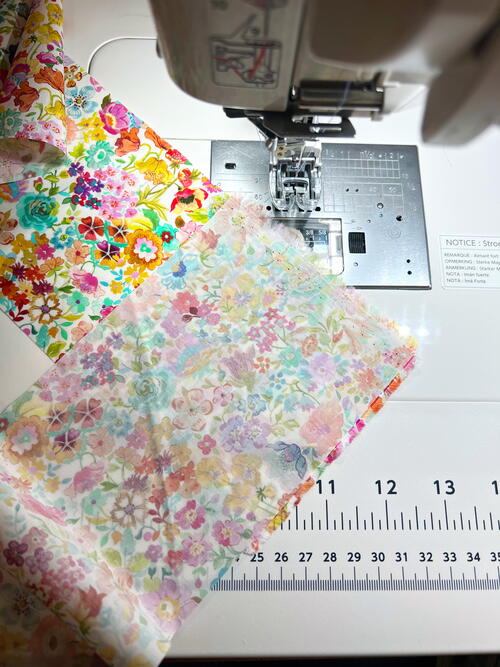
Now we will combine all of our strips into one single strip. To reduce bulk, attach at a 45 degree angle like so: place them right sides together, and orient the short ends to be perpendicular so that you can sew a 45° seam by sewing from corner to corner.
-
Cut away excess, so that you only have about 1/4” of seam allowance, press all seams open.
-
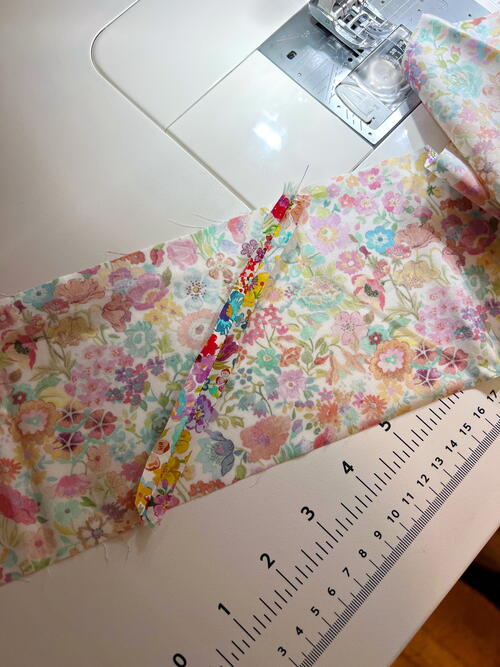
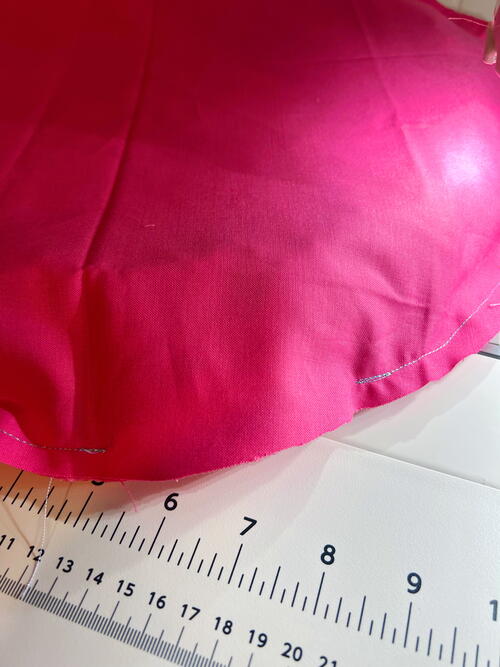
At one end, fold the fabric right sides together, and using a rounded edge (I used a small bowl), mark a quarter circle. Sew along the line and trim seam allowance. Press. This just makes a neat end so we won’t see any of the selvedge in the center of our pillow.
-
Fold and press entire length of strip in half, wrong sides together.
Gather fabric
-
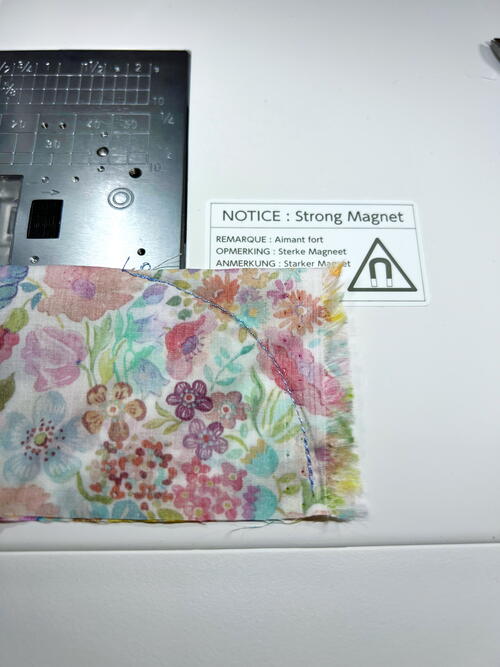
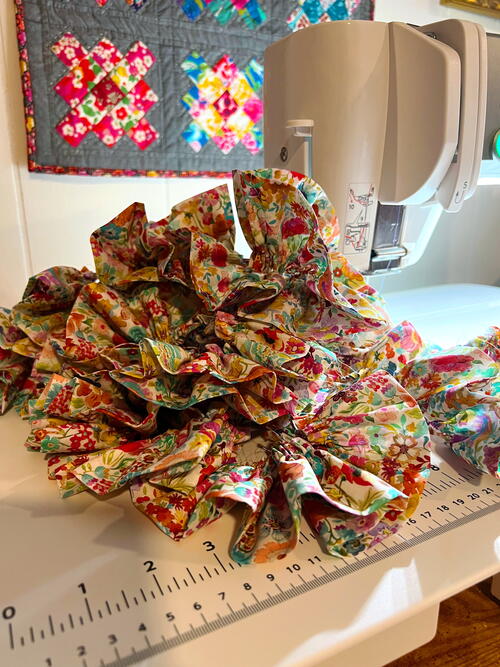
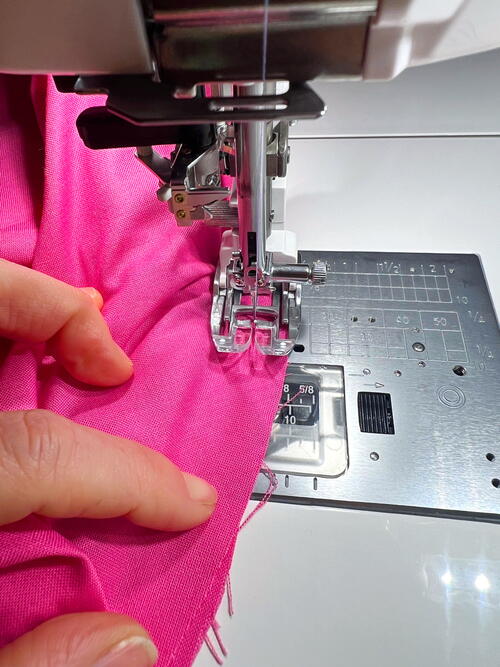
Attach your gathering foot and adjust the settings (Stitch Length 4.0, Tension 7.0). Gather the entire length of the strip. You should have just about 286” of total length to work with, but if it is just a little more, that’s okay!
-
Attach your AD foot (walking foot) and reset to normal sewing settings to prepare for the next step.
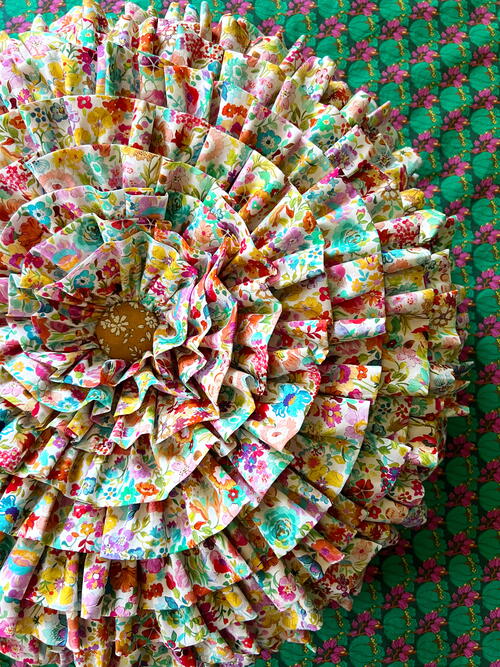
Add gathered fabric to pillow front:
-
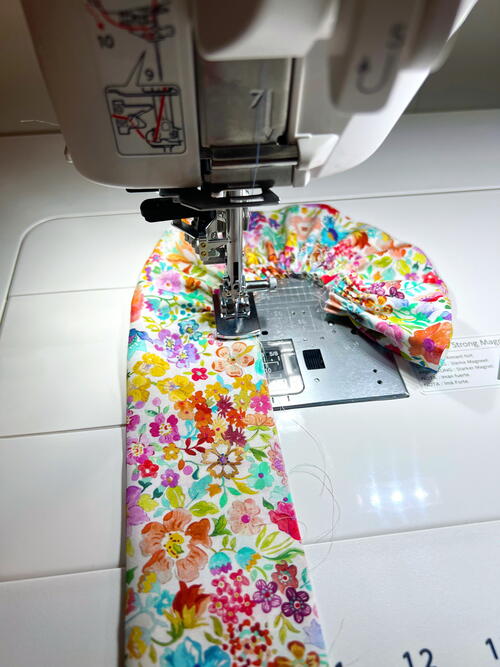
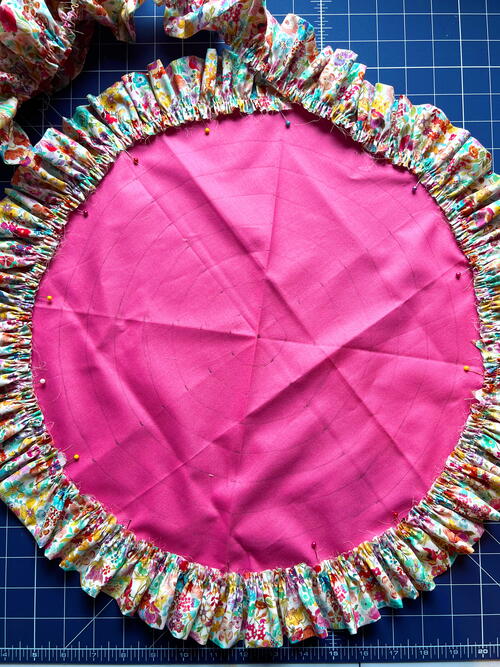
This is the super fun part! Working counterclockwise, we are going to pin the ruffle to our marked pillow front beginning at the outermost circle. Pin every couple of inches until you make it around the circle. Do NOT cut away the excess.
-
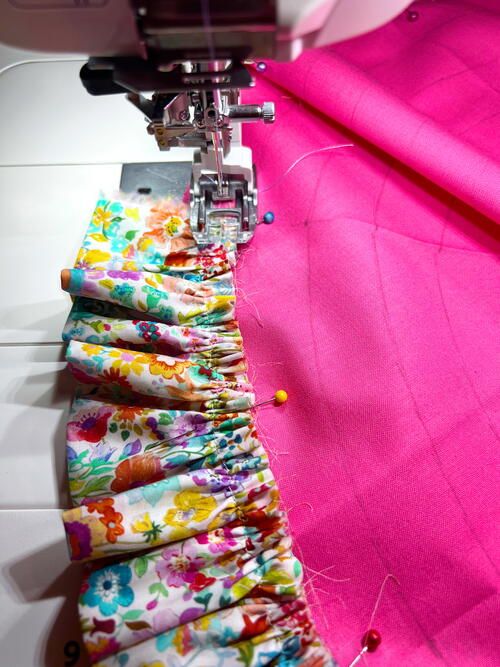
Take the pinned pillow front and the excess, and using a 1/4” (or 3/8” if you prefer) seam allowance, sew the gathers down to the pillow front. Backstitch at the beginning and end.
-
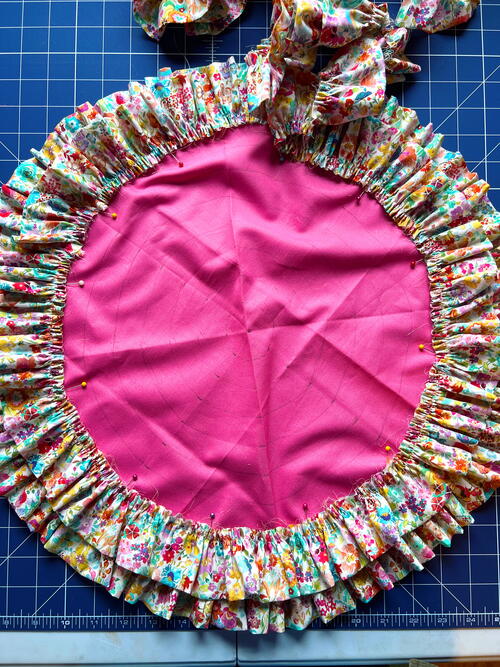
Once you reach the beginning, pin around the next circle. Keep in mind that this is technically more of a swirl than a true circle since we are continuing to use the same strip of gathers. I used 1/8” of the circle to gradually work my way down to the second circle so I could avoid a harsh transition. Continue to pin, sew, pin, sew, until you work your way to the center of the pillow. If you do have some excess at the end, you can layer around the center a bit so its a bit fuller. If, somehow, you do come up short, don’t sweat it! You can create another gathered strip and just continue on. The business of the design can cover flaws, so don’t feel defeated if this happens!
Attach pillow back:
-
Sew pillow back to the pillow front, right sides together using a 3/8” seam allowance, and backstitching at the beginning and end. Leave a 4-5” opening for stuffing. Tuck in the gathered edge so you don’t catch it as you go. Pin if it is helpful to you.
-
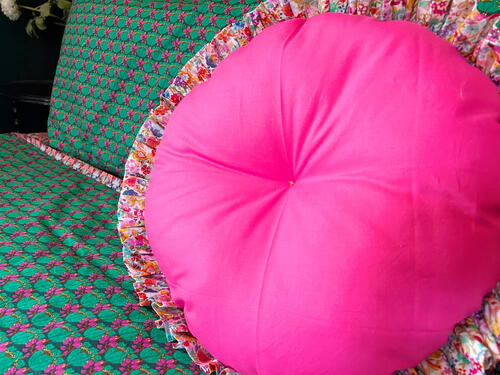
Turn right side out. Stuff with fiber fill, then use needle and thread to hand stitch the opening closed.
Finish pillow:
-
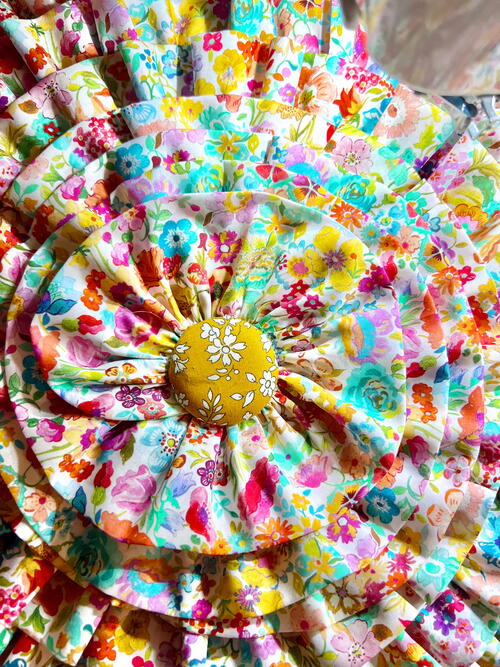
Finally, make a covered button in the fabric of your choosing, or use a favorite button from your stash and attach to the center of your gathered flower pillow. You can *carefully* insert your needle to the center back of the cushion from behind the button and make a few passes back to front to create a light tuft if you want. That’s what I’ve done here because I like the shape it gives.
-
Now all that’s left to do is step back and appreciate your hard work! There are much simpler ways to make pillows, but you did a lot of math, gathered a ton of fabric, and made yourself a seriously luxe cushion. Do be proud of your effort and share a picture with the rest of us! You can tag me, @thefooshe and @janomeamerica and use #janomemakes so the rest of us can applaud your good work!
Happy sewing! -
Your project is finished! If you love this tutorial, be sure to check out Janome.com for even more inspiration.