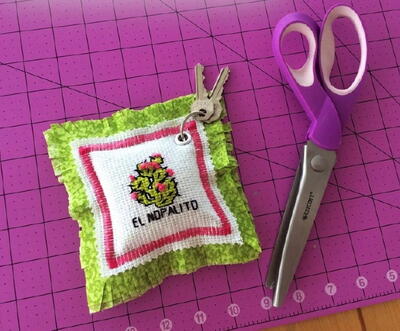
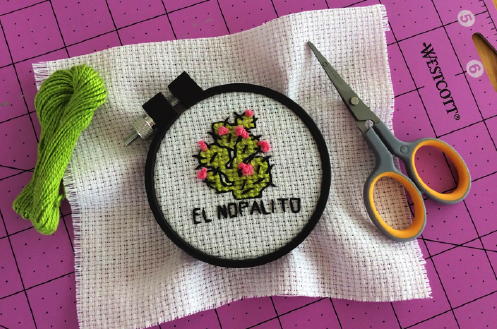
Cross Stitch DIY Keychain

Are you always losing your keys? Us too! Try making this oversized Cross Stitch DIY Keychain so you'll never lose track of your keys again! While this project has a cross stitched cactus as the feature of this simple keychain tutorial, feel free to stitch up an image of something else you love. This DIY accessory is a great beginner cross stitch project to do with your kids, since they will love choosing a picture to embroider for their own personalized keychain! If they love ice cream, try cross stitching a tiny ice cream cone. If they love animals, try cross stitching a cute animal, like a puppy or penguin! Plus, your kids will be thrilled to have a cool new keychain at the end of this project!
Project TypeMake a Project
Time to CompleteUnder an hour
Sewn byBoth Hand and Machine

Materials List
- Westcott 4” Straight Titanium Bonded Scissors #13866
- Westcott 8” ExtremEdge Titanium Bonded Scissors #14731
- Westcott 9.5” Pinking Shears #15983
- Westcott Brand Hobby Knife #15156
- Westcott LetterCraft Stencil Book #TS-1000
- Westcott KleenEarth iPoint Evolution Pencil Sharpener #15085
- Cross Stitch Fabric or Monk's Cloth
- Embroidery Floss
- Small Embroidery Hoop
- Needle
- Stick Pins
- Cotton Fabric
- Sewing Machine
- Sewing Thread
- Fiberfill
- Grommet and Grommet Setting Tool
- Keyring
Instructions:
-
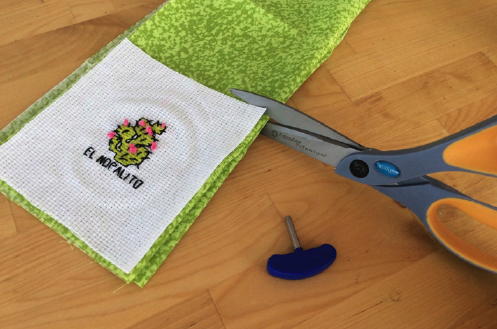
Create your cross-stitch design within the embroidery hoop, trimming the embroidery floss as needed with the 4” Straight Titanium Bonded Scissors. For this design I went with a Mexican inspiration based off of the traditional Loteria game.
-
Then with the 8” ExtremEdge Titanium Bonded Scissors, cut 4 layers of fabric that are roughly the same size as your cross stitched piece. The ExtremEdge scissors are wonderful for cutting through multiple layers of fabric and the tension may be adjusted for your comfort!
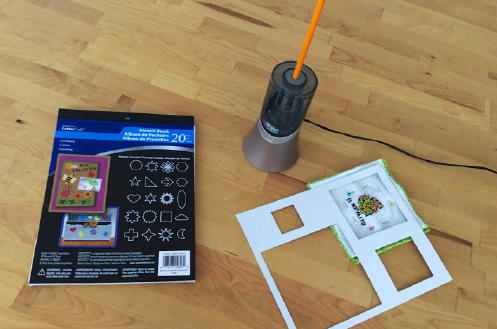
-
Layer the cross-stitched piece on top of your fabric. Sharpen up a pencil with the Westcott KleenEarth iPoint Evolution Pencil Sharpener and use the square template from the Westcott LetterCraft Stencil Book to mark out your stitch line. Or if you prefer, you can make it your own and choose from any of the assorted shapes included in the Westcott LetterCraft Stencil Book!
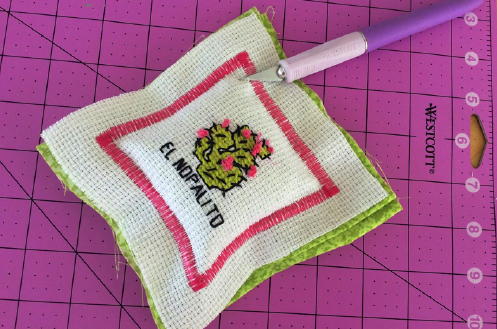
-
Pin all the layers together and use your sewing machine to stitch around three sides of the square with a wide and tight zig-zag stitch in a coordinating color. Then stuff the inside with fiberfill and stitch the remaining side closed. Next you are ready to cut a hole for the grommet using the Westcott Brand Hobby Knife. After you set the grommet, trim the border of the cross-stitched panel with the 9.5” Pinking Shears. To finish the piece off, cut a fringed border all the way around with the 8” ExtremEdge Titanium Bonded Scissors and attach the keyring.
What other quick sewing projects would you like to see on AllFreeSewing? Let us know in the comments below!
Read NextScrappy Infinity Scarf