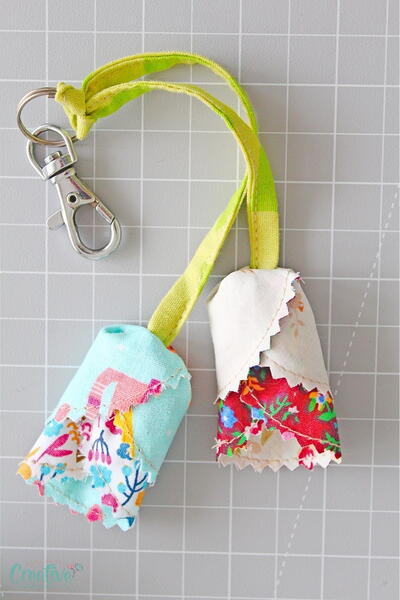
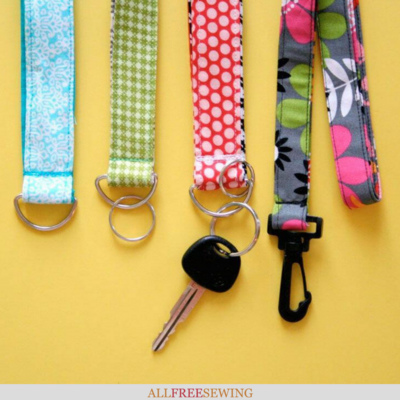
How to Make a Lanyard

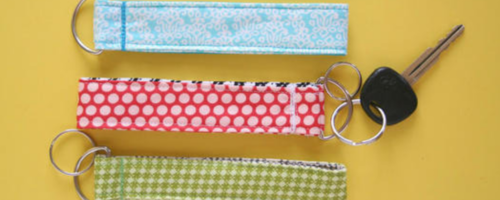
Never lose your keys again, thanks to this Super Easy Lanyard and Key Chain Wristlet! These handy accessories are so cute and will save you from hours locked out of the car or the house.
Keep all your keys in one convenient place that's guaranteed to keep them safe and secure.
Travelers, learn how to make a fabric lanyard to keep your passport or travel money safe around your neck.
Plus, these DIY fabric lanyards or wristlets will look super cute clipped to your purse or belt. They're a must-have outfit accessory for people on the go.
Not to mention, they're one of the best scrapbusters around. Because you don't need much fabric, you can use all of your favorites. Every choice will result in a beautiful lanyard that you'll appreciate.
Sign Up For More Free Patterns
Materials List
- 1 1/4” D-Rings – Dritz
- Swivel Hook for 1” Strap – Dritz
- Key Rings
- A couple coordinating prints of fabric (1/8 yard, 45” wide)
- 45mm rotary cutter
- Thread snips
- Cutting mat
- Quilting ruler
- Scissors
- Iron
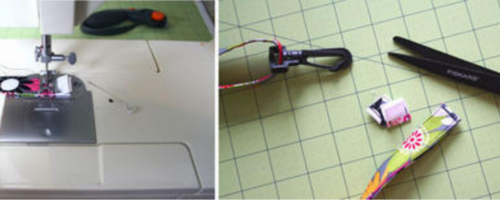
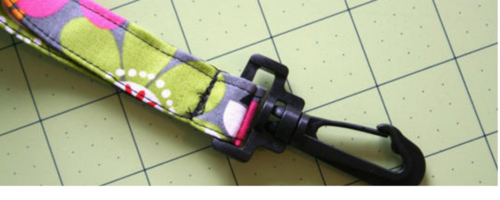
Instructions (Lanyard):
-
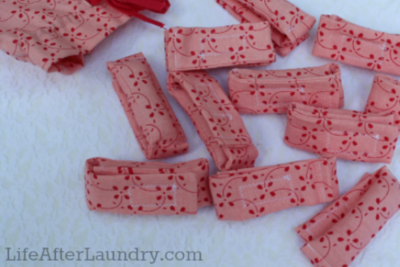
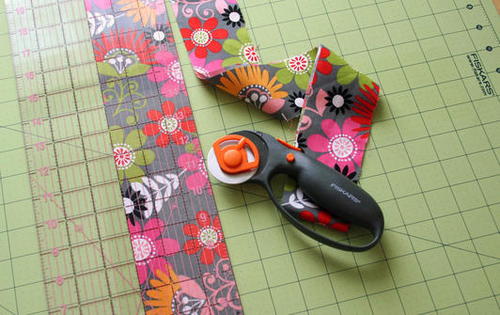
Cut one piece of fabric using your rotary cutter so it measures 3” wide x 40” long.
-
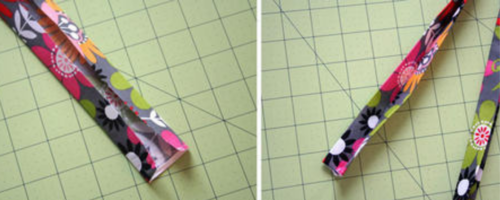
Fold each long side in toward the middle and iron. Fold strip in half and iron again. Basically you’ve just created custom bias tape.
-
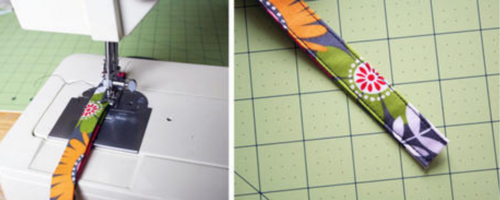
Stitch down the entire length of the open side of the strip stitching as close to the edge as possible. Repeat along other side. Trim dangling threads with Thread Snips.
-
Fold stitched strip in half, making sure the strip isn’t twisted. Thread swivel hook onto strip. Match ends and stitch forward and reverse several times, approximately 1” from the ends. Clip the ends 1/8” from the stitching.
-
Flip strip inside out and move swivel hook to hang at the stitching that closes the loop. Stitch hook in place with the same forward and reverse stitching as close to the hook as possible. Trim dangling threads with Thread Snips.
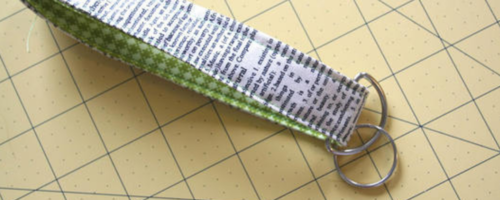
Instructions (Key Chain Wristlet):
-
First you’ll cut two pieces of coordinating fabric using your rotary cutter so they each measure 3” wide by 13” long. Iron each side in, toward the middle, approximately ¼”. Fold strip in half, iron. (Tip: I find it helpful to use spray starch to get a crisp fold.) Repeat for second fabric.
-
Lay one fabric strip on top of the other to the folded edges are on opposite sides. Pin together. Stitch down the length of each long edge, as close to the edge as possible. Trim dangling threads using Thread Snips. If necessary, trim short ends of fabric even.
-
Decide which fabric you want on the outside, hereinafter called: right side. Fabric on the inside of the finished product: wrong side. Fold in half, matching ends, with right sides together. Slide D-ring onto strip.
-
Match ends and stitch forward and reverse several times approximately ½” from ends. Trim ends approximately 1/8” from stitching.
-
Flip strip right side out and move D-ring to hang at the stitching that closes the loop. Stitch ring in place with the same forward and reverse stitching as close to the ring as possible to secure in place.
Ways To Use This Lanyard
This DIY sewing project can be used in a variety of ways. Take a look at the list below for ideas on how to use your new lanyard or wristlet!
1. Keychain collection
If you're someone that likes to collect keychains after visiting a place or taking a vacation, this DIY project would be a great way to display them and show them off to friends.
2. I.D. Holder
For college students especially, an I.D. card is your ticket to everything. Making your own luggage tag that can clip right onto this DIY lanyard ensures that everything coordinates. This simple DIY phone wallet would also be handy for an on-the-go student!
3. Customizable Gift
Lanyards are functional and a great way to show personality, so why not make some as gifts? These easy lanyards and wristlets don't require much fabric, so you could easily buy several different fabrics (be sure to check the remnant bin!) to make lanyards in different patterns and colors for each of your friends.
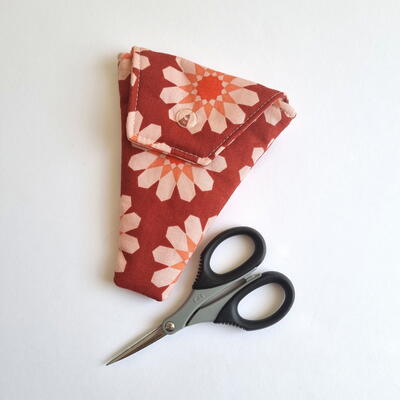
Read NextScissor Pouch
Your Recently Viewed Projects
Thanks for your comment. Don't forget to share!
Tricia108
Apr 20, 2018
This is a great idea for keys. I have something for my keys similar that is falling apart and I was just thinking I should replace it and here is a pattern. Like so many people who sew I have odd pieces of fabric that will be just right for this. Easy and quick to make. Thank you.
Cheryl E
Apr 03, 2017
The lanyard and key chain wristlet make for great gift ideas. Having the D rings for the wristlet and the swivel hook for the lanyard allow for this scrap savers project to look most well-designed. The lanyard is especially nice for attaching a passport pocket, company or school badge id.
Marilyn B
Jan 15, 2017
My friend made this for me and I have made one for my daughter. These are especially helpful for college kids or some one who has lots of keys and IDs they need to keep at the ready! Thanks for the detailed tutorial, very clear and helpful! These would make a nice gift for a teacher or coworker, or to hand out as promo gifts for a small local biz or non-profit!
Weberme
Dec 21, 2016
These key chains and wristlets are so cute and so very simple to make that you can make many at a time to give to everyone in your family or for a simple cute gift.This is a great way to use up those extra pieces of scrap fabrics. I like that you can use the fabric of your choice so can design it yourself . This is a good put together tutorial for you to even teach someone to sew and get super quick results. Great job.
lganme 5689802
Mar 11, 2016
Absolutely love it and sew easy. Thanks so much for sharing. Here is mine.
Report Inappropriate Comment
Are you sure you would like to report this comment? It will be flagged for our moderators to take action.
Thank you for taking the time to improve the content on our site.