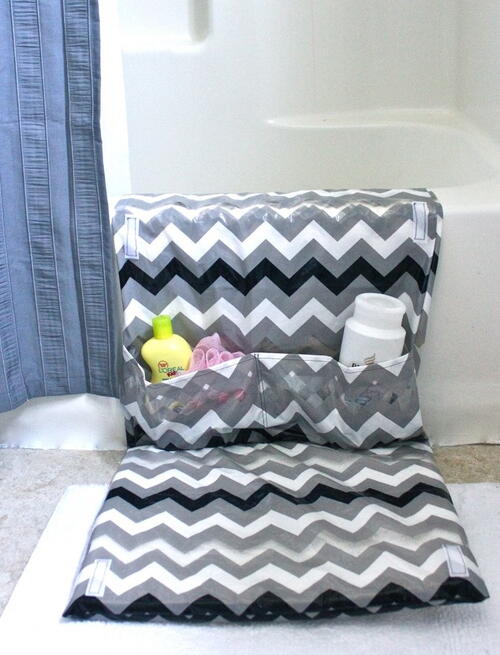
DIY Bath Mat with Pockets
Make bath time fun for both you and your child with this padded DIY bathroom mat.

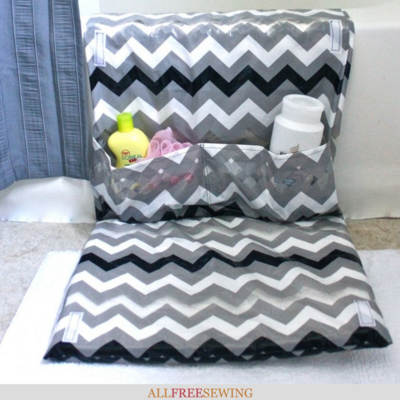
Kneeling on the hard tile floor while giving the kids a bath can do a number on your knees. Create the DIY Bath Mat with Pockets. Watch Maureen Wilson as she leads you through the steps to creating this handy tubside mat.
There's even a sewing video tutorial below the written version. This free sewing project will not only give knees a comfy place to rest, but it's also easy storage for bath supplies.
Ideal for new moms, this DIY bathroom mat will take the pain out of bathtime. Not only will you be comfortable while leaning over the tub to wash your baby or toddler, but all the supplies or toys you'll need will be conveniently placed in the pockets and reachable with your free hand.
Not to mention it's waterproof and so you don't need to worry about touching it with soapy hands or accidentally spraying it with the showerhead. Rub a dub dub, we can't wait to get to the tub now that we have this handy mat.
We think you'll agree that this homemade sewing project is a life-changer. Find more baby-themed sewing patterns here.
Sign Up For More Free Patterns >>>
Project TypeMake a Project
Time to CompleteIn an evening
Sewn byMachine

Materials List
- Plastic shower curtain
- Velcro, 6 in.
- Foam cushion, 1 x 15 x 17
- 3 suction cups
- Ribbon, 18 in.
- Wire (optional)
- Sewing machine & thread
How to Make a Baby Bath Mat
Supply Tips:
- You'll need a plastic shower curtain. This one was $10 at Wal-Mart, but there were cheaper ones available as well.
- You'll also need a foam cushion. If your shower curtain is transparent, be sure to select a white cushion. This piece of foam is 1 x 15 x 17 inches, and cost $5 at JoAnn's. Make sure the foam you use is wide enough for you to kneel on comfortably, and not taller than the side of your tub.
- You'll need 3 suction cups, either medium or large sized. You can find these in the craft section, they're sold next to the plastic suncatchers. This package was $2 at Wal-Mart.
DIY Bath Mat:
-
Begin by measuring the side and rim of your tub. Next, we'll cut two large rectangles that will become the front and back of the Tubside Mat. Here's the formula for figuring out how long to make these pieces. I've included the measurements for my tub and cushion.
LENGTH
Height of tub + 15.0
Width of rim of tub + 3.5
Length of cushion + 15.0
Thickness of cushion + 1.0
6 in. (seams & overhang) + 6.0
_____
40.5
Here's the formula for figuring out how wide to make these pieces:
WIDTH
Thickness of cushion x 2 + 2.0
Width of cushion 17.0
_____
19.0
-
Cut a pocket piece. It will need to be the same width as the other two pieces, plus another 3 inches so it will have some give. The height should be 15 inches.
-
Fold the pocket piece in half so that it is now 7-1/2-inches tall. Right sides should be together. Pin the long bottom edge. Sew with a 1/2-inch seam, then turn right side out. Insert your hand into the tube and poke out the seams.
-
Topstitch the long folded edge of the pocket piece.
-
Add the pocket piece to the main rectangle. Measure from the bottom edge of the mat, so you'll know where to place the bottom of the pocket. Add the thickness of your cushion x2, plus the length of your cushion, and pin the pocket there. It should be on the right side of the mat, and the topstitched edge will become the top of the pocket.
-
Pin the short sides of the pocket first, aligning with the edges of the mat. The pocket piece is wider than the mat so that the pockets will hold more. You'll need to make a series of tiny folds, or pleats, as you pin the bottom edge of the pocket to the mat. Make the pocket fit the mat in this manner.
-
Sew the pocket to the mat along the bottom edge of the pocket.
-
Next, divide the pocket panel by adding two rows of stitches side-by-side down the center. Having two rows will make the pocket more durable.
-
You could add your rough Velcro strips in the bottom corners right now, about 2 inches in from the edges. I added mine a little later, but it probably would have been easier to do it now… it's up to you.
-
Layer the back mat piece on top of your front mat piece, right sides together, and pin. Sew the long sides and bottom with a 1/2-inch seam, leaving the top edge open.
-
Clip the two corners, being careful not to cut your stitches. Turn right side out and poke out the seams. This is when I added my Velcro to the bottom corners. If you're adding it now, be careful that you are sewing through only the top layer of the mat!
-
Slide the cushion into the mat. Be sure to push it all the way to the bottom. Sew alongside the top edge of the cushion to secure.
-
It's time to add the coordinating pieces of Velcro. To get the proper placement, fold the cushion up on top of the mat. Note where the Velcro touches, and pin the matching Velcro tabs there. Sew in place. I only sewed through the top layer but realized later that it didn’t matter whether I sewed through both. Either way is fine.
-
Finally, we'll add the ribbon loops for the suction cups. Fold the top open edge of the mat inward a 1/2-inch. Add one ribbon loop to each corner, and one to the center. Pin the edge shut, and sew. Add two rows of stitches for durability: one at 1/4-inch, and another at 1/8-inch.
-
Add one suction cup to each loop. Depending on the type of hook your suction cups have, you may want to remove the hook provided and instead wrap a piece of wire around the ribbon and cup so it won't slide off.
DIY Bath Mat Video Tutorial:
If you're a visual learner, then check out the video tutorial below:
What was your or your child's favorite bathtime toy?
Read NextDIY Reusable Dryer Sheets
Your Recently Viewed Projects
Thanks for your comment. Don't forget to share!
Tricia108
Jan 16, 2017
I like the idea of this bathmat but I don't like the idea of using a plastic shower curtain to make it from. I don't like kneeling on plastic and think it would be slippery. Use the same pattern and use a cheap fabric curtain.
Report Inappropriate Comment
Are you sure you would like to report this comment? It will be flagged for our moderators to take action.
Thank you for taking the time to improve the content on our site.