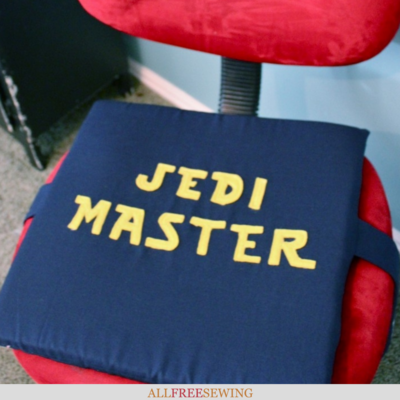
Star Wars Inspired Chair Cushion DIY
This Star Wars sewing pattern is for Jedis only! Make your own Jedi Master (or other message) DIY seat cover with this tutorial.

There are no fans quite like Star Wars fans. If you're looking to make the perfect gift for your Star-Wars-loving family member or friend (or for yourself), then you need to see this Star Wars Inspired Chair Cushion DIY.
Watch and learn how to make a seat cushion fit for a Jedi Master. For major Star War fans (and fans of comfortable seating), follow this helpful tutorial, and learn how to make a chair cushion that rivals anything store-bought.
It's both funny and comfy! You can create any Star Wars message or quote that you want, or simply have your new sewn seat cover say "Star Wars" instead.
That being said, you can go in a completely different direction and find a font you like and make a personalized message you prefer.
Plus! Designer Maureen Wilson has provided this step-by-step tutorial and is also featured in the video tutorial found at the bottom of this page. Scroll to watch how this project is made.
Star Wars Inspired Chair Cushion DIY

Materials Needed:
- Cotton fabric (navy or color of choice)
- Felt (yellow or color of choice)
- Hook and loop fastener (Velcro)
- Temporary fabric glue
- Foam cushion
- Sewing machine
- Iron
- Needle & thread
Chair Cushion Instructions:
My husband asked for a seat cushion for the chair he uses at work. He's a big Star Wars fan, so I decided to surprise him with a themed cushion.
- Start by finding a free Star Wars font online. This font is called Star Jedi.
- I just cut out my letters freehand, but you could also print them off and pin them to your fabric, then cut around them.
- You'll need to cut 2 fabric squares for your cushion. Cut them 1-inch wider than the seat of your chair.
- Use temporary fabric glue to adhere the letters to one of the fabric squares. This will hold them in place while you sew.

- Topstitch the letters to the fabric square. Use a 1/8-inch seam. Don't forget to sew around the center of letters that have cut-outs.

- Make the straps that will secure the cushion. You'll need a total of 4 pieces, but you can fold your fabric and cut them all out at once if you want. Make them 3-1/2-inches wide.
Measure beneath your chair from side to side, then divide by 2. Add 4 inches, and cut each rectangle to that length.

- Sew 2 rectangle straps right sides together with a 1/4-inch seam, leaving one short end open for turning. Do the same with the other set of rectangles.
- Trim the corners without clipping your stitches, then turn right side out and press.
- Lay the square with the letters face-up on the table. Pin the straps to the center, one on each side, with the raw edge pointing outward. Extend the strap about an inch past the edge of the square so it will be secure within the seam.

- Lay the other fabric piece face-down on top, sandwiching the straps between the layers. Pin together, then sew with a 1/4-inch seam. Leave a 6-inch hole in one of the sides so we can insert the cushion.
- Clip the corners, then turn right side out. Press the edges, being careful not to iron the felt letters.
- Add Velcro to each strap. One should have the Velcro on the top of the strap, while the other has the coordinating Velcro on the bottom of the strap.

- Cut a 1-inch thick foam cushion to the size of your sewn square. Roll up the foam so it fits inside the opening. Insert your hand to position the foam in place. Make sure it's smooth.
- Finally, hand sew the opening shut with a blind or ladder stitch.


Star Wars Inspired Chair Cushion Video Tutorial
If you are a visual learner, then below is the video tutorial that will walk you through what we've shared in written form above.
Up Next
Pop Culture Sewing Projects >>>
Who is your favorite Star Wars character?
Let us know in the comment section!
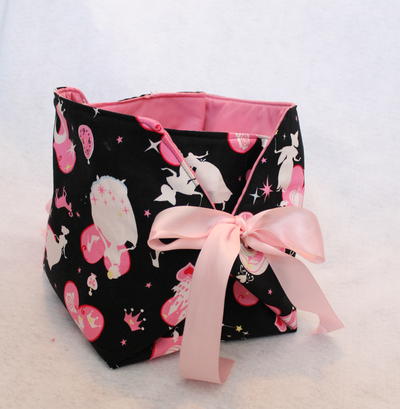
Read NextFold-Out Bow Box
Thanks for your comment. Don't forget to share!
Plusk24
Dec 14, 2015
I need this cushion in my life. I will take it everywhere I go, and I will always sit on it. Because every chair I sit in is the chair of a Jedi Master. Also this cushion is so cute.
Mistress of All Ev il
Dec 14, 2015
I totally agree. It is the definition of perfection. You should totally make it (and include a photo when you do)!
Report Inappropriate Comment
Are you sure you would like to report this comment? It will be flagged for our moderators to take action.
Thank you for taking the time to improve the content on our site.