Fabulous and Fun Fabric Book Cover Tutorial
Learn how to sew a fabric book cover that's as pretty as it is useful. Make reading or working on the go faster and more stylish than ever!

This adorable DIY fabric book cover helps you easily transport your bible or another favorite book. It has a vintage and country charm that we love.
However, you can easily adjust the fabric pattern and embellishments to make it more modern or have a different style profile.
Regardless of how you want it to look, you'll love this Fabulous and Fun Fabric Book Cover Tutorial.
There is a set of written instructions below. You can also find the video tutorial for this project, created by Maureen Wilson, at the bottom of the page. Visual learners can rejoice!
Learn how to make a padded book cover that works for most books and even some notebooks. There is a spot for a pen or highlighter as well, so you are ready to make notes as needed.
Follow these directions for making a fabric book cover and you'll have a personalized book tote in no time! Fabric book covers also make great gifts.
Sign Up For More Free Patterns >>>
Fabric Book Cover Tutorial
Although it may look intimidating, it's one of the best sewing projects for book lovers. This is the perfect place to learn how to sew a fabric book cover because it's stepped out for even the least experienced sewist. Don't forget about the video tutorial, too!
Materials Needed:
- 1/2 yard outer fabric (1/3 yd for a smaller book)
- 1/2 yard inner fabric (1/3 yd for a smaller book)
- 1/2 yard light interfacing (I used sew-on, but you could use fusible)
- 1 yard trim (optional)
- Large button
- Hair elastic
- 14 inches elastic for pen holder

Fabulous and Fun Fabric Book Cover Tutorial:
- Measure around the width of your book. Add two inches. This measurement will be the length of your covers. Then measure how tall the book is. Add an inch and a half. Cut the outer fabric, the inner fabric, and the interfacing to those measurements.
- Now we’ll cut the pockets. You can use either fabric. Cut two the same height as your book, plus an inch and a half. Make it 8 inches in width (we’ll fold it in half later). Cut a piece of interfacing to the same dimensions. Then cut the interfacing in half, making two pieces that are 4×8 inches.
- Next, you’ll need to decide how long you’d like your handles. Wrap a flexible tape measure around the book, and hold the tape up to see what a comfortable length would be. Then, double that number and add one inch.
- You’re going to cut a strip of your inner fabric to 1.5 inches in width, and the outer fabric will be cut to 2.5 inches in width. Cut them to the length you determined. Chances are, your fabric won’t be long enough. That’s okay, you can cut extra strips to make up for the length… just don’t forget to add in a seam allowance. If you need to lengthen with another piece, sew right sides together, and don’t forget to press your seam.
- Next, you’re going to fold in the edges of your strip to meet in the center. When you press, the pattern should be face up. Repeat for the other strip.
- The wider strip should have the side with the slit face up. Then lay the skinnier strip on top of it, with the slit on the back. Pin together.
- Use an overcast stitch or a zig-zag stitch on both raw edges to prevent fraying. Then, sew the strips together, a quarter inch in on the skinny strip. Sew on both the right and left edges. Remove the pins.
- Make the strip into a loop by putting right sides together. Sew the end using a half-inch seam. Press the seam open.
- Center the strap on the piece of outer fabric. Pin in place. You’ll start and end sewing two inches from each edge, so mark those measurements so you don’t sew too far.
- Sew on the strap, following the stitches of your previous seams exactly. Don’t forget: start sewing two inches from the edge, and stop sewing two inches from the end! Remove the pins.
- Center and sew on the button about three inches from one end.
- If you want to add decorative trim, now’s the time to pin it in place. Line up the trim with the edge of your fabric. Your trim should not extend past the edge of your fabric. Sew in place with a quarter-inch seam. Remove the pins.
- Time to work on the pockets. Fold the fabric in half so that it measures 4 inches wide by 8 inches tall. Insert the interfacing between the layers.
- To make the pen holders, cut two pieces of elastic to 7 inches. Fold one piece in half to make a loop and zig-zag the ends together. Pin onto a pocket panel about a quarter inch in from the folded edge. Make three evenly spaced lines of vertical zig-zag stitches to create the pen holders. Repeat these steps on the other panel.
- Pin the panels to the interior fabric piece. All fabrics should be face up. Now it’s time to sandwich the fabrics together. Pin the interior fabric, the exterior fabric, and the interfacing together. Sew with a quarter-inch seam on the long sides ONLY. Remove the pins. Turn right side out and press.
- Turn in the edges at the end with the button. Pin in place. Then fold and pin the opposite side, leaving a gap in the center. Insert the end of a hair elastic into the gap and pin.
- Topstitch around the entire cover, using a quarter-inch seam. Backstitch over the hair elastic for durability. Remove the pins.


Fabulous and Fun Fabric Book Cover Video Tutorial:
With a project with so many details, it's nice to be able to watch someone make it. That's why we love Maureen! She shared this all in a video tutorial that's easy to follow and enjoyable to watch. Take a look:
Want More?
37 Fat Quarter Sewing Projects >>
What's your favorite book?
Let us know in the comments!
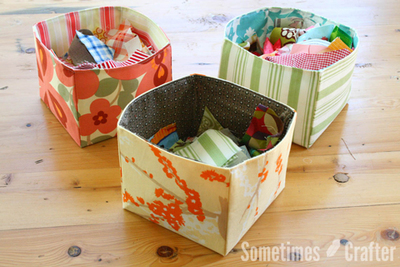
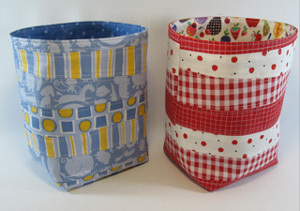
Read NextScrappy Fabric Baskets
Your Recently Viewed Projects
Thanks for your comment. Don't forget to share!
Weberme
Feb 01, 2017
My grand daughter in the 2nd grade class is doing a human wax museum on Friday and she is doing Anne Frank and I was thinking of making her a diary and could not find anything that I could use for the cover and now I will be making one for her. These are so clever for keeping books neat and clean. This is a good tutorial and a super great video to explain how it is done.Thanks.
Cheryl E
Dec 22, 2016
Fabric book covers are the best gift idea when gifting with a printed book. It provides an elegant presentation. Easy to do and a wonderful scrap fabric project. The accompanying video is charming and helpful. There are printed instructions as well. A fabric book cover would be perfect to protect a treasured family bible.
noneyet49 2981543
Nov 27, 2012
Wow, great pattern! Where can I print it out at. My computer is not in my sewing room and I can't remember all that at one time? or Please send me a printable pattern please.
pjsnsn 0347843
Dec 29, 2013
I would like to know where I can print off the patterns instructons also. would ou please send me a printable patern. Penny pjsnsn@gmail.com
jckg841 4572393
Jun 04, 2011
what a great project. I am going to make this as a scrapbook cover. Are there printed tutorial instructions for this?
Report Inappropriate Comment
Are you sure you would like to report this comment? It will be flagged for our moderators to take action.
Thank you for taking the time to improve the content on our site.