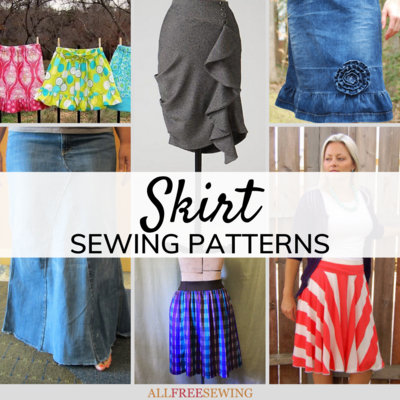
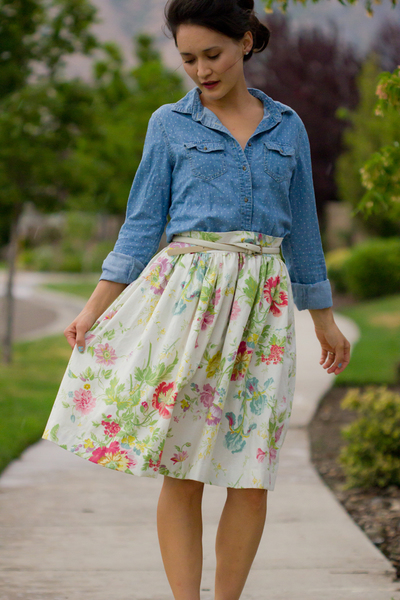
Half Circle Skirt Tutorial

From Camelot Fabrics comes the Half Circle Skirt Tutorial. This easy skirt sewing project walks you through putting together an amazing DIY skirt that will fit adorably into your wardrobe.
Designed to fit you in the waist and flare elegantly outward on your hip, this handmade skirt will flatter any figure.
During warmer months this project works as an easy piece to wear out, while colder temps can see it paired with tights for a feminine look despite the chill.
This free half circle skirt pattern is easy to create in just about any size. Create it in a light and flowy fabric for summer and spring or try something weightier for colder months.
Sign Up For More Free Patterns >>>
Project TypeMake a Project
Time to CompleteIn an evening
Sewn byMachine

Materials List
-
Fabric (for 26" waistband and 18" skirt length):
- 2 yards of Scented quilting cotton (44" wide) from Camelot Fabrics in 2142205SC
- 1/4 yard of Scented quilting cotton in 214-0040SC
- 2 yards of coordinating lining fabric (58" wide) from Camelot Fabrics
To discover exactly how much yardage you need, simply add your Waistband radius to your skirt length and double the result. A note on fabric: Since the Skirt is drafted as one half-circle piece, the grain will be rotated 180° through its width.
Make sure to choose a multi-directional pattern for the Skirt so nothing looks like it's sideways or upside-down.
The Waistband, on the other hand, may have a directional pattern. Please wash, dry & press your fabric before beginning. For this project, you’ll also want to trim off your selvages. Unless otherwise noted, sew all seams with a 1/2” allowance.
- One 6"-8" zipper
- Basic Sewing Supplies
- A buddy
Instructions:
Drafting & Cutting
-
Measure the circumference of your waist and add 1” for seam allowance. Cut a rectangle to this length from your Waistband fabric.
Multiply the desired width of your waistband by four to find the height of the rectangle. For example, if your waist is 28” and you want a 1 1/2” tall band, cut a rectangle 29” wide and 6” tall. -
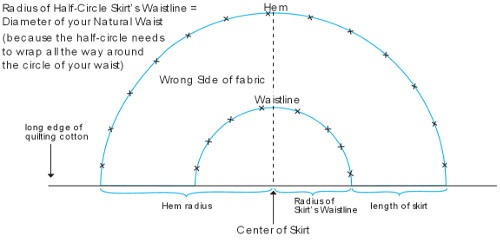
Divide the circumference of your waist by 3.14 (pi) to find the radius of your Skirt’s waistline (since the Skirt is only half a circle, its radius is equal to the diameter of your waist). Make a note of this number.
Now have your friend measure from your natural waist to where you’d like the hem of your Skirt to fall, add 3” for seams & adjustments, and write down the result as the length of the Skirt. -
Add the length of the Skirt to the radius of the Waistline as shown in the diagram to find the radius of your Skirt’s Hem.
Let’s sum up those numbers:- Waistline circumference (natural waistline + 1”)
- Waistline radius (Waistline circumference ÷ 3.14)
- Length of Skirt
- Hem radius (Length of Skirt + Waistline radius)
- Total yardage needed (Hem radius x2)
-
Mark a point for the center of your skirt along the long edge of your quilting cotton. You can fold the fabric in half and work from the center, or you can measure the Hem radius from one end of the cloth.
-
Hold one end of your measuring tape at this center point and mark a series of Xs around it so that their distance from the center is the same as the length of your Waistline radius. Draw the Waistline of your Skirt by connecting these Xs.
-
Draw your Hem in the same manner as the Waistline, but use your Hem radius to find the distance of the Xs from your center point. Cut out the half-doughnut shape you’ve created.
-
Repeat Steps 4-6 on your Lining fabric

Assembly
-
Hem the short ends of your Waistband and press the seams.
-
Fold your Waistband in half lengthwise, Wrong Sides together, and iron the crease. Unfold the band, fold each long edge to the center fold, Wrong Sides together, and iron these creases.
-
Finish the straight edges of your Skirt & Lining by serging them or edge-stitching with a zigzag seam.
-
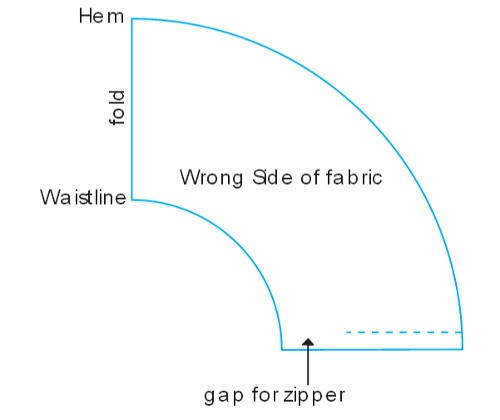
Fold the Skirt in half, Right Sides together, so the straight edges are aligned. Sew the straight edges together, leaving a gap near the Waistline for the zipper, and install your zip with one end open at the Waistline. We have a tutorial on how to do that here.
-
Sew the straight edges of your Lining together as your did for the Skirt piece, again leaving a gap for the zipper. Press the seam open, including the gap, and turn the lining Right Side out.
-
Fit the Skirt into the Lining, Wrong Sides together. Hand-tack the folded seam allowance of the Lining to the zipper’s seam allowance on the Skirt. This step can be done by machine, but a little hand stitching will actually make your life easier and give a much cleaner result.
-
Baste the Skirt to the Lining around the Waistline.
-
Fit the Waistline of the Skirt & Lining into the Waistband so their raw edges are against the center fold of the band and they are sandwiched between its two folded halves. Use plenty of pins, inserted perpendicular to the Waistband, and ease gently as necessary.
If you’re using a directional print for the Waistband, make sure the pattern is the right way up on the Skirt side (upside-down on the Lining side). -
Sew the Waistband to the Skirt & Lining with seams 1/4” from all four edges of the band. You may want to sew a second seam 1/8” from the edges for a more polished finish.
-
Hang your project from its Waistband overnight to allow for any settling of the Skirt’s fabric around the bias.
-
The next day (or the one after; we’re in no rush), put on the skirt and ask your friend to insert pins where you’d like the finished Hem to be, making sure all the pins are at the same height from the floor.
-
Take the skirt off and trim it 1” below the line of pins. Turn a rolled hem from the row of pins and sew it with an invisible hem stitch (we have a tutorial for that here).
-
Trim the Lining so its raw edge is flush with the finished edge of the Skirt and machine-stitch a rolled hem. This hem will be an inch or so shorter than the Skirt.
-
Press your hems, thank your buddy and you’re all set!


Your Recently Viewed Projects

Thanks for your comment. Don't forget to share!
Report Inappropriate Comment
Are you sure you would like to report this comment? It will be flagged for our moderators to take action.
Thank you for taking the time to improve the content on our site.