How to Make a Peace Sign Necklace from Denim
Make a far-out DIY denim necklace inspired by the '60s and '70s era of hippies.

Denim jewelry is a trend that cannot be dismissed, especially when there is this tutorial exists. Learn how to make a peace sign necklace from denim to bring back those bohemian hippie vibes that have become popular once again.
One of the most influential time periods in fashion will always be the 1960s and '70s.
Now you can make your own DIY peace sign necklace with materials you already have. The vibe is free-spirited and full of love, with accessories that never go out of style. Feel like a modern-day hippie in this frayed denim peace sign necklace.
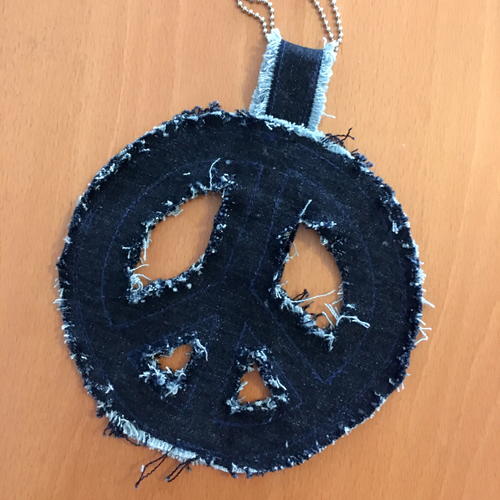
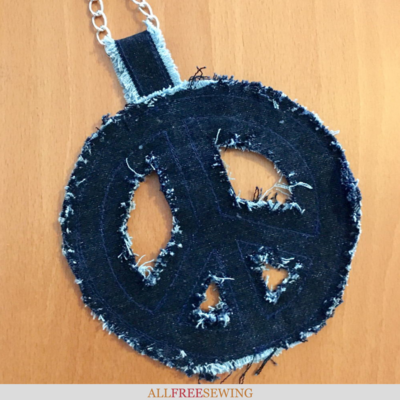
This project upcycles an old pair of jeans to create a beautiful, wearable statement piece that is sure to get you compliments. If you don't need a necklace, this peace sign design can easily be turned into a keychain or pin, too.
Let's go step-by-step and make this cool fashion jewelry!
So, if you have an affinity with that awesome hippie lifestyle and have some old denim laying around, this is the ideal project to create. Make one of these DIY denim necklaces for yourself, for your daughter, or for your vintage-loving friends. If it's too much for your everyday style, it's a great addition to a hippie Halloween costume.
Sign Up For More Free Patterns >>>
Project TypeMake a Project
Time to CompleteIn an evening
Sewn byBoth Hand and Machine

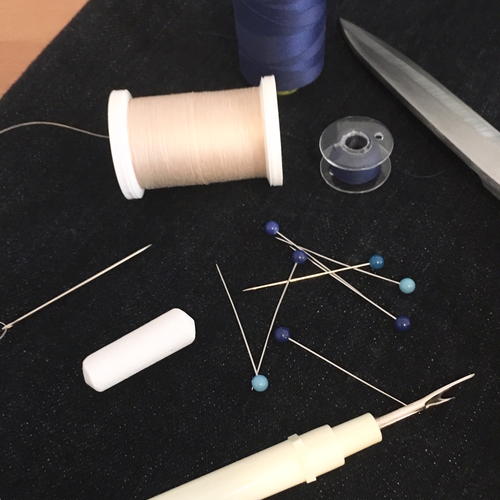
Materials List
- Denim fabric, preferably an old pair of jeans
- Fabric scissors
- Measuring tape or ruler
- Sewing thread in a blue that's pretty close to the denim color (or a bright thread color if you prefer it to pop)
- Sewing thread in a contrasting color
- Sewing pins
- Hand-sewing needle
- Piece of chalk
- Seam ripper tool
- Chain or cord of your choosing
- Sewing machine
How to Make a Peace Sign Necklace:
Click any image to enlarge.
-
Gather your materials.
-
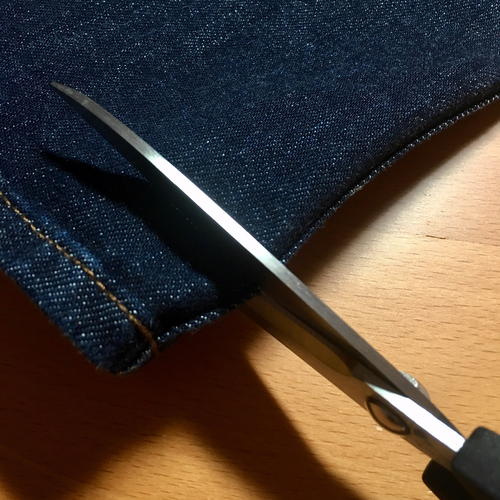
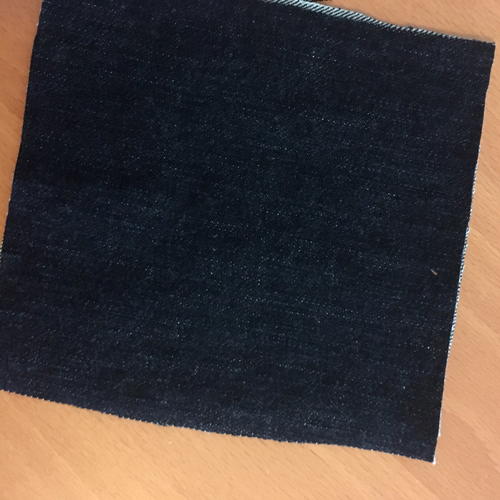
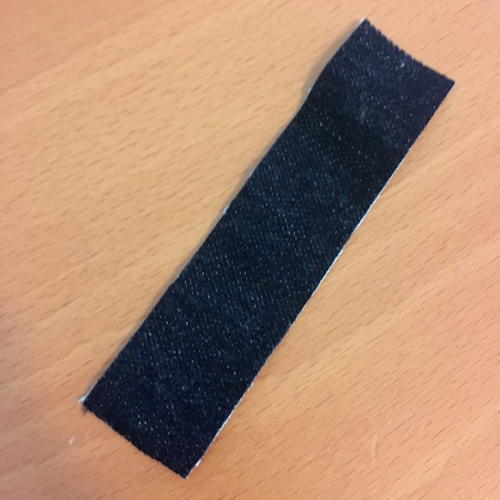
Start by cutting out two large squares from your old jeans or denim fabric. They should be approximately 6" by 6" in size. Do not use the seam parts of the jeans, just the plain fabric.
-
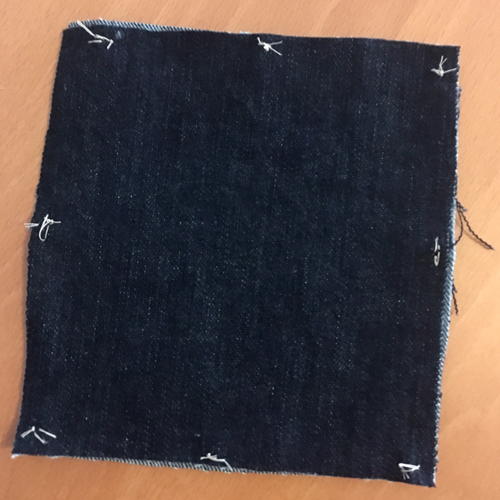
Once you have your denim squares cut out, put the "wrong" sides together and pin them along each side. The "right" sides should be facing outwards on both the front and back. I kept the grain of the fabric going the same way for both pieces but it's not required.
-
Using your hand-sewing needle and thread, sew a tacking (or "basting") stitch at each corner and in the middle of each side with a contrasting thread color. This should be a quick stitch that you are able to remove later. It should be just tight enough to keep the fabrics together when you’re sewing under the machine, but not so tight that it’s hard to unpick.
-
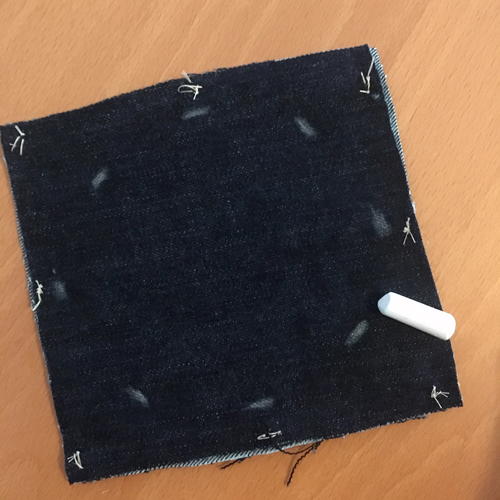
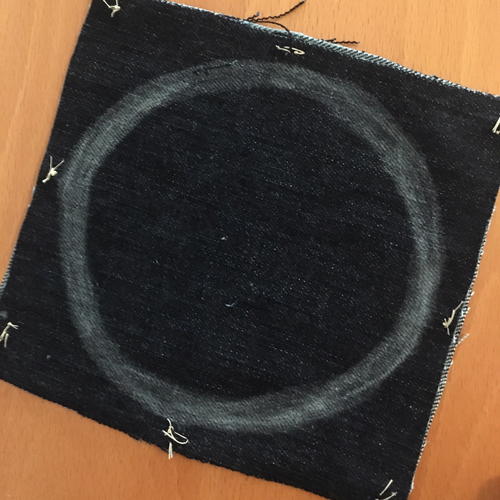
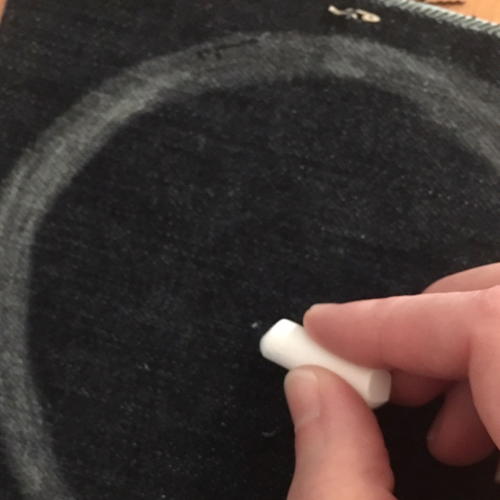
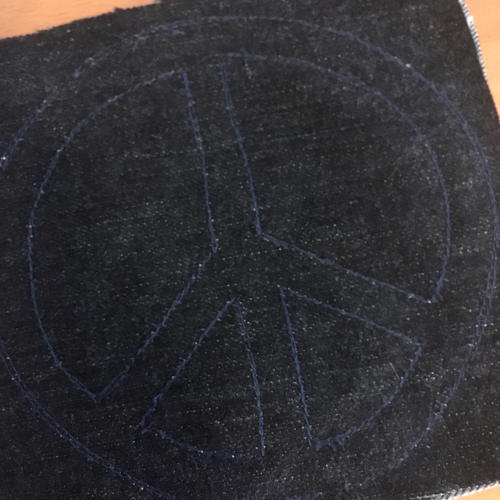
Next, grab your sewing chalk or even a small piece of regular blackboard chalk, preferably in white or yellow so you can see it on the denim material. Start to draw the peace sign shape by making a point in the middle of each edge, leaving about 1/2" of space on each side. Make four more dots halfway between these points in a rough circle. Attach your points so they become a complete circle and then thicken the line.
-
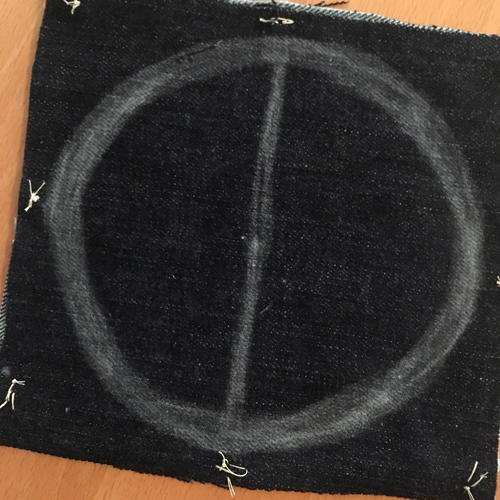
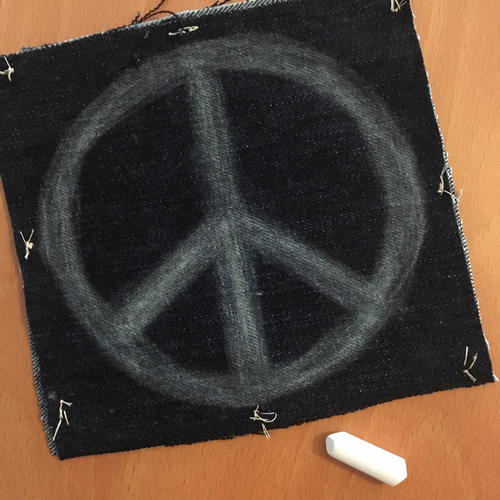
Make a point in the center of your circle, then draw a vertical line connecting down the center. Follow this by creating two small lines that extend from the vertical line a little bit more than halfway down. Thicken these parts as well so that all of your peace sign's lines are about 1/2" wide.
-
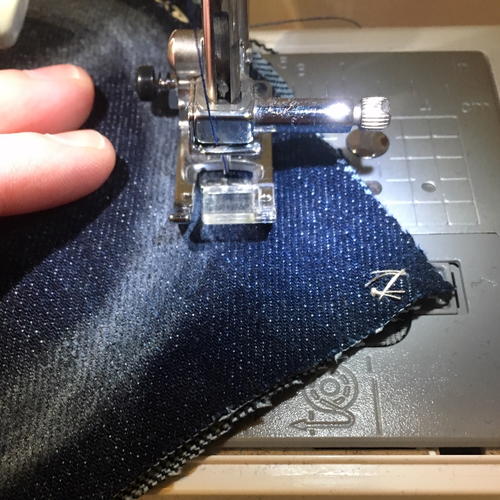
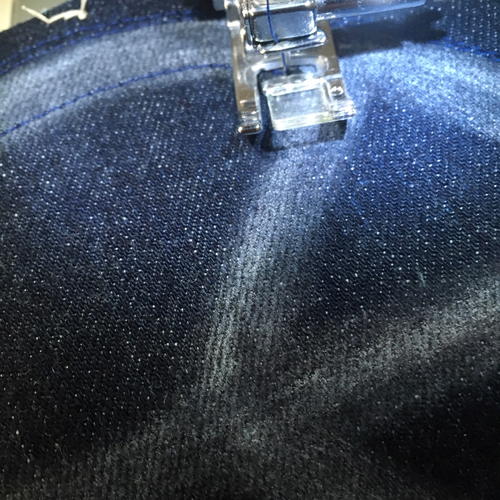
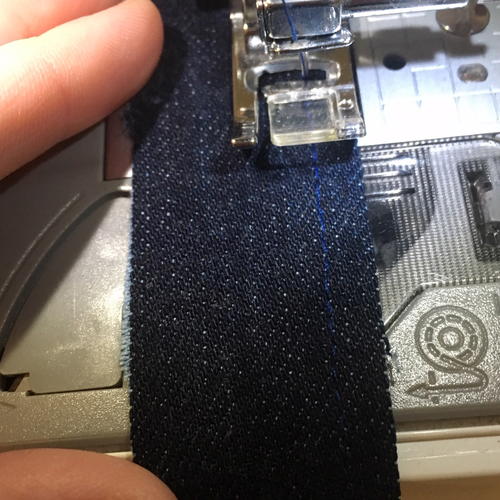
Now that you've drawn the shape it's time to use a sewing machine to stitch the peace sign. Start with the outer circle, going around twice and backstitching to secure it well. A medium stitch length and tension is recommended. It should be a strong stitch that doesn't gather the fabric (too tight) or come apart easily (too loose).
-
After completing the outer circle there are 4 inner "wedge" shapes to make. Leave about 1/2" of equal space from the circle to your inner lines. The goal is to keep all of the peace sign in proportion, so it may be worth it to do a practice one on a scrap of material. Just like the circle, stitch your inner shapes twice with your sewing machine for strength.
-
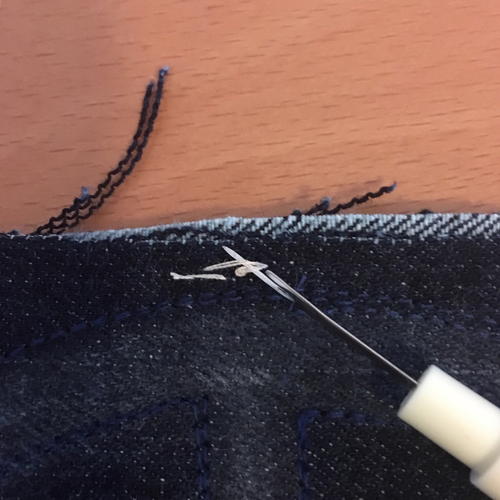
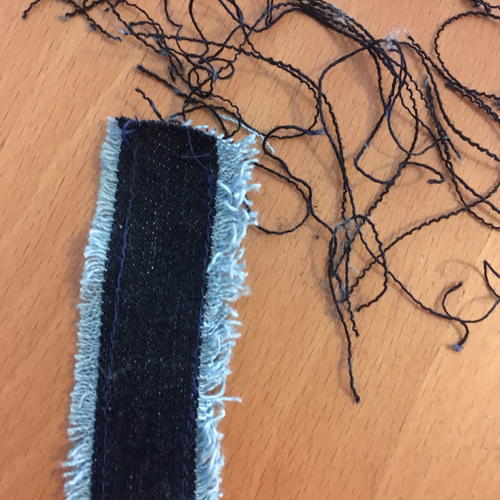
Carefully unpick the stitches around the edges with your seam ripper and discard this thread.
-
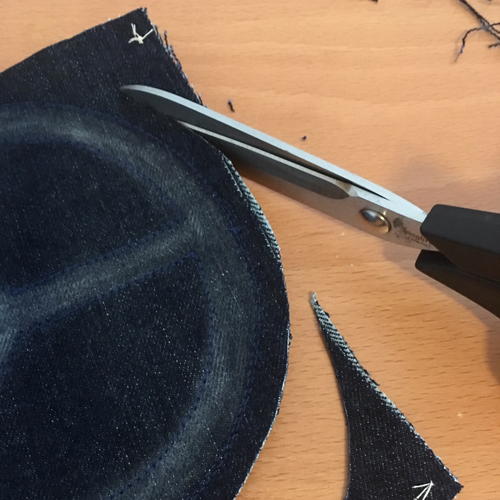
The next step is to cut out your peace sign, leaving at least 1/2" all around the circle shape. This excess material around it will be distressed and frayed a little later on.
-
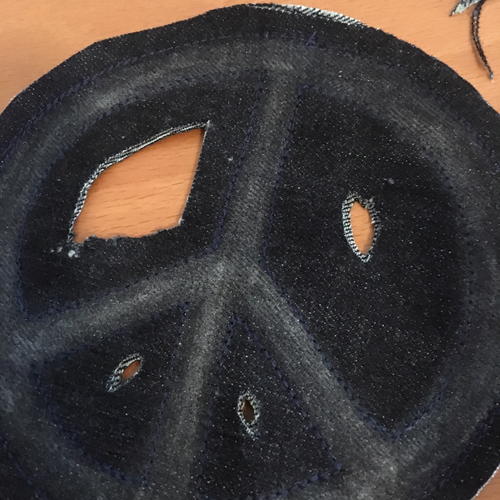
Your peace sign pendant is almost finished! Use your fabric scissors to very carefully make a hole in the middle of each center section, avoiding the lines of the peace sign. Go through both layers of fabric (it will eventually have negative space in these areas). Keep the holes fairly small for now.
-
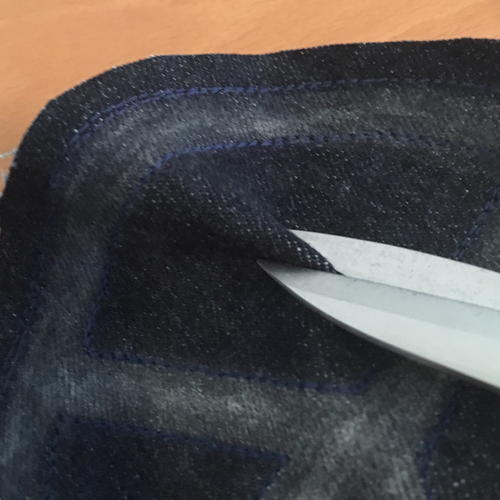
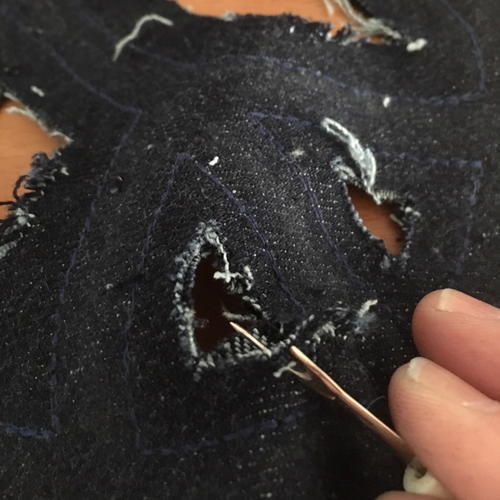
Now it's time to fray your denim fabric! Widen the holes you cut in the center of the peace sign using your fabric scissors, then fray the inner edges with your seam ripper. You want to leave some fraying visible while being able to see through the holes, so you might want to trim the threads a little shorter. Two of the sides will have the blue threads going across, so change the angle of your seam ripper to get more blue mixed into the white threads.
-
Repeat the fraying process all around the circle shape of your peace sign, being careful not to stick your finger with the tool. It will eventually distress a bit more over time, and you can always fray it more but can't add onto the fabric after it's removed. This step takes the longest in this tutorial, so don't get too frustrated if it seems tedious. The result will be very cool!
-
Once your peace sign is finished you'll need to make a loop that will allow a chain or cord to hold the pendant. Cut your old jeans lengthwise into a thin strip that is approximately 4" long and 1-1/4" wide.
-
Using your sewing machine, sew vertically on each side of the loop with about 1/2" in between. Go over these lines a second time as you did on the peace sign shape.
-
Distress and fray the sides of this loop by gently pulling the vertical blue threads off. The amount of fraying depends on your preference- it just shouldn't go past those stitched lines.
-
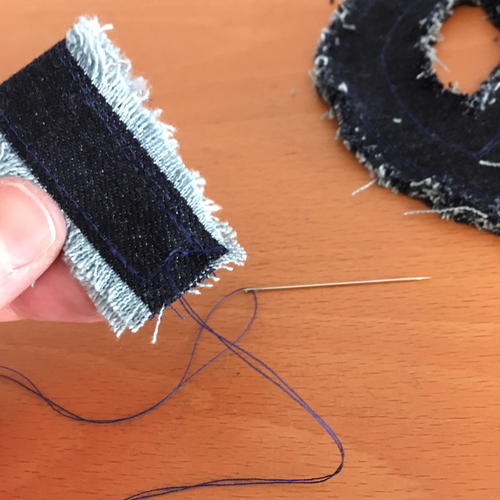
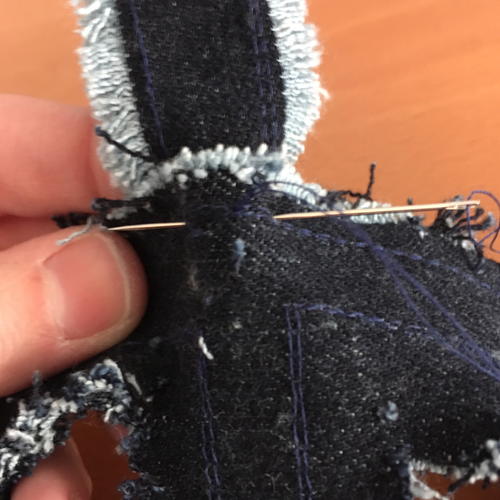
The final step is to attach the loop to your peace sign shape. Fold over the loop and do a quick tacking stitch that connects the ends. Then carefully hand-sew the bottom (connected) part of the loop to the top of the back of your peace sign. If you're using a matching blue thread it's okay to stitch through the front side because it will blend into the denim material.
-
Put your cord or chain through the loop to wear your cool peace sign pendant!
If you have any residual chalk still remaining it can be removed with a slightly damp cloth. Enjoy your groovy new jewelry!


What is your favorite era for fashion?
Let us know in the comment section!
Read Next25+ Patterns for Face Masks
Your Recently Viewed Projects
Thanks for your comment. Don't forget to share!
KLC
Jun 17, 2019
I do love the '70s the most when it comes down to it. I like the free-flowing looks and florals. Maybe it's because my mom is a hippie...
Report Inappropriate Comment
Are you sure you would like to report this comment? It will be flagged for our moderators to take action.
Thank you for taking the time to improve the content on our site.