What is Basting in Sewing?
Your sewing projects will look even more professional after you learn what a basting stitch is and how to baste stitch.

When reading through sewing patterns, one term that often comes up is the word "baste." If you're new to sewing or are simply new to the term, it may be a bit perplexing at first.
Perhaps the word brings your mind to the kitchen, conjuring images of baked turkeys and succulent pork loins. After all, doesn't "basting" have something to do with cooking meat?
Though you're not wrong, the word "baste" has a slightly less delectable, but equally important, significance in the sewing world.
If you've ever wondered, "What is basting in sewing?" you've come to the right place!
An essential skill to have while sewing professional projects, basting is a type of stitch that is used to temporarily hold fabric(s) in place, usually used before sewing in a final seam.
Want to learn even more about this crucial sewing technique? Keep reading!
This quick and simple guide will teach you everything you need to know about basting in sewing, from how to make a basting stitch to when to use a basting stitch and more.
Sign Up For More Free Patterns >>>
Basting in Sewing Table of Contents
What is Basting in Sewing?
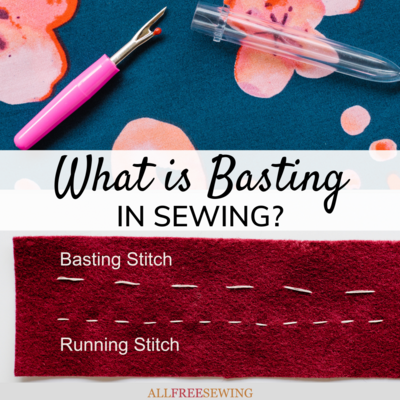
As mentioned above, sewing baste or basting is a type of stitch that is used to temporarily hold fabric(s) in the desired position. These stitches are long and loose so that they can easily be removed later on.
When comparing regular stitches and basting stitches, you’ll notice that basting stitches are several millimeters longer, and it is easier to find space between the thread and the fabric itself.
Fun Fact: Ever wonder what stitch length to baste stitch with? According to Liz Johnson’s Sew4Home article “Machine Basting Basics: Why and How,”
regular stitches are about 2.2 mm in length while the average basting stitch length is 5 mm. However, some sewing machines can set their basting stitches to be up to 9 mm long!
 and a running stitch (bottom).")
Why Baste Stitch?
At face value, basting is...odd. After all, it seems strange to sew in a stitch that you know will be removed later on, right? However counterintuitive basting may appear, the process is essential to making professional-level sewing projects.
First of all, basting stitches ensure greater accuracy. They’re kind of like a practice stitch or a trial run before you sew your final seam.
As we learned above, basting stitches are a breeze to remove, so if you decide that you don’t like where a seam falls, you can easily remove a basting stitch and try again.
Basting stitches also streamline the sewing process, making it faster, smoother, and less clunky. The best part? When you use a basting stitch, you might not even need cumbersome pins anymore, since the basting stitch holds your pieces in the desired position.
No more having to stop every 15 seconds to remove a pin! It’s no wonder why sewists love the basting stitch so much.
Finally, basting stitches allow sewists to create certain fabric effects that they generally can’t with regular stitches.
This includes gathering fabric, so that your final piece bunches together handsomely along the seam, like the waists of many skirts do, and then flares out towards the other end.
When to Baste Stitch
The basting stitch is a godsend for many sewing scenarios. You can use it for basically any project, thereby ensuring that your final seam is exactly where you want it.
Whether this is the seam of a basic pillow or a zipper on a designer bag, it doesn’t matter! Everyone can use the basting stitch for their projects, and they’ll become infinitely easier to complete.
However, there are a few cases in which the basting stitch comes particularly in handy. These scenarios include...
Tip: Though there are many scenarios in which using a basting stitch is beneficial, it should never be used on fabrics that will show the holes, such as leather.
Garment fitting and tailoring: There’s nothing worse than finishing a sewn garment only to find that it doesn’t fit right.
Can you imagine the hassle of having to individually tear out tiny stitches that were accidentally sewn a few millimeters too far in one direction?
The basting stitch bypasses these frustrations by giving you a stress-free way to try out a fit before sewing in the final stitch.

Draping: When sewing a garment, a sure-fire way to add a touch of elegance is by draping the fabric.
Basting is necessary to get the exact drape you want with only one final seam. Learn more by reading our What is Draping? guide.

Sewing set-in sleeves: Sewing in sleeves can be a difficult task since it requires creating a flat seam from a rounded hole.
A basting stitch makes this process easier by allowing mistakes and by eliminating the need to maneuver pins while you sew in your final seam.

Holding slippery fabrics in place: Some fabrics, like satin, silk, and velvet, can be a nightmare to sew because of how slippery they are.
However, when they move around during sewing, it often results in inaccurate seam placement, stitches that aren’t flat, and general frustration during the process.
The basting stitch takes fabric slippage out of the equation, which makes sewing much easier. Learn more by reading How to Sew Slippery Fabric.

Sewing in zippers: Zippers can be difficult to sew because their placement is so important to the function of a piece.
Basting before you sew will make sure that the zipper is in the exact right place, and you won’t have to deal with pins while you sew.

Quilting: Quilting is a fun activity, but it can be difficult to sew several layers of material--top layer, batting, and backing--at a time, which all shift around as you work.
Basting keeps these layers from moving around, thereby making sure that your quilt doesn’t turn out unevenly.

Gathering fabric: An easy way to add some frilly and flattering texture to a sewing project, gathering fabric is one major benefit of basting.
To gather fabric, sew two parallel lines of basting stitches inside a fabric’s seam allowance, and then pull the bobbin threads to pull the fabric together along the thread.

Serging: Using a serger, or a specialized sewing machine that trims off the seam allowance and overlock stitches the edge of a fabric as you sew, can be daunting.
Because the extra fabric is cut off as you sew, it is important that you get a seam correct the first time. Basting stitches ensure that you are as exact as possible so that you never have to experience any serger mishaps.

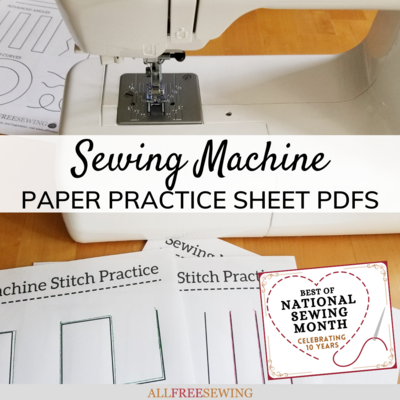
How to Baste on a Sewing Machine
There are few sewing techniques as simple as performing the basting stitch with a sewing machine. Basting with a sewing machine is a skill that’s truly a piece of cake.
Oftentimes it is only a matter of adjusting your machine to the correct settings. This four-step tutorial will forever change the way you sew, resulting in cleaner, more accurate, and more professional sewing projects.
- Pin your fabric (as needed) to hold it in the desired position.
- Set the stitch length on your sewing machine to the highest possible setting. Instructions on how to do this can be found in your individual sewing machine manual. Oftentimes this ranges between 5 mm and 7 mm.
- Sew your fabric normally using a straight stitch.
- There is no need to backstitch while basting. Doing so will only make the stitch more difficult to remove.

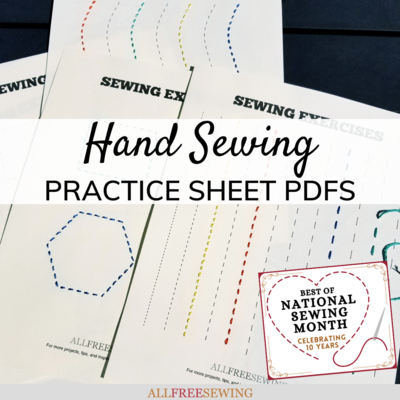
Basting Stitch By Hand
Though sewing a basting stitch on a sewing machine is a piece of cake, it’s not the only way to baste.
In fact, when a fabric is too thick or when you need more finesse when sewing, it may even be better to baste by hand than by machine!
Not only does hand-basting save you the hassle of having to set up your sewing machine, but the stitch it creates is also often easier to remove than those created by a sewing machine.
If you want to learn how to baste stitch by hand, then this simple 6-step tutorial is just the thing for you!
There’s no need to check your watch, either; this beginner-level skill only takes seconds to perfect.
- Pin your fabric (as needed) to hold it in the desired position.
- Thread the needle and tie a knot at the end.
- Push the needle from the back of the fabric to the front. This puncture will determine the position of the beginning of your basting seam. Pull the needle until the knot you tied in Step 2 hits the fabric.
- About 5 mm away from your last puncture (or however long you want your basting stitch length to be), push the needle from the front of the fabric to the back. Pull the thread taut.
- Repeat Step 4, alternating the direction of your needle but keeping the same stitch length each time. This is a simple running stitch with an increased stitch length.
- Once you have reached the end of your seam, tie a knot on your thread as close to the fabric’s surface as possible. Clip the extra thread.
 and a running stitch (bottom).")
How to Remove a Seam
Once you no longer have the need for the basting stitch, either because you have determined the exact desired line of sewing or because your piece is held together securely enough to stay in place without the stitches, you can remove them using a seam ripper.
A seam ripper is a tool with a small hook that can undo stitches without damaging the fabric.
It has a semi-forked end, with one long point and one shorter point that is often topped by a small bulb. These two “tines” are connected by a sharp, rounded center.
This middle part is the surface that slices thread. Even though the tool may look scary, there’s no need to fear!
If you’ve ever wondered how to use a seam ripper, you’ll be delighted to find how simple it can be. Just follow the simple steps below and you’ll be removing basting stitches with ease!
Tip: As mentioned in Barbara Harris’s SewingMachinesView article, “How to Make a Basting Stitch with a Sewing Machine,”
you should, if possible, remove basting stitches before pressing fabric so that the stitches do not become set in the fabric. They will be more difficult to remove that way, which means that it will be more likely that you will accidentally harm the fabric.
- Hook the seam ripper’s longer "tine" in between the thread of a stitch and the fabric it loops over. Be careful not to accidentally catch any of the threads of the fabric’s weave. This may damage the fabric and, therefore, weaken it.

- Push the seam ripper forward, parallel to the fabric, with the thread still hooked between the tines. Keep pushing so that the area between the tines rips the thread.
- For a basting stitch, cut every third stitch or so, all on the same side of the fabric. This should break up the seam enough that you can pull out the unnecessary threads and pull apart any pieces of fabric you may have sewed together.
Beginner-Friendly Sewing Tutorials & Guides
You know what basting is and how to do it, but there’s a wide world of sewing out there, and there’s still so much to discover!
If you’re looking to expand your sewing skill by learning all the basics sewists should know, then these beginner sewing tutorials and how-to guides are just what you need.
Find everything from a guide to the parts of a sewing machine to a glossary of sewing terms in this user-friendly collection.
- Glossary of Sewing Terms - The hardest part of sewing is often parsing out the language of a pattern. What is free motion, and when do you use a lettuce hem? Uncover the mystery of sewing language, and you'll be able to follow any pattern with ease.
- What Are Sewing Notions?: Every Sewing Essential You Need - Want to get to know your notions? Find out what sewing notions are, their categories, and their individual functions with this simple and quick guide. You'll want to print off a copy and keep it with all of your sewing projects!

- Parts of a Sewing Machine: How to Wind a Bobbin, Sewing Machine Needle Sizes, Etc - Just because a sewing machine looks complicated doesn't mean it is! You can learn everything about your favorite sewing tool, from the bobbin to the needle, with one simple (and printable!) article.
- 50+ Quick and Easy Sewing Projects - Are you just starting out as a sewist and want some stress-free projects to help you learn the craft? In this collection of 50+ Quick and Easy Sewing Projects, you'll find a beginner-friendly pattern for everything from home decor to clothing refashioning!
Want More?
Learn How to Make Alterations at Home >>
What other sewing tips or tutorials would you like to learn?
Let us know in the comments!