This project was submitted by one of our readers, just like you.
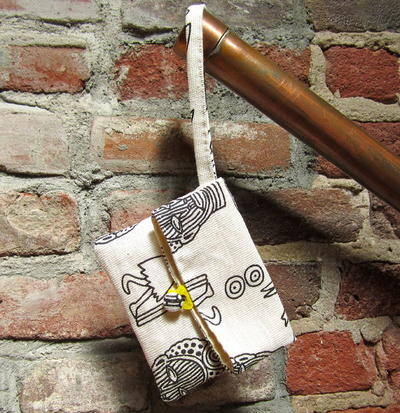
See-Through Zipper Bag Tutorial

See-Through Zipper Bag Tutorial
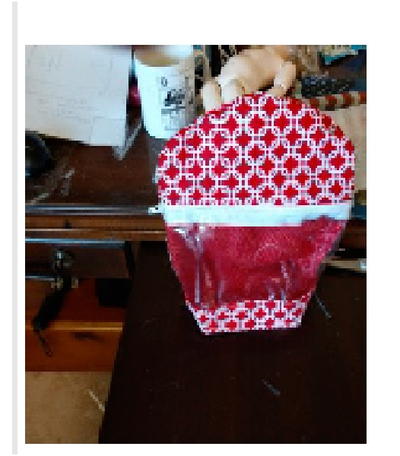
From the Blogger: "Do you need a bag for all those sewing gadgets or your cosmetics but would like to be able to see what you have? Many times things get lost in a bag, and you don't know what is in there. This unique bag with a see-through window on the front will help you to see what you have put in the bag. It has a square bottom so the bag is extra, extra roomy."
Project TypeMake a Project
Time to CompleteIn an evening
Sewn byMachine

Materials List
- 2 Fat quarters of different colors
- A 16'' x 22'' piece of interfacing
- 9- or 10-inch zipper
- A piece of clear fabric to fit the front opening
- Sewing thread
Instructions
-
I cut out my interfacing first and then traced the pattern lines for the top and bottom on the interfacing. I then used this a pattern for cutting the back and the lining.
-
From each fat quarter, cut one rectangle that is the size of a full sheet of paper (8-1/2'' x 11'') and also cut a piece this size from your interfacing.
-
Stack these three pieces together, and then use the pattern as a guide. Cut off the rounded top edge and the bottom corners.
-
I did the same thing with the top and bottom pieces on the interfacing. Cut out one top piece from each of the fat quarters and one bottom piece from each of the fat quarters. Then cut one interfacing piece for each of the top and bottom pieces.
-
When I cut my plastic piece, I used the center of the pattern with the dotted lines above the seam lines as my guide to cut it out. Cut two small rectangles (4'' x 2'').
-
The piece that you have left over in the middle will need to be cut 1'' wider on the short side to allow for seams. Once you have all the pieces cut, you are ready for assembly. The first step is to sew in the zipper.
-
Place the zipper wrong-side-down on one long side of the piece of plastic. Sew the seam then turn the zipper to the right side and top stitch in place.
-
Now you are going to make a sandwich of the outer fabric, lining, and interfacing. With the zipper facing you, place the outer fabric wrong-side-up on the right side of the zipper. On the wrong side of the zipper, place the lining fabric right-side-down and then the interfacing on top.
-
Sew through all the layers, and then fold the layers over to expose the zipper. Top stitch the seam. Repeat this on the bottom of the clear plastic to finish off the bottom. Before sewing the bottom, make sure that the length will match the back.
-
Lay the outer fabric on the front of the bag right-side-down. Then on the back, lay the lining right-side-down with the interfacing on top. Pin all around. Start at the top center of the bag and sew down one side. Go back to the top center and sew down the other side.
-
Notice that you can “see the lining peeking through.” Also, make sure that your zipper is undone. When you pin open the side, make sure to get the tapes as close together as you can.
-
Turn the bag right side out through one of the holes in the bottom.
-
Turn the bag to the inside and sew the seams to box the corners. Bind with the strips that you cut.
-
Turn the bag back to the right side, and then top stitch along the two edges on the bottom between the corners to give the bottom some definition.
-
Now your bag is done and ready to stuff! Since it has the clear pocket, you can see what is inside! Pretty cool, huh?

Read NextTwenty Minute Tote