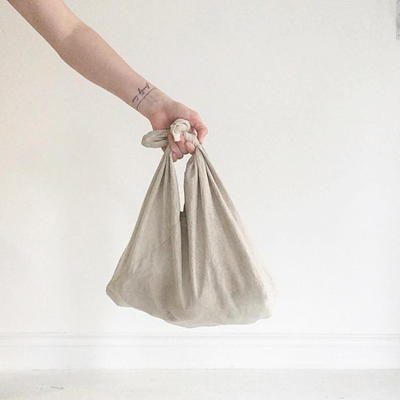
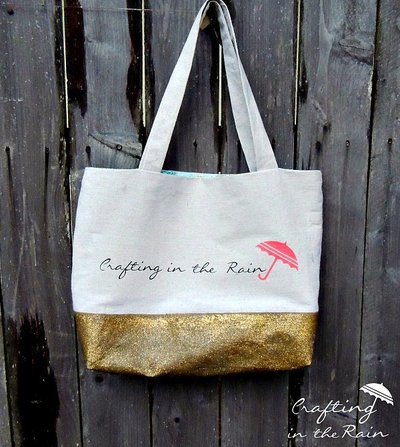
Spring Zing Tote with Polymer Clay Buttons
Combine an easy sewing project and clay crafting with this DIY tote bag project from Polyform!

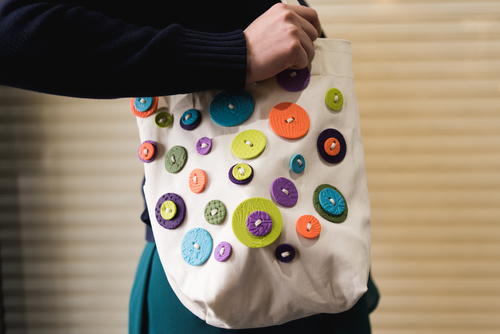
Button up the compliments with a handmade tote embellished with custom-designed polymer clay buttons! If you've always wanted to learn how to make buttons that you can customize for sewing projects, then this is the tutorial you've been looking for.
This free tote pattern is easy to make, and the buttons are thin so they don’t weigh you down. You can make this tote from start to finish in an afternoon. This beginner sewing project is a fantastic way to combine clay crafting with simple sewing, and is a fun family project that you can make with your kids and grandkids. Treat yourself to a new tote with a little something extra with this DIY clay button and tote bag tutorial.
PLUS! Learn how to sew buttons with this Hand Sewing Buttons tutorial.
Project TypeMake a Project
Time to CompleteIn an evening

Materials List
- Twill Tote Bag Fabric – 1 yard
- Sewing Supplies
- Perle cotton to match fabric
- 1 block Premo! Sculpey®: Orange - 2 oz
- 1 block Premo! Sculpey: Purple - 2 oz
- 1 block Premo! Sculpey: Spanish Olive - 2 oz
- 1 block Premo! Sculpey: Turquoise - 2 oz
- 1 block Premo! Sculpey: Wasabi - 2 oz
- 1 block Premo! Sculpey: Wisteria - 2 oz
- Clay Conditioning Machine
- Sculpey Super Slicer blade
- Sculpey Clay Tool Starter Set
- Sculpey texture sheets
- Premo! Circle Graduated Cutter Set
- Waxed paper or deli paper
- Coffee stirrer or cocktail straw
- Craft knife
- Cardboard
- E-6000 Industrial Strength Adhesive
How to Make Clay Buttons and Your DIY Tote Bag
Two crafts for the price of one! Making your button tote bag is simple with these step-by-step instructions. If you're new to sewing, then you'll love this DIY tote bag that's completely beginner-approved, and the instructions for working with Polymer clay can also be applied to other fun craft projects, such as jewelry making. Design a unique purse that's sure to be the envy of all your friends with this simple sewing project.
Learn more about other fun clay crafting ideas by checking out Polyform's website!
Step-by-Step Instructions:
-
Cut 2 - 13"x17" rectangles from the tote bag fabric for your tote bag.
-
Cut 1 - 13"x11" rectangle from the tote bag fabric for pocket.
-
Cut 2 - 4"x30" strips from the tote bag fabric for straps.
-
On pocket fabric with wrong side facing up, fold one 13” edge over 1" and iron flat. Fold ironed edge under and pin. Sew hem with ¼” seam allowance.
-
Place 1 - 13"x17" rectangle right side up; place hemmed pocket fabric on top, right side up, matching unhemmed 13" edge to bottom. Place on top the remaining 13"x17" rectangle wrong side up, matching edges. Pin edges. Sew sides and bottom together with 1/2" seam allowance.
-
Keeping bag inside out, match side seams and flatten to create 2 points on the bottom of the side seams. On each point, measure 3" from point and draw line perpendicular to seam. Sew across line on each side to create box bottom. Trim, leaving 1/2" seam allowance.
-
With strap fabric pieces right side out, fold in half lengthwise and iron flat. Tuck edges inside toward fold, iron and pin. Sew open edge with 1/4" seam allowance.
-
Keeping bag inside out, position strap ends 3" from each seam (straps will hang toward bottom of bag). Sew straps to bag from top edge 2" down, reinforcing stitching.
-
Keeping bag inside out, fold top edge down 2", iron and pin. Flip straps up and pin. Sew bottom edge with 1/4" seam allowance.
-
Turn bag right side out. Sew top edge with 1/2" seam allowance.
-
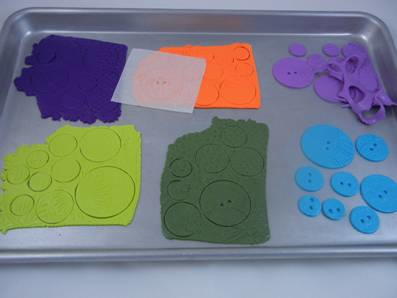
Condition 1/2 package of each clay color and roll into sheets on the third-thickest clay conditioning machine setting.
-
Place sheets on polymer clay–dedicated baking sheet. Press texture sheets into clay. Cut out buttons with graduated round cutters.
-
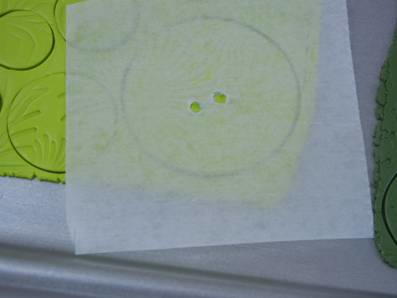
Cut 3” square of waxed paper. Using pointed tool, poke two holes in the center of the paper to make a template for button holes, and enlarge the holes with the coffee stirrer. Place paper over each button and use coffee stirrer to cut two holes in center of each button. This makes the button holes evenly spaced on all the buttons.
-
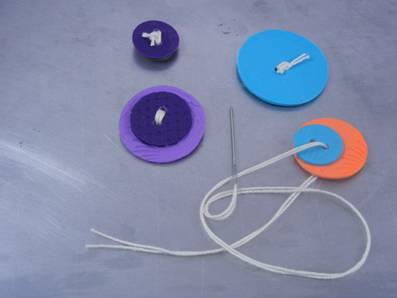
Bake buttons according to manufacturer's instructions. Allow to cool completely. Use craft knife to clean up holes if needed. Sew perle cotton through center holes of each button several times, tying a knot on the wrong side. If desired, stack two buttons together and sew through both.
-
Cut cardboard to fit inside tote bag (this keeps the glue from seeping through and gluing the tote bag shut). Glue buttons to front of tote bag. Remove cardboard when glue is dry.
What kind of craft and sewing projects would you like to see on AllFreeSewing? Let us know below in the comments!
Read NextThe Lauren Bag Pattern