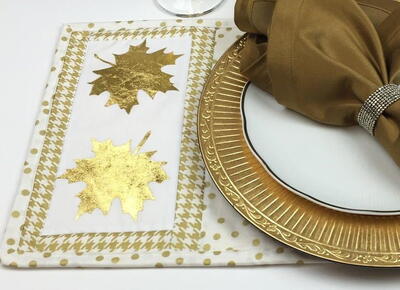
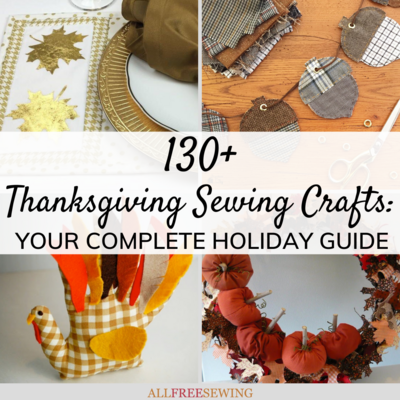
Gold Leaf Placemat Pattern

Everywhere you look these days, there’s a little splash of gold. If you want to add some gilded glamour to your Thanksgiving table, learn how to make placemats with these Gold Leaf Placemat Patterns. These foil-embellished, quilted free placemat patterns make an ideal gift for anyone who enjoys setting a beautiful holiday table. While the designer traced and hand-cut her leaves, you can also use favorite dies, punches or an electronic cutter to create designs. Thanksgiving is all about traditional cooking and a big family meal. That does not mean you have to keep your décor stuffy, however. Add a touch of gold with these stunning placemats and impress all of your dinner guests.
Project TypeMake a Project
Time to CompleteIn an evening
Sewn byMachine


Find this project and many more in our new eBook, 7 DIY Christmas Gifts: Handmade Gift Ideas You'll Love. Filled with lots of great DIY gift-giving ideas, this new printable collection will help you tackle your gift list in no time! Download your own free copy today!
Materials:
- iCraft® Deco Foil™ Hot Melt Adhesive
- iCraft® Deco Foil™ Gold Transfer Sheets
- SpraynBond® Basting Adhesive
- Gold dot fabric (for each placemat): one 11-1/2”x12”; two 2-1/2” x width of fabric (for binding)
- Gold houndstooth fabric (for each placemat): two 1-1/2”x5”; two 1-1/2”x12”
- White fabric (for each placemat): one 5”x10”; one 20”x14” (for backing)
- Batting, 20”x14”
- Coordinating thread
- Tools: sewing machine, iron, straight pins, craft knife and cutting mat, leaf pattern of choice, laminator (optional)
Instructions:
Note: Follow manufacturer’s directions throughout.
- Place one Hot Melt Adhesive Sheet on work surface with textured adhesive side up. Cover adhesive sheet with sheet of Deco Foil; foil should be color side up.

- Cover foil with pressing cloth or parchment paper and iron as directed. Alternately, place layered pieces inside folded parchment paper and insert into laminator with fold at lead edge. (Note: Designer used laminator and ran pieces through machine multiple times to create more distressed effect.) Let cool completely; peel away foil sheet.
- Cut out leaf pattern. Trace twice onto paper side of foil-covered adhesive sheet, positioning leaves in attractive arrangement so that negative image may be used on second placemat.

- Using craft knife with new blade, very carefully cut around leaves on traced lines. Keep cuts as neat as possible.

- Set aside foil leaves and negative.

- Gather fabric pieces for placemat.

- Using 1/4” seams, sew short houndstooth strips to short ends of 5”x10” white panel. Press seams toward patterned strips.

- Sew long houndstooth strips to long panel ends. Press seams toward patterned strips.

- Sew dot fabric panel to houndstooth/white panel. Press seam toward patterned strips.

- Using SpraynBond Basting Adhesive, make quilt “sandwich” of backing fabric, wrong side up, batting and placemat top. Machine-quilt layers together as desired.

- To create binding strip for placemat, join ends of gold dot strips together at 90° angle with right sides together. Sew diagonal seam from corner to corner where strips intersect.

- Trim excess fabric 1/4" from stitch line and press seams open to create one long, continuous strip. Fold binding strip in half lengthwise, wrong sides together, and press.
- Bind placemat edges using favorite binding method. Many tutorials are available online, including video tutorials; search “how to bind a quilt.”
- Position foil leaves on white panel. Cover foil with pressing cloth or parchment paper and iron as directed.
- Trim foil negative to fit white panel on a second placemat. Repeat Step 14 to apply foil to fabric.

 ENTER TO WIN!
We're giving away a Spectacular Christmas Giveaway to help celebrate the launch of our new eBook, 7 DIY Christmas Gifts. With more than $500 in prizes, this is any craft lover's dream come true! But you better hurry! This giveaway ends November 22nd! Enter today!