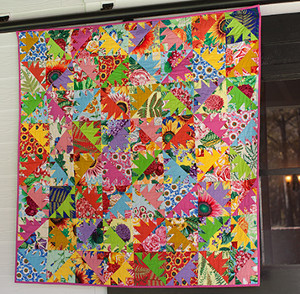
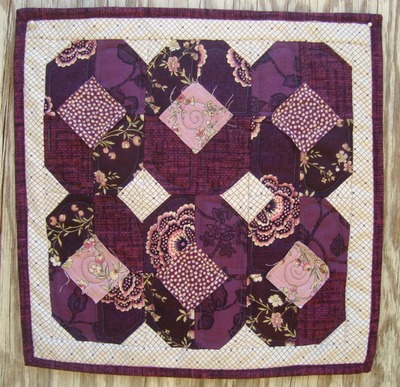
Botanical Confetti Quilt
The Botanical Collection is inspired by some of the many beautiful antique botanical illustrations in the Snow Leopard archive. These botanical illustrations by the best 19th Century artists of the day inspire works like this Botanical Confetti Quilt.

Materials
- Thirty-two 10” (25.4cm) squares of FreeSpirit Botanical print fabrics by Snow Leopard Design– one of each print (Alternatively you can purchase ¼ yard (22.86cm) or one fat quarter of each print)
- ¼ yard (22.86cm) of each of the following FreeSpirit Designer Essential Solids:
Lavender (CSFSESS.LAVEN)
Maize (CSFSESS.MAIZE),
Grass (CSFSESS.GRASS)
Tango (CSFSESS.TANGO)
Almond Pink (CSFSESS.ALMPK)
Kiwi (CSFSESS.KIWIX)
Sky (CSFSESS.SKYXX)
Yellow (CSFSESS.YELLO)
- 3/4 yards (68.6cm) FreeSpirit Designer Solid Fuchsia
- (CSFSESS.FUCHS), includes binding
- 3 1/8 yards (285.8cm) backing fabric
- 55” x 55” (140 x 140cm) piece quilt batting
- Coordinating Coats & Clark Dual Duty XP® all-purpose thread to match
- Optional: Quilting thread to match fabrics
Additional Requirements:
- Sewing Machine
- Iron
- Needle and pins
- Ruler and fabric marking pen or pencil
- Scissors
- Optional: Rotary cutter, mat and ruler
Note: All seams are ¼” (.64 cm) unless otherwise noted.
Cutting
- Cut each 10” (25.4cm) block as follows:
- Cut one 2 ½” (6.35cm)–wide strip from one side. Cut another shorter 2 ½” (6.35cm) strip-wide strip from an adjacent side leaving a 7 ½” (19cm) square.

- From the strips, cut four 2 ½” (6.35cm) squares, cut each square in half diagonally to make two small triangles. Cut two 2 1/4” (5.7cm) squares.

- Cut the large square in half diagonally to make two large triangles.

- From the designer solids, cut the following squares:
Cut 3 7/8” (9.84cm) squares. Cut half diagonally to make two medium triangles.
Cut 2 ½” (6.35cm) squares. Cut in half diagonally to make two small triangles.
Fabric 3-7/8”(9.84cm) Squares 2 ½” (6.35cm) Squares
Maize: 3 12
Kiwi: 4 14
Tango: 4 16
Fuchsia: 4 14
Almond Pink: 4 16
Sky: 4 14
Lavendar: 4 14
Yellow: 4 14
Grass: 3 12
Cut six 2 ½” (6.35cm)-wide crosswise strips from fuchsia for the binding.
Instructions
Stitch all seams right sides together using ¼” (.64cm) seam allowances.
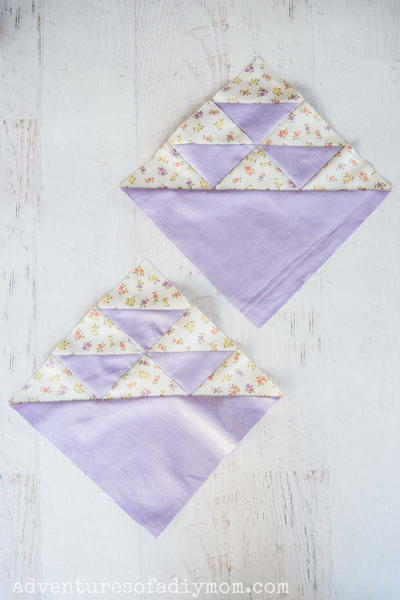
- For each block, you will need one large print triangle and four small print triangles, one print square, one solid medium triangle and four small solid triangles. Follow the photo for suggested color combinations or choose your own.
- Stitch each print small triangle to a solid small triangle along the long edges to make a square.

- Stitch the patchwork squares together in pairs.

- Stitch a square to the end of one pair. Stitch solid triangles to the ends of the pairs.

- Stitch the pair of patchwork squares to one short edge of the medium triangle. Stitch the remaining pair with the square to the other short edge and the patchwork square.

- Stitch the patchwork triangle to the large print triangle to make a square. If necessary trim the edge of the small square even with the edges of the block.

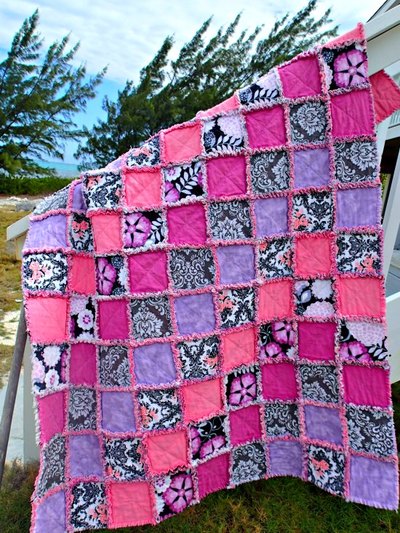
- Arrange the squares in eight rows of eight blocks following the photo for suggested color placement or make your own arrangement.
- Stitch the squares in each row together. Press the seams toward the top in the even rows. Press the seams toward the bottom in the odd rows.
- Stitch the rows together in pairs matching the seams. Then stitch the four pairs of rows together as shown in the photo to complete the quilt top.

- Layer, Quilt and Bind.
Read NextBirds In The Air Quilt Block