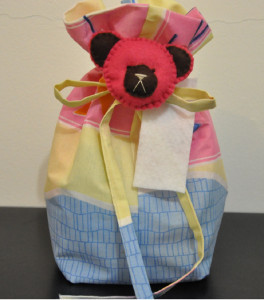
Fabric Gift Bag for Baby
This Fabric Gift Bag for Baby for Jamie Reyes is proof that beginner sewing projects can look just as good as advanced ones. DIY gift bags like the one in this tutorial come in handy when a baby shower is on the way. Get creative with your wrapping ideas by sewing this sweet container for a precious little one. If you take one look at this baby sewing project you'll see it beats regular wrapping paper any day of the week. Becoming an advanced sewer requires baby steps, and this project is perfect for that.

Materials:
- Fabric of your choice
- Coordinating thread
- Rotary cutter & cutting mat (optional)
- Sewing Machine
- Iron and Ironing board
- Pink felt
- Brown felt
- White Felt
- Embroidery thread in pink and brown that matches felt color, black, and light brown (2shades lighter than brown felt)
- Black embroidery thread
- Embroidery/tapestry needle
- Scissors
- 8” pink ribbon
Instructions:
PART 1- The Gift Bag
-
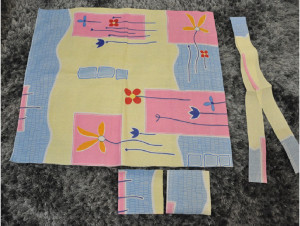
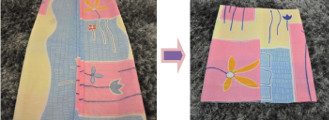
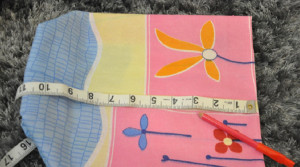
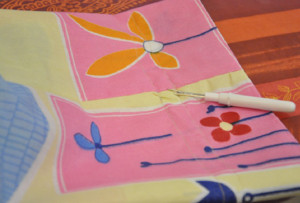
Cut the fabric as follows (you can adjust according to the size of your gift). Here the large piece is 24"x21", the two bottom pieces are 5"x5", and the tie is 41"x2".
-
Fold your main fabric lengthwise right sides together. Sew on the long side.
-
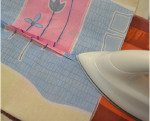
Press open seam then fold your fabric outward in half. Press.
-
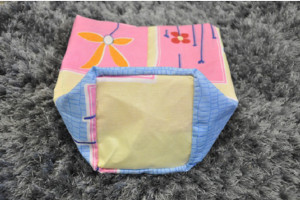
Get your bottom pieces. Baste stitch the two pieces, wrong sides together.
-
Secure the bottom piece to the main fabric with pins and sew. Trim excess fabric. Serge your seam for a neat finish. Turn your piece right side out.
-
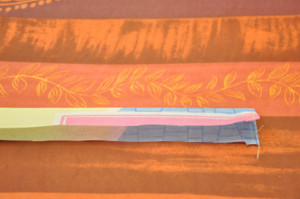
Now get your tie piece. Fold down 1/4” on each short edge, wrong sides together. Press and topstitch to secure.
-
Fold in half lengthwise, wrong sides together and press.
-
Unfold. Fold each raw edge into the crease you just created and press.
-
Fold in half again and press. Topstitch along the open edge to close with a very small seam allowance.
-
Measure 2.25” and 3” from the top of the bag. Mark and sew a double stich creating a casing for the tie. (Make sure the tie will fit inside the casing.)
-
With your seam ripper, open a hole in the casing through the seam and insert the tie.
Part 2- The Felt Bear Head
-
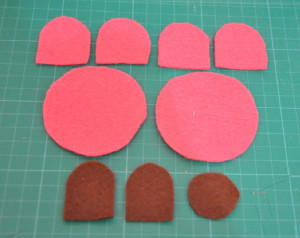
Cut your felt as follows:
-
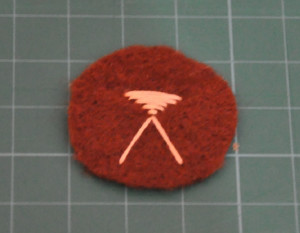
Take the muzzle piece and Embroider details using the light brown thread:
-
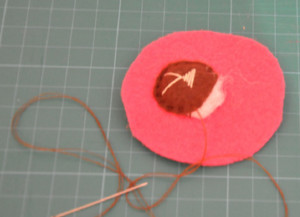
Take one of the pink head piece. Position the muzzle piece 0.5” from the bottom of head piece. With the brown embroidery thread, sew the pieces together using running stitch. Pause when almost done and stuff cotton or polyfill through the small opening. Continue stitching to close the opening.
-
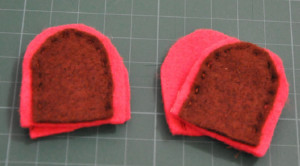
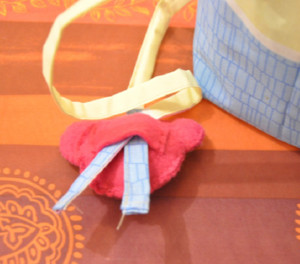
Place the brown ear piece over one of the pink ear piece and with the brown embroidery thread, sew them together using running stitch. Take the other pink ear piece and align them together. Set aside and do the same with the other ear.
-
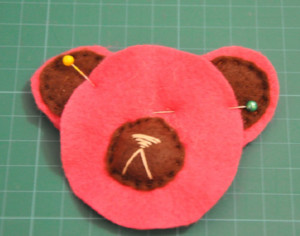
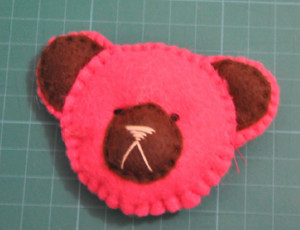
Determine the perfect position of the ears and pin in place. Align the back head piece. Then, using pink embroidery thread, blanket stitch around the head. Pause when almost done and stuff cotton or polyfill. Finish stiching the head. Do the same with the ears.
-
Using the French knot, embroider the eye. Secure it tight to create dimension on the bear’s face.
-
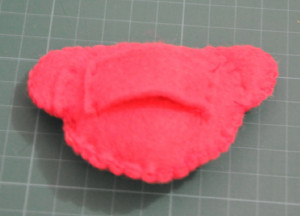
Attach the pink felt strip on the back of the bear head.
-
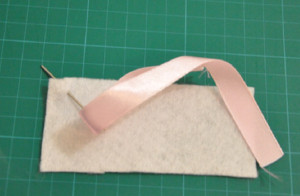
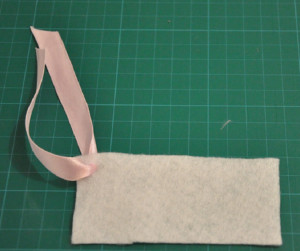
For the gift tag, cut 2” x 4” rectangular piece from the white felt. With the tapestry needle, thread the pink ribbon through the upper left corner. Embroider your tag.
PART 3- To Finish the Gift Bag
-
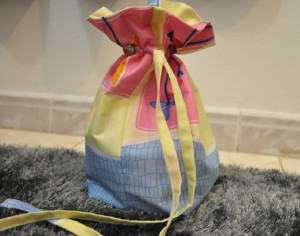
Put your gift inside the bag and close.
-
Insert both ends of the tie into the strip at the back of the bear head and push upward. Secure by tying the drawstring into a ribbon.
-
Loop and secure the gift tag behind the bear head.
Read NextOh Deer Washable Baby Bib
Your Recently Viewed Projects
Thanks for your comment. Don't forget to share!
Report Inappropriate Comment
Are you sure you would like to report this comment? It will be flagged for our moderators to take action.
Thank you for taking the time to improve the content on our site.