Wild Things Free Diaper Changing Pad Pattern
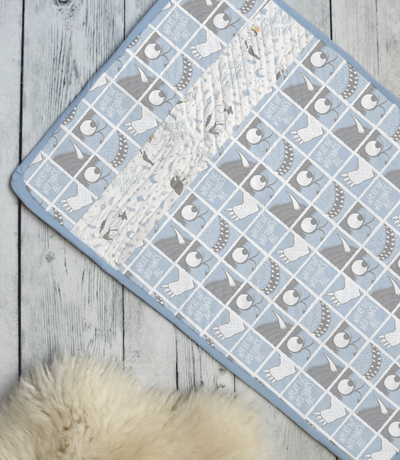
This Where the Wild Things Are fabric makes this adorable monster-inspired DIY diaper pad is a must-make for moms!
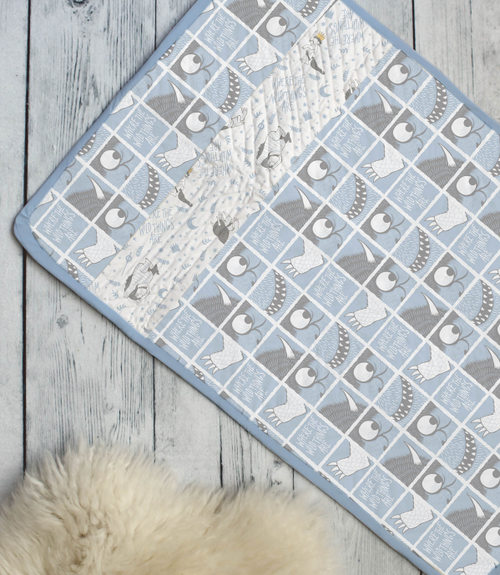
Maurice Sendak's beloved book Where the Wild Things Are is a classic that's not just for children. Everyone loves the story of Max and his monster friends who end up being far less scary than first expected.
Camelot Fabrics has paired up with Warner Bros. to create an exclusive fabric set featuring your favorite wild things.
Camelot Design Studio has developed this lovely Wild Things Free Diaper Changing Pad Pattern that's fun to make!
It's an intermediate design that's truly adorable and will make a great addition to any new mom's life. This DIY changing pad also makes a fantastic baby shower gift.
To make this diaper pad, all you need are a few sewing notions and tools, two of the Where the Wild Things Are fabrics, and a piece of solid complementary fabric. The finished size is 20" x 30" and can be rolled for travel.
Let the wild rumpus start!
Sign Up For More Free Patterns >>>
Wild Things Free Diaper Changing Pad Pattern
Skill Level: Intermediate
Project Type: Make a Project
Time to Complete: In an Evening
Sewn By: Machine
Materials List:
• Main Camelot Fabric: 23740106-02 - 1 yd
• Accent Camelot Fabric: 23740101-02 - 1/4 yd
• Binding Camelot Fabric: 214-0015 - 1/4 yd
• 2/3 yd of quilt batting (58" wide)
• 24" straight edge ruler
• Basic sewing supplies: sewing machine, quilting foot (optional, but recommended), iron and pressing surface, fabric shears, measuring tape, pencil/fabric marker, straight pins, and coordinating thread
Notes:
• Please wash, dry and iron your fabric before beginning, and trim selvages.
• Unless otherwise directed, sew all seams with a 1/2” seam allowance.
• RST = right sides together.
• WOF = width of fabric.
• Finished size: 20" w x 30" l
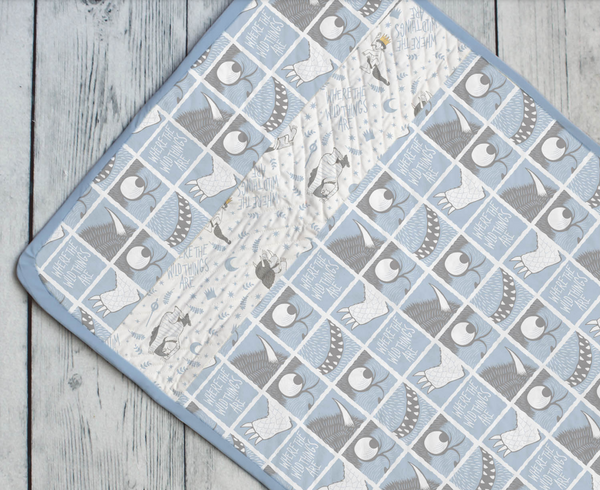
Cutting Instructions:
- Cut (1) 21" x 5" rectangle from your Accent fabric.
- Cut (3) 2-1/2" x WOF strips from your Binding fabric.
- From your Osnaburg, cut:
- (1) 30" x 21" rectangle for the Backing,
- (1) 22" x 21" rectangle for the large front panel.
- (1) 6" x 21" rectangle for the small front panel.
- From the batting, cut (1) 36" x 24" rectangle.
Piecing the Top Instructions:
- Sew the Accent rectangle to the larger front panel along their 21" edges, RST.
- Sew the smaller front panel to the Accent rectangle along their 21" edge, RST.
- Press both seams toward Accent.
Binding Instructions:
- Join the Binding strips end-to-end, RST, and press the seams open.
- Fold and press your Binding strip in half lengthwise, Wrong Sides facing, and unfold.
- Fold and press each long edge to the center crease.
- Fold the strip in half lengthwise and press.
- We suggest wrapping your Binding around a piece of cardboard and securing the end with a pin, to keep it tidy.
Assembly Instructions:
- On a large work surface (we like the floor), make a "sandwich" of your Backing, batting, and pieced top, with the fabrics' Right Sides facing outward and their edges aligned.
- Pin or baste all layers together, over the entire surface of the mat. Trim the excess batting.
- Install your quilting foot (if you’re using one) according to your sewing machine manual’s directions, and quilt the mat as desired. We sewed out quilting lines at a 45º to the fabrics’ grain, making up shapes as we went.
- Trim any uneven edges, and finish the edges with your Binding.
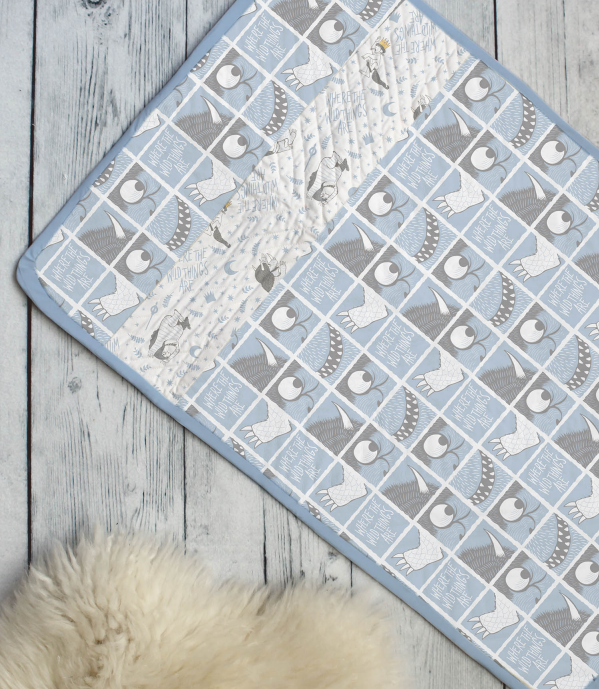
Wild Things Free Diaper Changing Pad PDF
Click the button below to download the PDF so that you can keep this pattern handy when you need it. Don't forget to make one of these cuties before your next baby shower!
Click Here to Download the Free Printable PDF
Want More?
11 Free Baby Dress Sewing Patterns >>
What's your favorite children's book?
Let us know in the comments!

