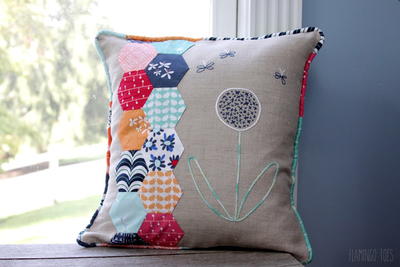
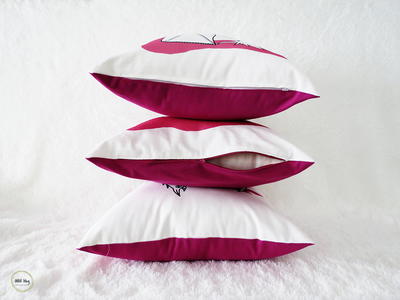
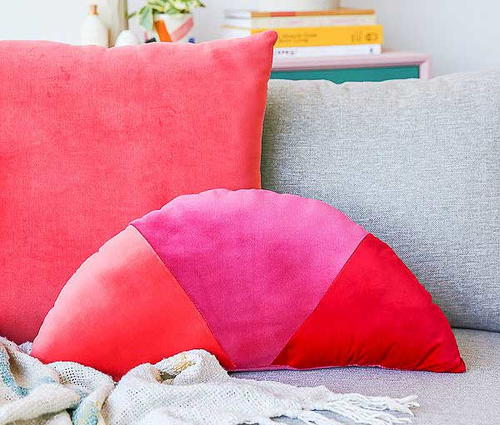
Geometric Color-Blocked DIY Throw Pillows

Color-blocked designs are the hottest trend of the year. Sleek, modern, and bold, they immediately give any space a refined aesthetic. Now you can embrace your mod edge in everything down to your home decor with these Geometric Color-Blocked DIY Throw Pillows! These sophisticated DIY decorative pillows are sewn in geometric shapes, and you can even mix fabrics for alternating textures and sheens, thereby magnifying the color-blocking effect. Choose your favorite color palette for designs that are tastefully coordinated or playfully contrasted. No matter how you customize it, this pillow set is sure to spruce up any living space.
Project TypeMake a Project
Time to CompleteUnder an hour
Sewn byMachine

Materials List
- 8'' Scissors
- Paper or poster board (to make pattern)
- Pencils and string (to make half-circle pattern)
- Sewing machine
- 1/2 Yard fabric (we used three different colors)
- Spools of thread in colors that match your fabric
- Straight pins
- Sewing chalk
- 12-20 Ounces of fiberfill
- Wooden dowel (to poke filling into pillow corners)
Instructions
-
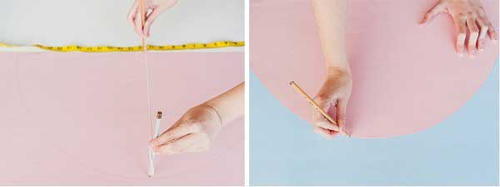
Create a template using a large piece of paper or poster board. If you want to create a half circle shape, like the one in this project, start by determining the base length (bottom of pillow) and then use two pencils and string (as shown in the photo) to create a half-circle shape that will be even on both sides.
-
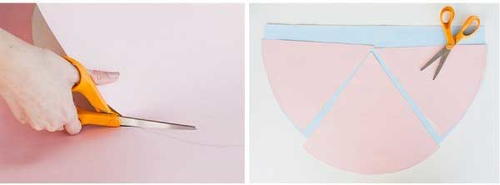
Cut out the template and then trace and cut a second template that matches the first, for the back of the pillow. You will want to add an extra inch to the bottom of the back pillow template, just to be safe. Now, cut the first template into three "slices," as shown.
-
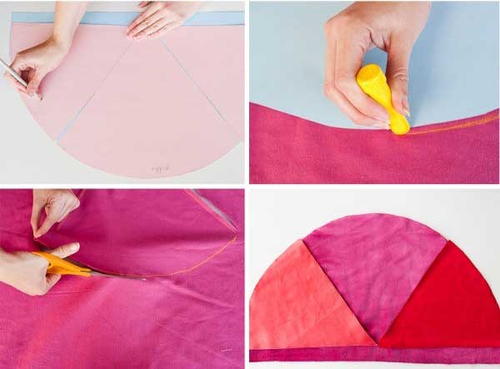
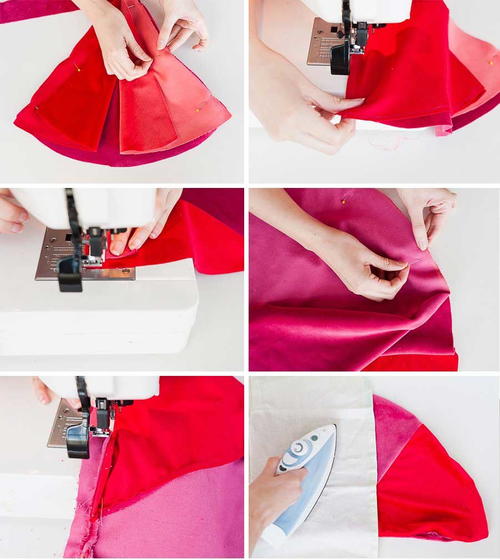
Trace the templates onto the wrong side of your velvet fabric and cut out each shape individually. That should give you four pieces of fabric–one for the back of the pillow and three pieces for the front in coordinating colors.
-
Take your three pieces for the front of the pillow and arrange them as they will look when sewn together, with right sides facing up.
-
Starting with the piece of fabric on the right, flip it over on top of the middle piece and pin them together on the right edge. Next, with the left piece of fabric, flip it over on top of the middle piece and pin those two pieces together on the left edge.
-
Sew a straight line down both edges that are pinned, being sure to backstitch at the beginning and end of each edge. Remove pins and you’ll have the front of your pillow.
-
Now, you are ready to add the back. Pin the two pieces together, right sides facing in and wrong side facing up. Sew all the way around, minus a gap as big as your wrist so you can turn it inside out and add filling later. Again, backstitch at the beginning and end.
-
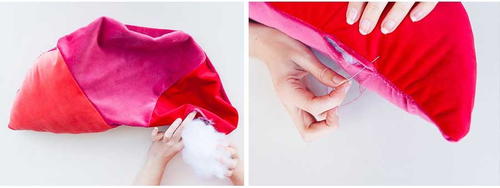
Turn the pillow inside out and iron on a low heat setting, using a towel to protect the velvet surface from direct heat. Add filling to stuff the pillow to your liking, using a wooden dowel to poke the corners with filling as necessary. Hand stitch the opening closed.
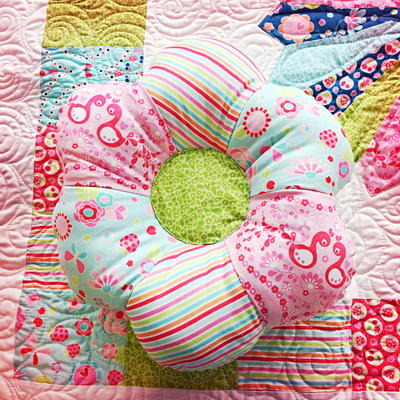
Read NextPetal Pillow