Sunshine Rose Pillows
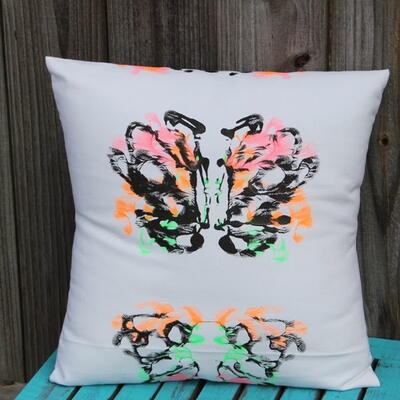
Inspired by crystal clear blue skies, sunshine and gardens in full bloom, Sunshine Roses is a happy, bright and unabashedly vibrant collection. Pretty roses, damask and stripes rendered in crisp clean aquas, pinks and greens will bring a bit of sunshine to your pillows. With this simple tutorial, you will learn how to sew a ruffled pillow and a lumbar pillow with this gorgeous, cheery fabric.

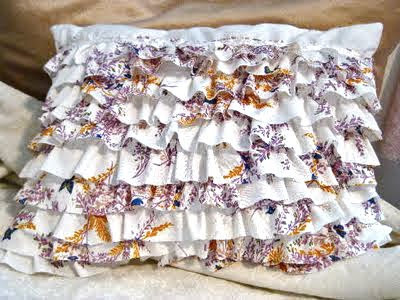
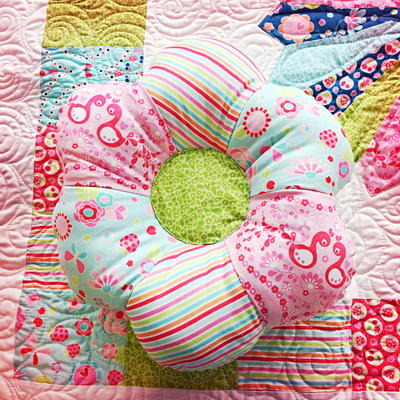
Ruffled Pillow
Materials
- 3/4 yd (.69m) FreeSpirit Sunshine Rose by Tanya Whelan, PWTW073.GREEN for pillow
- 1 yd (.92m) FreeSpirit Sunshine Rose by Tanya Whelan, PWTW071.PINKX for ruffle
- 24” (61cm) Pillow Insert
- Length of cord for gathering
- Coordinating Coats & Clark Dual Duty XP® all-purpose thread
- Fabric Scissors
- Sewing Machine
- Sewing Needle
- Sewing Pins
- Ruler
- Fabric Marker
- Iron
Cutting
- Cut two 25” (63.5cm) squares for pillow
- Cut 193” (490.2cm) of 5” (12.7cm) bias strips for ruffle (This length allows for double fullness)
Instructions
Note: Seam allowances are 1/2” (1.27cm) unless stated otherwise. WOF = Width of Fabric
Make the Ruffle
- Stitch fabric strips using ¼” (.64cm) seams, right sides together. Stitch the ends of the ruffle together, forming a continuous strip. Fold in half lengthwise, wrong sides together, press.
Gather the Ruffle
- Using the zigzag stitch on your sewing machine, stitch over a cord a scant ½” (1.27cm) from the cut edges of the ruffle. Pull up the gathering stitching so the ruffle measure approximately 96” (244cm) in length. Divide the ruffle into four equal parts and pin-mark.
Apply Ruffle to Pillow
- Mark the center on each side of one pillow section. Place the ruffle on the pillow right side having cut edges even, aligning the pin marks to the center marking on your pillow. Adjust the ruffle to fit evenly. Pin in place, stitch.
Finish Pillow
- With right sides together pin remaining pillow square to pillow over the ruffle. Stitch through all thicknesses, leaving an opening along one side for turning. Turn pillow to right side and press.
- Insert pillow. Slip-stitch opening closed.
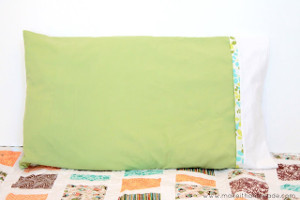
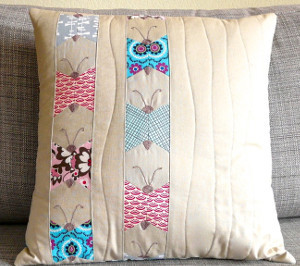
Lumbar Pillow
Materials
- ½ yard (0.46m) FreeSpirit Sunshine Rose by Tanya Whelan, PWTW072.IVORY for pillow front and back ½ yard (0.46m)
- FreeSpirit Sunshine Rose by Tanya Whelan, PWTW074.GREEN for pillow front
- ¼ yard (0.23m) FreeSpirit Sunshine Rose by Tanya Whelan, PWTW071.PINKX for welting
- 14” x 20” (36 x 50.8cm) Pillow Insert
- Filler Cord
- Coordinating Coats & Clark Dual Duty XP® all-purpose thread
- Fabric Scissors
- Sewing Machine
- Sewing Needle
- Sewing Pins
- Ruler
- Fabric Marker
- Iron
Cutting
- Cut one Right Front 15” x 13” (38.1 x 33cm)
- Cut one Left Front 15” x 9” (38.1 x 22.86cm)
- Cut back 15” x 21” (38.1 x 53.4cm
Instructions
Note: Seam allowances are 1/2” (1.27cm) unless stated otherwise. WOF = Width of Fabric.
Make Welting
- Cut 72” (183cm) of 2” (5.08cm) bias strips from welting fabric. Sew the 2” (5.08cm) strips into one long strip. Fold the fabric strip around the filler cord, wrong sides together, matching cut edges. Using a zipper foot, stitch cording as close as possible, keeping the cut edges of the fabric together as you sew. This will enclose the cord in the fabric.
Make the Pillow Front
- Pin a 15” (38.1cm) strip of welting to Right Front section having cut edges even. Using a zipper foot, stitch welting.
- With right sides together, pin Left Front section to Right Front over the welting. Stitch. Press seam to one side.
- Pin the remaining welting to the front having cut edges even. Clip welting to ease around corners. Using a zipper foot, begin stitching welting to front 2” (5.08cm) from end. Stop stitching 2” (5.08cm) from where the ends will meet. Open out stitching on welt and cut off the filler cord so it lines up with the beginning of the welting. Fold under the end of the welting fabric and wrap it around the beginning. Finish stitching welting to top.
- With right sides together, pin the back to the front. Stitch, using a zipper foot and making sure to leave an opening along one side for turning. Turn pillow to right side and press.
- Insert pillow and slip-stitch opening closed.
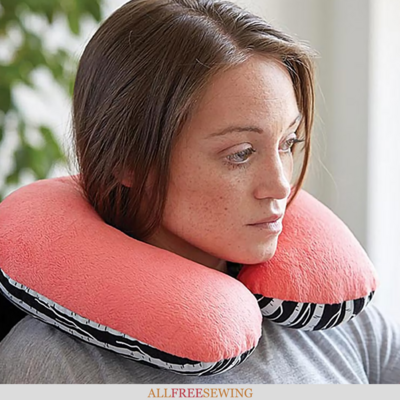
Read NextHow to Make a Neck Pillow for Travel
Your Recently Viewed Projects
Thanks for your comment. Don't forget to share!
Report Inappropriate Comment
Are you sure you would like to report this comment? It will be flagged for our moderators to take action.
Thank you for taking the time to improve the content on our site.