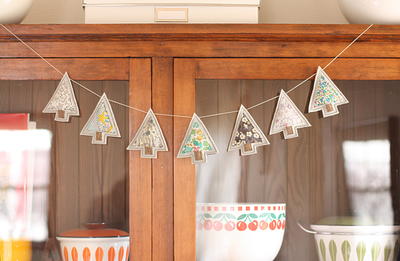
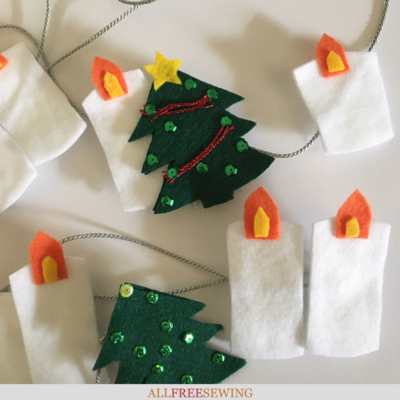
Scandinavian Christmas Garland No-Sew Felt Tutorial
Looking for Scandinavian Christmas decorating ideas that will delight everyone? Then check out this Christmas garland DIY!

Lighting is so important for holiday season decor, especially when establishing the cozy mood of Scandinavian interiors.
As the Danish concept of comfort known as "hygge" has become increasingly popular in the US over the past few years, so has this style of illuminating a room.
That's why we love this Scandinavian Christmas Garland No-Sew Felt Tutorial! Traditionally, candles of varying sizes are often grouped together to achieve this mood in Scandinavian countries, so they are the perfect inspiration for a decorative felt garland.
It's particularly charming during the Christmas holiday season when we are feeling extra comfy and spend more time indoors. If you’d like to decorate your home with a reusable string of faux candles, use the following step-by-step instructions for this pretty Scandinavian Christmas felt garland project.
This felt garland can be put together with fabric glue or you can take it a step further by hand sewing or adding sewn embellishments. It's up to you!
Sign Up For More Free Patterns >>>
Scandinavian Christmas Garland No-Sew Felt Tutorial
Materials List
• Felt sheets (you can choose any colors you’d like- for the garland shown in this tutorial, I used approximately 3 rectangular sheets of white, 1 green, and a small amount of yellow and orange for the "flame" part of the "candles")
• Silver string or twisted cord of your desired length (for this garland, I used a string that is approximately 15’ (feet) long, but you can adjust it to fit your space)
• Fabric scissors
• Paper scissors
• Cardstock or thick paper (to make the templates)
• Pencil
• Green or red sequins (or any color you prefer)
• Craft glue (one that dries clear)
• Optional: Toothpicks (to help with applying small spots of glue)
• Optional: Sequins or other sparkles for decorating the tree shapes
Skill Level: Beginner
Project Type: Make a Project
Time to Complete: In an Evening
Sewn By: No-Sew or Hand

How to Make Scandinavian Christmas Garland:
- First, lay out your materials on a long table or countertop. Since you’ll be working with a length of string this can help you best visualize the finished project.
When deciding the length to make your garland you may want to measure the area you will be displaying the garland (the wall, tree, etc.), then add extra for the slack and for finishing (unless you want it to be straight across).
If you’d prefer to work with a large spool of string and then finish when you feel it’s decorated and long enough that is perfectly fine too! It’s customizable to your space, so go with what works best for your decorating needs.

- Next, you’ll need to cut out your templates to make the felt “candles” and Christmas “trees.” For this project, I am making 12 faux candles along with 3 green tree shapes to add some more holiday charm.
From these, 2 of the tree shapes will be used to finish the ends of the garland. The type of candle you can choose to make in felt is up to you: pillar, votive, and taper are three popular styles. For this project, I am making a shorter votive shape and a slightly taller pillar shape.
Draw these on the cardstock or print out a (public use) photo in the appropriate size and cut it out to use as a template. See the below photo for the candle and tree shapes I used and the dimensions.
Note: They aren’t really to “scale” as the trees are about the same size, but it worked for this project to give it the Scandinavian forest look I was wanting.


- Once you’ve made your paper or cardstock templates, it’s time to cut out your felt! Place the templates on the felt sheets and slowly cut around, being careful not to trim off parts of the cardstock. Once I had a few cut out in the felt, I then used them to cut out identical sets of the designs.
I made 3 of the green Christmas trees and 7 of each candle shape (pillar and votive), so double that amount when cutting them out. Cut the felt out in pairs to save time when you glue them together later.


- Lay out candle and tree shape felt pieces, then glue them together in pairs. If the back felt layer peeks out a little bit that’s okay, you can trim it off later.


- Cut out (by hand without a template) the orange and yellow shapes for the felt "flame" parts of the candles. If you don’t have one of those two colors you can use red with orange or red with yellow instead.
The shape is basically a rectangle with the top cut into a point and then the edges softened a bit. They don’t all have to be exactly uniform, but generally the same size and shape. My orange pieces were approximately 1" tall.

- Next, glue the smaller part of the felt flame onto the bottom center of the larger part. Set these aside to dry. You will attach them to the candle part soon in Step 7.

- Next, add a dot of glue to the top center of each candle shape. Then you can adhere your flame pieces to the candle, placing them so they stick out much further on top from the part that you glue at the bottom (see photos). Allow them to dry while you move onto the next step.


- If you want to add sparkle to your Christmas tree shapes now is the time! Use sequins, felt, colorful trim, or whatever you have in your craft supply stock. You can use a toothpick to apply the glue if it makes it easier. Lay the trees aside to let the glue dry after the decorations are applied.

- Cut out an additional felt rectangle for each candle and tree shape, in the same colors. The ones you will use for the smaller candles can be a little shorter so they don’t show from behind. I made my rectangles about 1.5-2" long and 3/4" wide. You will use these to attach your decorations to the string in a little while.
- Once the glue has dried on your felt candles, it’s finally time to attach them to your garland! You can also add your third Christmas tree at this point. Use one felt rectangle per candle shape, placing it under your string. Add a good amount of glue and then place your candle shape on top.
Press lightly with your fingers to help it stick together, but don’t apply too much pressure or the glue can seep through the felt. I grouped the candles together along the string in clusters, but it’s up to you how you want them spaced out.


- Now it’s time to finish the ends of your garland with the tree shapes! Once they are fairly dry, repeat the process from Step 10 to attach your Christmas trees to each knotted end. Keep in mind that your trees will be on a "right" and "left" end of the garland, so have the string come from opposite sides to attach to each tree.


- Allow the garland to lay flat and dry for a few hours. This will prevent it from coming apart when it’s being displayed, saving you a lot of time and frustration. Follow the drying instructions for your particular craft glue.
- Once your garland is assembled, give it a quick check to make sure it’s all securely attached and that you can’t see any of the back layers of felt. Carefully trim off any excess felt and repair any areas that might need more glue or have come apart.
- Now it’s time to put your creation up so it can be seen! You can hang your Scandinavian-inspired garland across a mantle place, drape it around your tree, or even display it across a wall or entryway. You can either attach it at each end so it forms a single curve, or secure it several times in the middle for a tiered look. Use removable hooks, thumbtacks, or sticky pads to attach the garland if you don’t want to put nails in your wall.
Always be sure your garland is safely secured to your tree or wall, placed away from small children and pets, and away from real lights and open flames. Store it for the next holiday season by carefully wrapping it around a piece of cardboard, then placing it away from dust and moisture.


Want More?
Christmas Baubles Printable Lacing Card Ornaments >>
Do you like the minimalist Scandinavian style?
Let us know below!
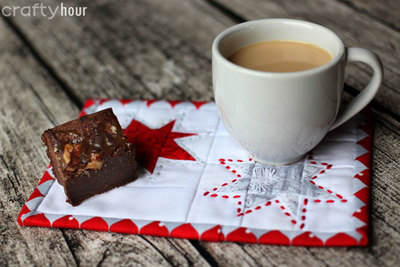
Read NextStars of Wonder Christmas Mug Rug

Thanks for your comment. Don't forget to share!
mrshem 9055435
Mar 03, 2019
Quite comprehensive instructions BUT . . . . . . . I would have liked to see a much better picture of the finished result to see what I was aiming for. Your picture doesn't help at all - it's much too small and rather twisted.
Report Inappropriate Comment
Are you sure you would like to report this comment? It will be flagged for our moderators to take action.
Thank you for taking the time to improve the content on our site.