Characters of Christmas Bath Mitt Sewing Patterns
Make bath time fun and festive with these easy Christmas sewing patterns!

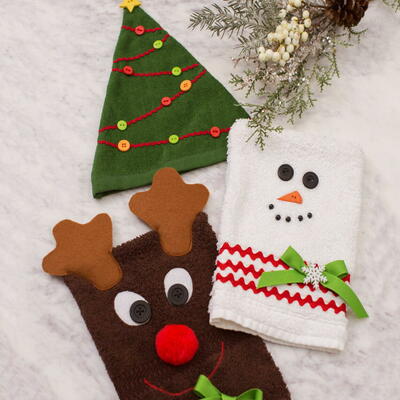
Add some holiday fun to the kids' bath time with this easy Characters of Christmas Bath Mitt Sewing Pattern. These friendly festive characters are sure to bring nothing but smiles and laughter to your little ones' faces.
Put your hand in the mitt to put on a funny Christmas puppet show - silly voices and all.
Then, simply pop a bar of soap inside to wash your child squeaky clean. The colorful Christmas faces will make the soapy process a memorable holiday experience.
This easy-to-follow pattern will make the snowman, the reindeer, AND the Christmas tree in no time. Soon you'll have a whole family of festive fun.
You can even use existing towels to make this an even faster and thriftier towel sewing project.
Get the whole family involved by giving a character to each member, and soon everyone will be feeling the Christmas spirit!
Who knew you could turn bath time into a warm, Christmas memory?
Join Sewing It Up For More Free Patterns, Tutorials, & Guides >>
Characters of Christmas Bath Mitt Sewing Patterns
Skill Level: Beginner
Project Type: Make a Project
Time to Complete: In an evening
Sewn By: Machine
Materials List:
• Find the template here (page 4). See individual pattern instructions below.
Notes:
• Finished Sizes:
Snowman/Reindeer: 6-1/2" x 9" (16.51cm x 22.86cm)
Tree: 8-1/2" x 10" (21.59cm x 25.40cm)
• Mitts can be made from hand towels with finished hems, or from terry cloth yardage.
• Supplies are given for existing towels. To use yardage, purchase 3-1/8 yard (34.29cm) terry cloth and you can get multiples from that length.
• Pre-wash towels or terry to prevent residual shrinkage.
• Since the mitts will be getting wet during use, be sure to choose only trims and embellishments made of plastic, not metal, and of course, washable felt for accents.
Snowman Bath Mitt Pattern
Materials List:
• Coats Dual Duty XP® All-Purpose thread
• 1 white terry cloth hand towel
• 1-1/4 yds (1.14m) medium red rickrack
• 1/2 yd (45.72cm) green grosgrain ribbon, 5/8" (1.59cm) wide
• 2 black buttons, 3/4" (1.91cm) diameter*
• 1 orange carrot button, 1-1/4" (3.18cm) long*
• 5 black buttons, 3/16" (.48cm) diameter*
• 1 white snowflake, 1-1/4" (3.18cm) diameter
• Template
*Note: These may be sold together as a snowman button set.
DIY Snowman Bath Mitt Cutting Instructions:
From the towel, cut: 1 rectangle 9-1/2" (24.13cm) tall and 13-1/2" (34.29cm) wide, using the finished towel hem along the width.
How to Make the Snowman Bath Mitt:
- Fold the terry cloth rectangle in half matching the finished lower edges and pin-mark the center line up the height of the rectangle.
- On the left-hand portion, position the eyes, nose, and mouth as desired. Stitch in place with coordinating thread colors.
- Along the lower edge, stitch three rows of rickrack about 3/8" (.95cm) apart. If the towel has a woven border, use that/those lines as a guide for positioning.
- Tie a ribbon bow and sew in place approximately 2" (5.08cm) to the left of the center line along the rickrack. Stitch the snowflake over the bow center.
- Fold the snowman rectangle right sides together, matching the finished lower edges. Stitch up the side and across the top using a 1/4" (.64cm) seam allowance. Zig zag seam allowances together to prevent raveling.
- Turn the mitt right side out and press the edges firmly.

Reindeer Bath Mitt Pattern
Materials List:
• Coats Dual Duty XP® All-Purpose thread
• 1 brown hand towel
• 3" (7.62cm) square white felt
• 1 light brown felt rectangle, 9" x 12" (22.86cm x 30.48cm)
• 1/2 yd (45.72cm) green grosgrain ribbon, 5/8" (1.59cm) wide
• 1 red pompom, 1-1/4" (3.18cm) diameter
• 2 black buttons, 7/8" (2.22cm) diameter
• Fusible web
• Template
DIY Reindeer Bath Mitt Cutting Instructions:
From the towel, cut: 1 rectangle 9-1/2" (24.13cm) tall and 13-1/2" (34.29cm), using the finished towel hem along the width.
From the brown felt: Fold the rectangle in half to 4-1/2" x 12" (11.43cm x 30.48cm) and tuck the fusible web between the layers; fuse, following the manufacturer's instructions.
Cut: 2 antlers, using the template provided.
From the white felt: Back the felt with fusible web.
Cut: 2 eyes, using the template provided.
How to Make the Reindeer Bath Mitt:
- Fold the terry cloth rectangle in half matching the finished lower edges and pin-mark the center line up the height of the rectangle.
- Position the white felt eyes on the left portion of the mitt rectangle, fuse in place, and zigzag the edges. Sew the black buttons at the lower end of each eye.
- Sew the red pompom below the eyes to create the nose.
- About 1" (2.54cm) below the nose, use a reverse zigzag stitch to sew a smile with red thread.
- Tie a ribbon bow and sew 1-1/4" (3.18cm) from the lower edge, slightly off center.
- Fold the reindeer rectangle right sides together, matching the finished lower edges. Stitch up the side and across the top using a 1/4" (.64cm) seam allowance. Zig zag seam allowances together to prevent raveling.
- Turn the mitt right side out and press the edges firmly.
- Position the antlers above the eyes at a slight angle and stitch in place along the portion overlapping the terry cloth.

Christmas Tree Bath Mitt Pattern
Materials List:
• Coats Dual Duty XP® All-Purpose thread
• 1 green hand towel
• 10 assorted buttons, less than 1/2" (1.27cm) diameter
• 1 yellow star button, 1-1/8" (2.86cm) diameter
• 1 yard (.91m) red baby rickrack
• Template
DIY Christmas Tree Bath Mitt Cutting Instructions:
From the green towel, cut: 2 trees, using the template provided and placing it above the finished towel hem.
How to Make the Christmas Tree Bath Mitt:
- Using one terry cloth triangle, sew rickrack swags across the width at a slight angle or curve, depending on the desired appearance.
- Sew the assorted buttons in place along the rickrack, keeping them out of the edge seam allowances 1/4" (.64cm).
- Right sides together, position the second triangle over the embellished tree front. Stitch both sides, pivoting at the point. Zig zag seam allowances together to prevent raveling.
- Turn the mitt right side out, poke out the upper point, and press the edges firmly.
- Sew the star on the tree top, extending it slightly beyond the point.


Want More?
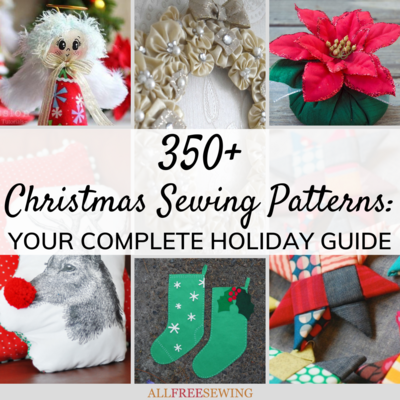
350+ Free Christmas Sewing Patterns >>
Who or what is your favorite Christmas or holiday character?
Let us know in the comments!
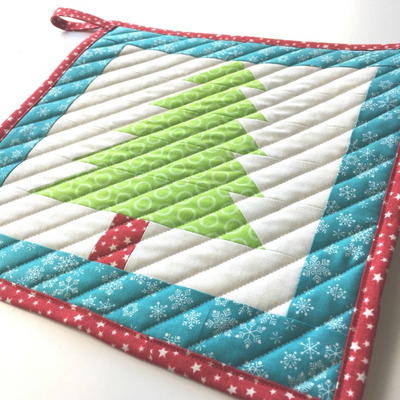
Read NextRed And Green Yuletide Quilt Pattern
Your Recently Viewed Projects
Thanks for your comment. Don't forget to share!
KLC
Nov 14, 2022
I am a big fan of Abominable Snowmonster of the North (Bumble) from the classic Rudolph movie. He's a cutie!
Report Inappropriate Comment
Are you sure you would like to report this comment? It will be flagged for our moderators to take action.
Thank you for taking the time to improve the content on our site.