How to Refashion T-Shirts for Children (3+ Ways)
There's no need to throw out your kids' lackluster t-shirts. With these clever upcycled t-shirt projects, transform any bland tee into a top your kids will wear over and over again!

You love your kids, but you probably don't love how expensive it is to buy them clothes. Ditch expensive department stores and learn how to make your own clothes that your kids will adore!
Once you learn how to refashion t-shirts for children, you'll no longer be hampered by rips or outdated styles again.
With these t-shirt upcycle ideas, transform any bland t-shirt into your child's new favorite piece. It's amazing the things you can create with just a few plain t-shirts. Plus, there's a bonus fourth shirt to make for your kiddos.
Wardrobe refashioning projects like these are great for both the environment and your wallet. It's a win-win!
Plus, refashioning is super fun and budget-friendly and can be done with clothing from and for the whole family.
Once you take a look at these t-shirt upcycle projects, all made by Maureen Wilson of MadeByMarzipan.com, you'll never shop for kids' clothes the same way again.
Sign Up For More Free Patterns >>>
This tutorial was written by Maureen from Made by Marzipan. To see more of her work, check out her designer profile here:
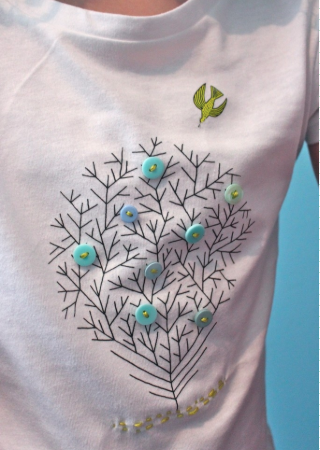
Iron-On Tree Tee
If you love adding dimension, pizzazz, and intrigue to your sewing projects, then you'll fall head-over-heels for this mixed-media design. A stunning tree iron-on applique and colorful buttons give this simple pattern a Bohemian flair your daughter will love. It's a top and an accessory all in one!
Supplies:
- Plain tee
- Iron-ons or fabric markers
- Buttons
- Embroidery floss & needle
Instructions:
-
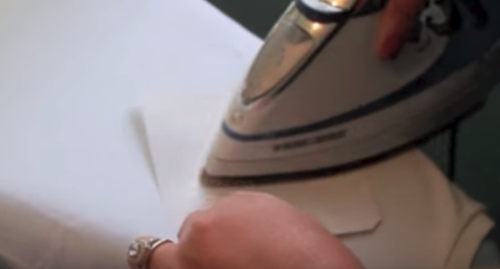
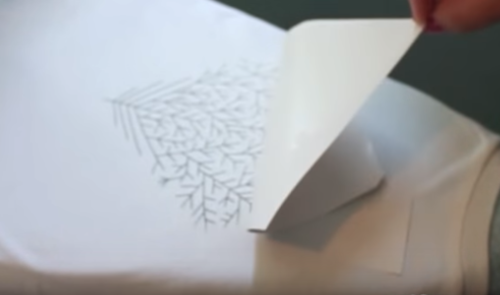
For the first refashion, I’ll be using some iron-ons. These came in a booklet I bought at Paper Source. However, it’s easy to make your own using printable iron-on paper. Alternately, you could draw a design on the tee using fabric markers.
-
To transfer an iron-on, place the image face down and iron from the center outward in a circular motion. It takes about a minute. Let cool, then remove the paper.
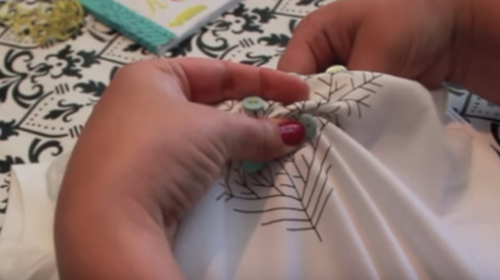
-
I’m going to embellish my iron-on with buttons. Use a contrasting thread for a pop of color.
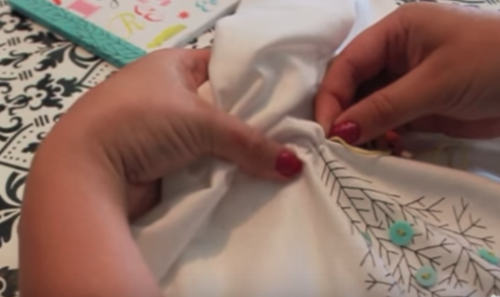
-
Finally, I’ll hand embroider a running stitch beneath the tree. This shirt has a hand-made, hipster feel.

Gamer Tee
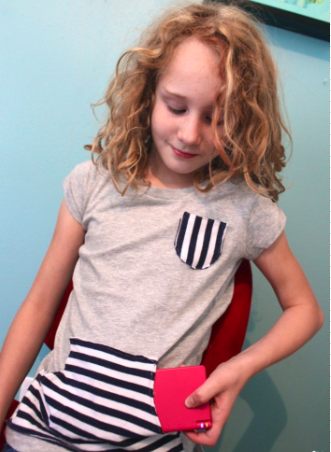
Whether it's for your video gaming son or your tech-savvy daughter, this Gamer Tee is guaranteed to be a direct hit. Score major Mom Points with a t-shirt refashioning project that's cozy enough to wear for hours of cyber fun. Two front pockets on the face of this design make sure your children can hold all of their gaming devices with ease.
Supplies:
- Plain tee
- Old tee to cut up
- 1/4'' Wide elastic, about 10''
- Saucer to trace
- Pencil
- Sewing machine, pins, and thread
Instructions:
-
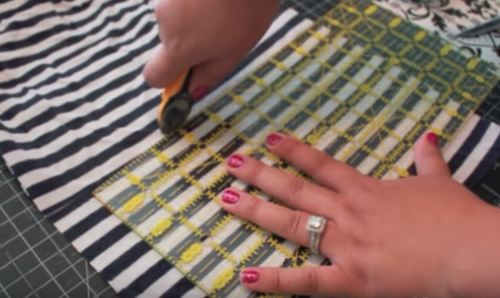
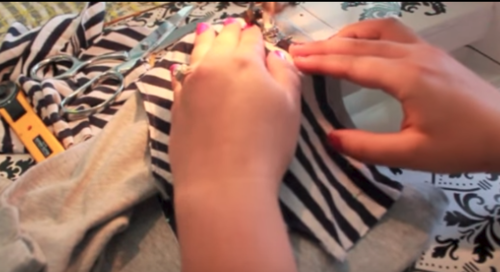
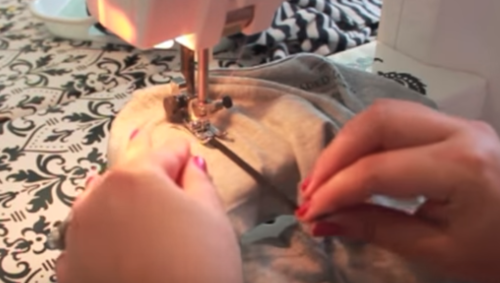
This next refashion would work well for a boy’s shirt as well. My daughter calls it her Gamer Tee because the front pocket can hold her Nintendo. I’ll be using a second shirt from my stash. As I’ve mentioned in other tutorials, I keep a large bag full of old tees to use while refashioning.
-
Cut a rectangle from the spare shirt. It should be several inches smaller than the width of your tee. Cut through both layers of the shirt.
-
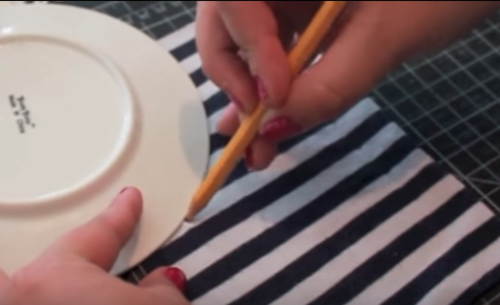
Fold the rectangle in half width-wise. Place a saucer on the upper corner and trace the arc. Cut along this curve and unfold.
-
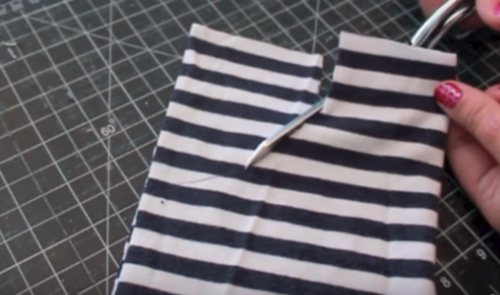
Now, if you wanted a polished look, you would sew these pieces right sides together, then turn and topstitch. But I want this shirt to be ultra casual, so I’m leaving raw edges. Since we’re working with a knit, it won’t fray, but will curl slightly in the wash.
-
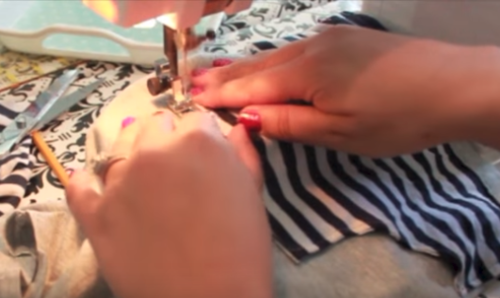
Sew the two layers of fabric together along the curves.
-
Then pin the large pocket piece to the tee shirt. Sew along the top, bottom, and sides, but leave the curves open so your hands can slide in. Be sure you’re only sewing on the top layer of the tee shirt.
-
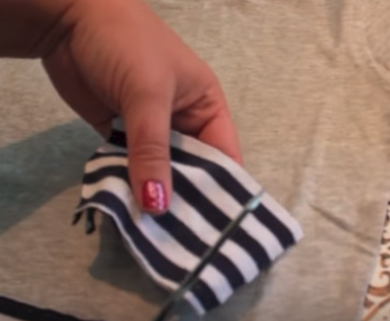
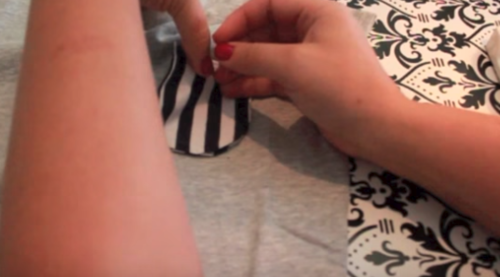
Next I’ll add a little pocket on the chest. For added interest, I’m turning my fabric so the pocket has a vertical stripe. Cut a rectangle from both layers of the spare tee, then trim the bottom into a U shape. Sew the layers together at top.
-
Pin the pocket to the shirt, and sew around the U, leaving the top of the pocket open.
-
Although my daughter loves this shirt as-is, I can’t help adding a girly touch to it. Ruching sleeves is a super simple way to add femininity to a garment. Turn the tee inside out. Sew a 1/4-inch wide piece of elastic from the shoulder to the cuff. Pull the elastic tightly as you sew. When you’re finished, the elastic will shrink and ruffle the sleeve.
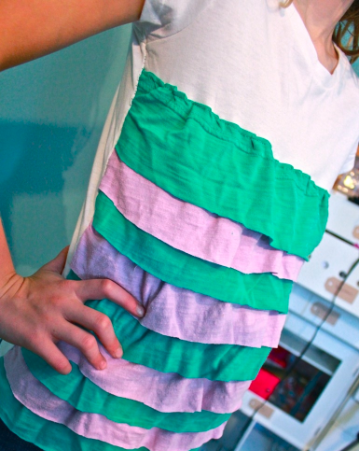
Layers of Ruffles Tee
Does your little girl love everything that is girlish, frilly, and fabulous? Then this t-shirt tutorial is just the thing for her! Decorate a drab t-shirt by adding on colorful ruffled stripes, and your budding fashionista won't want to get her clothes at the store. Get kid-friendly designer clothes on a budget with this Layers of Ruffles Tee pattern.
Supplies:
- Plain tee
- Old tees to cut up
- Sewing machine, pins, and thread
Instructions:
-
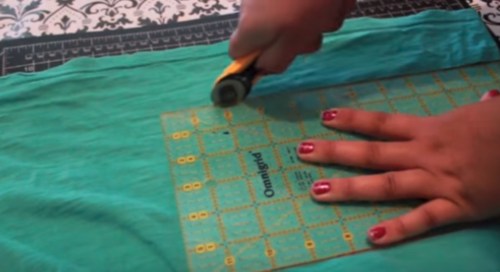
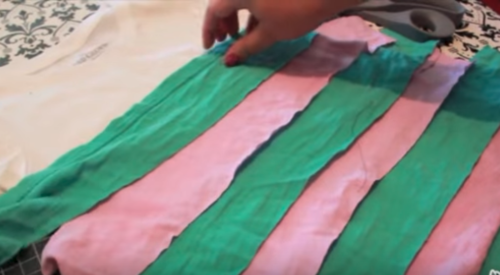
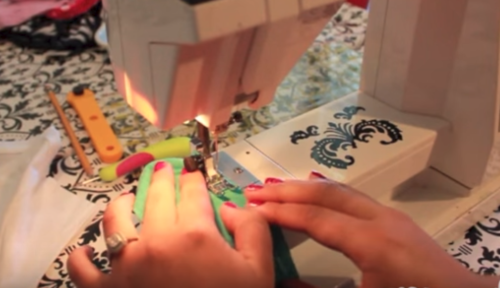
This third shirt is flirty and fun, with layers of ruffles. You can make them all in one color, or mix a variety of patterns. You’ll need old tee shirts that are at least several inches wider than the shirt you’re refashioning. Cut old tee shirts into strips. Mine are about 3.5 inches wide. Remove the side seams.
-
Lay them out on your shirt so you can see how many you’ll need. The final layer will go right beneath the arms. For this ruffle, you’ll be using the hem of an old tee, because it’s already finished nicely.
-
Now ruffle all of the strips, by sewing with a basting stitch. Do not backstitch. When you remove the strips from your machine, leave the threads long.
-
Unpick the side seams of the tee you’re refashioning, between the hem and the underarm area.
-
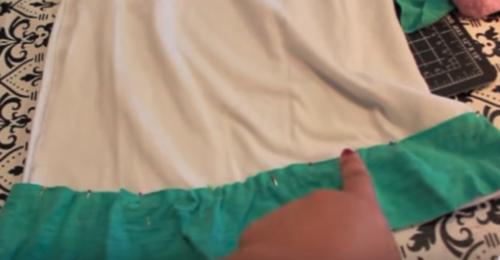
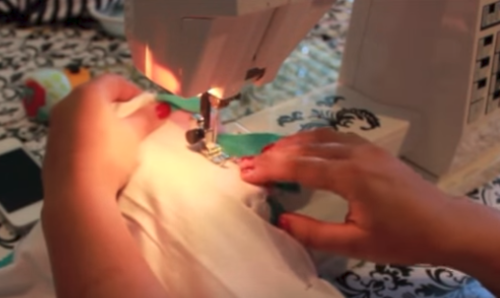
Starting at the bottom of the tee, pin a ruffle strip to the tee. Pull the bottom basting thread to tighten the ruffle. Adjust the strip so that it fits the width of the shirt, plus a little extra so it will be caught in your seam later.
-
Sew the strip in place with a 1/2 inch seam. You don’t need to switch your thread for different strips, just make your thread match the final top ruffle, because those are the only stitches that will show.
-
Remove the basting threads as you go.
-
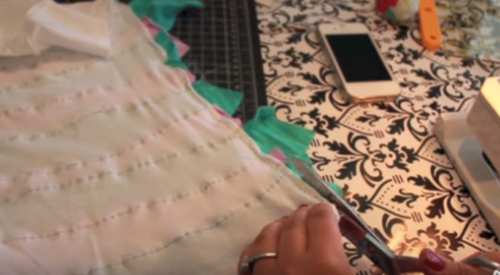
Once you’ve added all the strips, turn the shirt inside out. Line up the side seams and pin. Sew together with a zig-zag stitch. Then trim off any excess fabric.

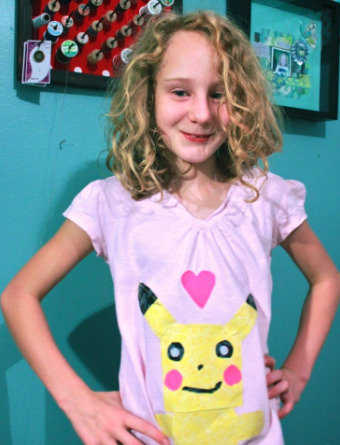
Bonus Project!
With all this refashioning going on, my daughter begged to design her own tee shirt. Applique is the perfect project for beginning sewists because double-sided fusible webbing will hold pretty well, even if the topstitching is less than perfect.
This pattern lets your kids get in on the fun of refashioning their own clothes by using their own designs. Teach them the value of recycling old pieces instead of throwing them away this simple (and fun!) bonus t-shirt upcycling tutorial.
Instructions:
-
Cut your design from scraps, then iron Heat’n Bond Ultra Hold to the back.
-
Peel off the paper backing and iron your design to the tee– there’s no need to bother with pins.
-
Topstitch the design in place.
Shirt Refashion Video Tutorials
Want to see these t-shirt refashions in action? Then take a look at the video tutorials and follow along:
More Refashioning Projects
Are you on an eco- and budget-friendly upcycling kick? If you need inspiration for your next refashioning escapades, look no further than this clever collection of upcycling projects! Whether you want to revamp your clothes or make a stunning piece of home decor from other unexpected materials, there's a tutorial in here for you.

Maxi skirts are a fashion trend that never goes out of style, but now you can skip the department store lines to get one of your own! With just a single scarf and some exquisite floral appliques, you can sew a maxi skirt you'll wear out on any sunny day.

Did you know you could turn linen into a look so lovely that all of your friends become jealous? Who knew?! Transform an unused pillowcase into a comfy and couture shift dress perfect to wear all summer long.

There's nothing more luxurious than a shiny, smooth, and lustrous silk top. You don't have to pay an arm and a leg to get one, though! You can have your own gorgeous top in minutes with this simple scarf-to-shirt tutorial.

You know how cozy you are when you're buttoned up in your favorite sweater on chilly days. Now your home decor can look just as comforting with this Upcycled Sweater Pillowcase pattern. Your whole family will love snuggling these knit throw pillows.

A Little Princess Upcycled Nightie is the perfect project for your young girl. Not only does this simple tutorial deliver a much-loved nightgown to your daughter, it teaches you how to upcycle a man's shirt to reduce waste in your home.
Read NextThe Elsa Dress
Your Recently Viewed Projects
Thanks for your comment. Don't forget to share!
Report Inappropriate Comment
Are you sure you would like to report this comment? It will be flagged for our moderators to take action.
Thank you for taking the time to improve the content on our site.