Big Daisy Fabric Flower Pin Tutorial
Learn how to make felt flower pins with this hippie-inspired tutorial.

If you're wanting a fun hippie-style accessory for the spring (or any season, really), this Big Daisy Fabric Flower Pin Tutorial is for you! Show off your love of nature with this large wearable floral brooch in the shape of a daisy.
It doesn't even require a sewing machine, just some basic hand-sewing skills. A perfect beginner project!
You can even use different colors if you prefer to personalize your wearable art! After this project, you will understand why making flowers out of felt is such a popular activity for both kids and adults.
Learning how to make large felt flowers like this mean that you can design much more than pins and brooches, too.
Add your new felt daisy to a hat, bag, or whatever else you can think of. Here are the steps for creating your own statement flower pin in about two hours.
Sign Up For More Free Patterns >>>
Project TypeMake a Project
Time to CompleteIn an evening
Sewn byHand

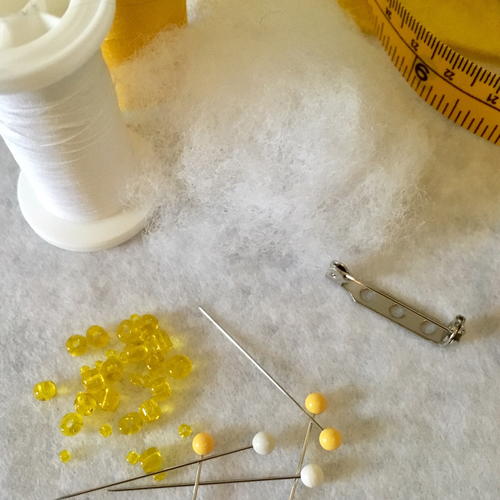
Materials List
- Sheets of craft felt (about 2 white and 1/2 yellow were used for this project)
- Small amount of polyester fiberfill (or you can use quilt batting and pull it apart), about the size of a quarter when compacted
- Yellow medium-sized seed beads, approximately 15-20
- Fabric scissors
- Sewing thread (in same colors as the felt)
- Hand-sewing needle (medium size)
- Pinback (bar-shaped, made for sewing)
- Sewing pins
- Measuring tape or ruler
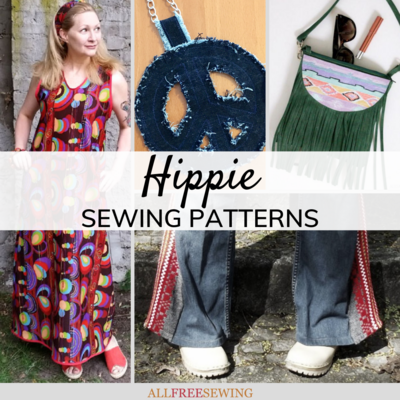
With this collection, 30+ Hippie Sewing Patterns: Flower-Power Fashion for Free Spirits, the main focus is retro clothing patterns but we also have lots of patterns and tutorials inspired by this era for your home, too. Find it here:30+ Hippie Sewing Patterns (Free!)
How to Make Fabric Flower Pins:
Click on any image to enlarge.
-
Gather your materials and make sure all the colors match as closely as possible.
-
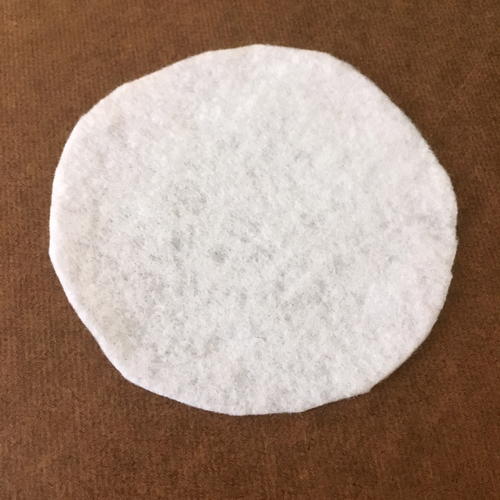
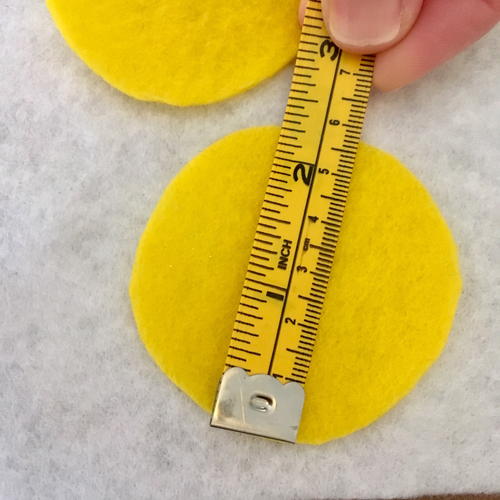
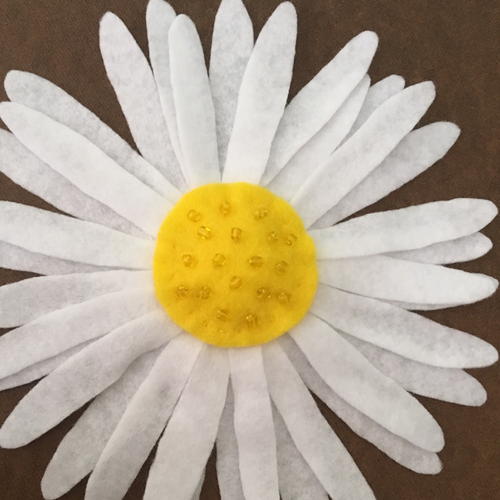
First, you'll need to cut out the base for your flower pin. Using your fabric scissors, create a white felt circle that is about 3.5" wide. You will attach the petals to this piece eventually.
-
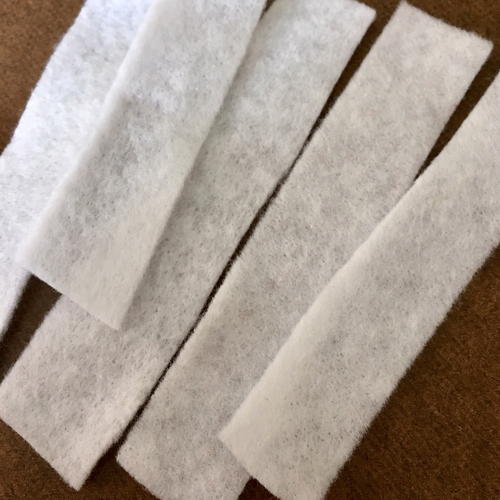
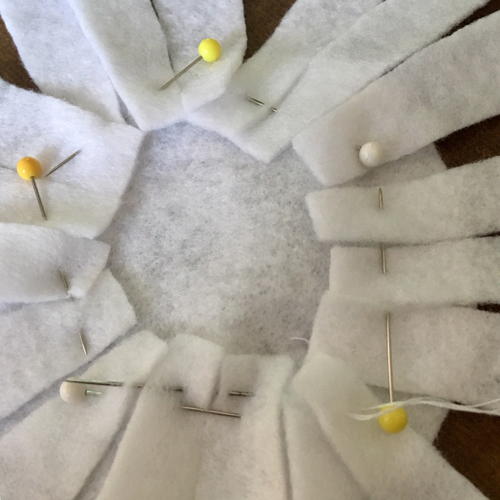
Using your white felt, create 35-40 long rectangular shapes that are approximately 3.5-4" long and 3/4" wide. Then trim and round them to resemble the petals of a daisy (see photos for the exact shape). The felt brooch that is shown in these photos used about 36 petals.
-
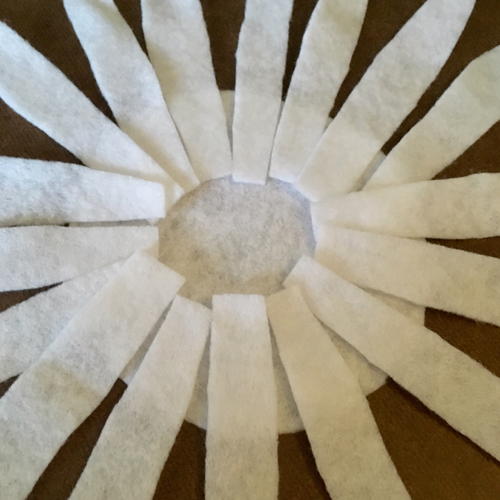
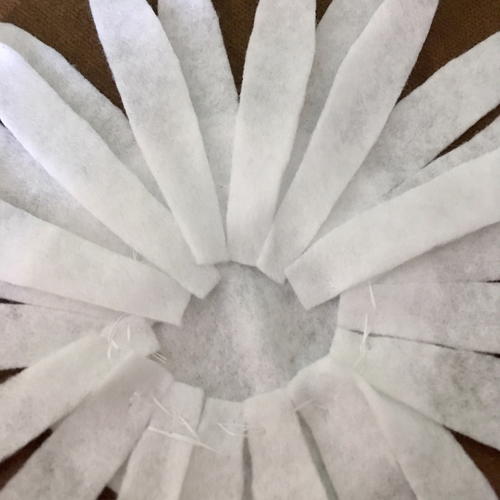
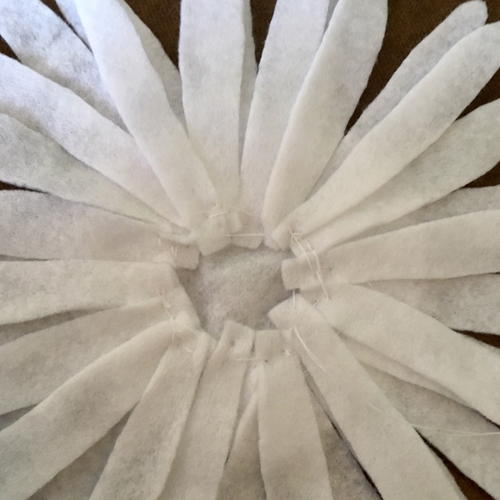
Pin the petals onto the base piece in a circle, keeping them about 1.5" from the middle. Then use hand-stitches that go through the felt to the back side until they are secure. Then add another layer on top of that for depth and sew them on as well. The top layer should be placed a little further in, with about 1" open in the center.
-
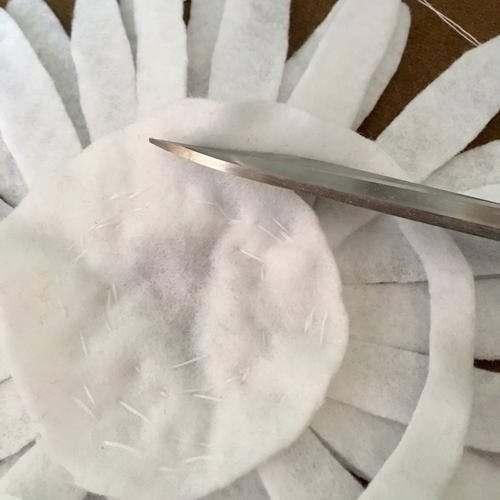
Flip the circle with the petals over so the back is facing upwards. Slowly trim around the white circle so that it's not as visible from the front side. This step shouldn't cut any stitches or petals, so take a bit off and check it from the front before taking more off.
-
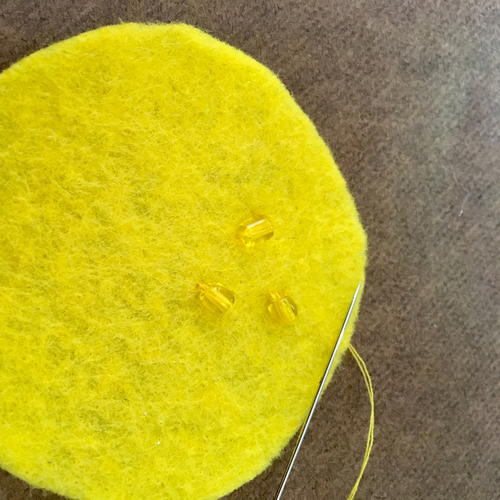
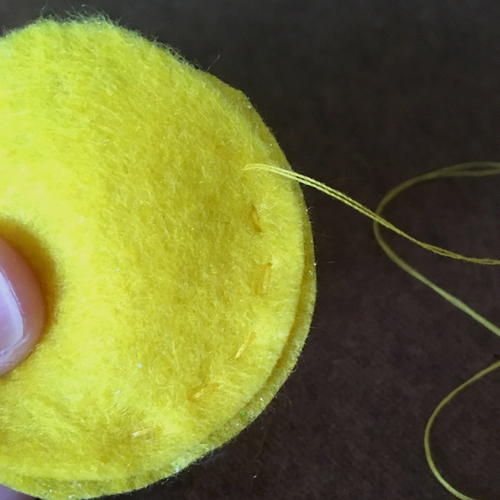
Now it's time to assemble the center of the flower! Cut out 2 small circles in the yellow felt. The larger circle should be about 2.25" wide and the smaller circle 2". They will become the center of your flower.
-
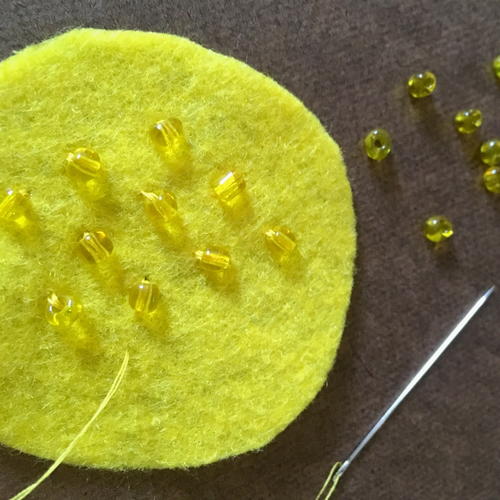
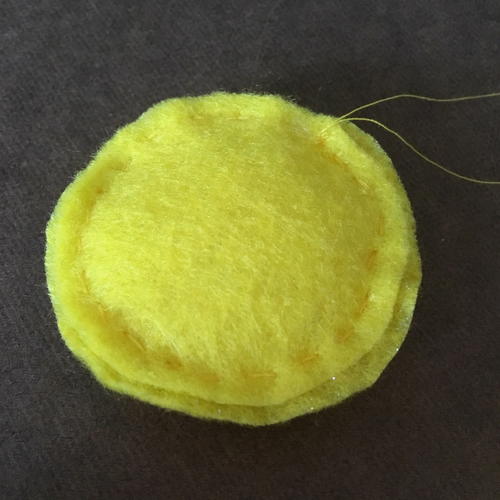
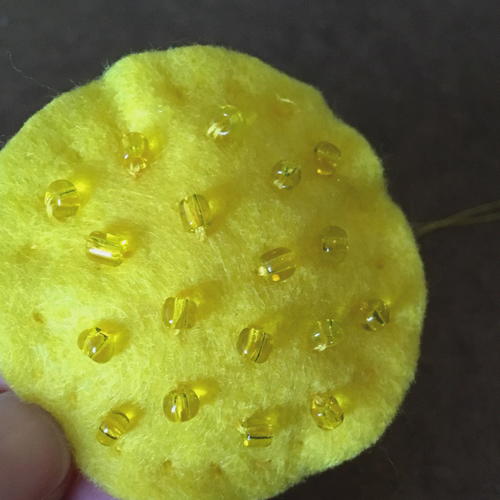
Take the larger felt circle of yellow felt and use your coordinating thread to attach the seed beads. How many you use is up to you and your preference. For this project I wound up using 18 beads, placing them randomly (but evenly spaced) on the felt.
-
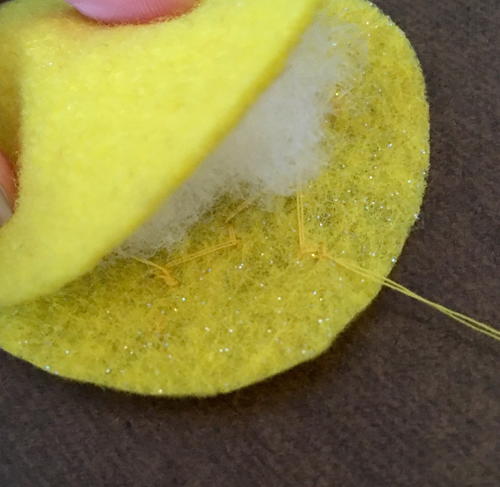
After you've finished sewing on the beads, grab your polyester fiberfill and the smaller yellow circle. Place it between the layers to create depth, making sure it's not sticking out or too full. Secure the yellow pieces together with very small hand-sewing stitches around the edge until you are sure it won't come apart.
-
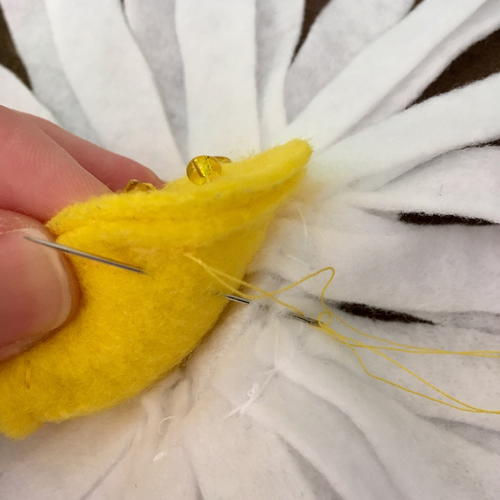
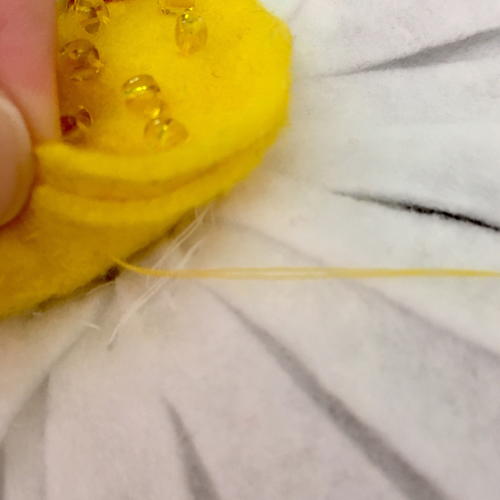
Now you can connect the yellow center part to the base with the white petals. Flip your flower back over so that the front is facing upwards. Use your thread and needle to attach the bottom (non-beaded) side to the center of the base. It's okay to sew through the back of the base piece as it will be covered up in the last few steps.
-
The daisy pin is almost complete! Gently flip your brooch over so that the back is facing upwards on your workspace (I did this on a piece of felt so the beads didn't get scratched). Cut out a circle of felt in white. The size should be large enough that it covers all the stitching on the back, but not so large that it is visible behind the petals.
-
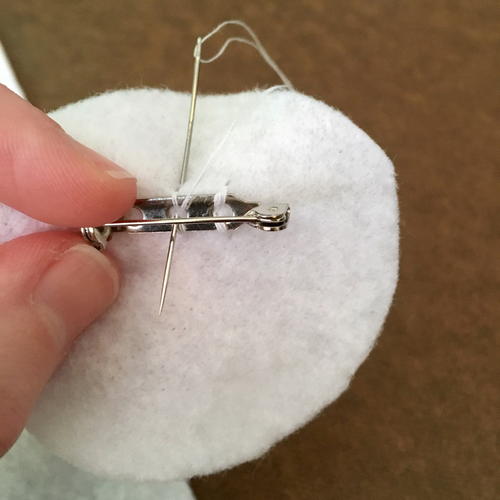
Secure the pin back to this new piece of felt by sewing through all of the holes. Make sure it's attached really well because this is how the pin will stay on your shirt, jacket, or dress.
-
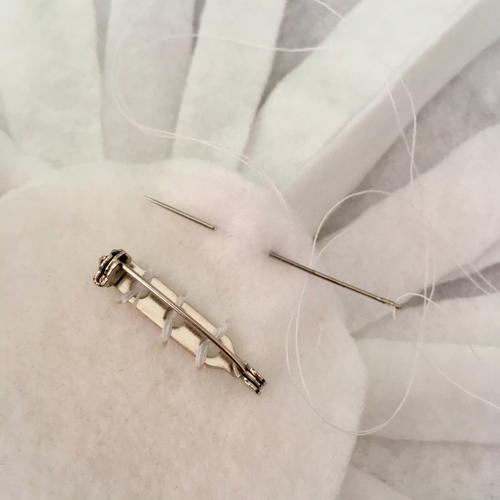
Finally, very carefully sew the backing piece with the pin bar onto your flower. If you prefer to use fabric glue that will also work. Double-check that it's connected all around and not loose.
-
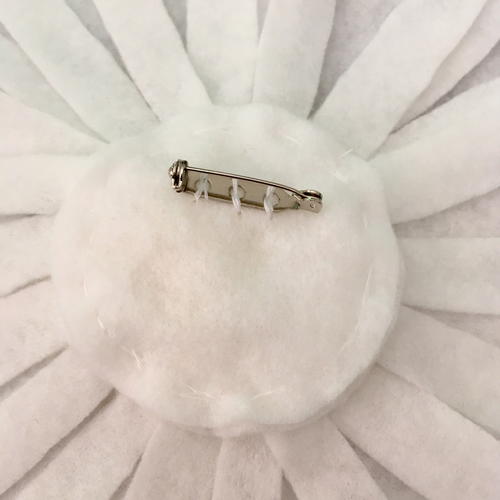
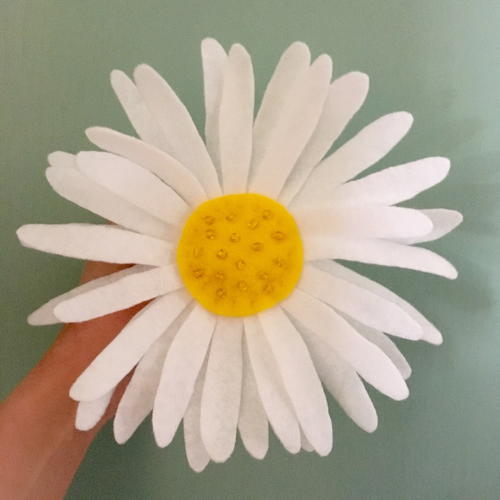
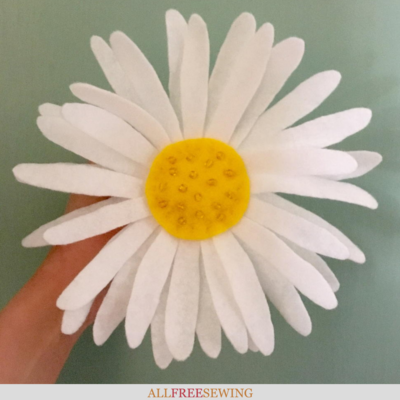
Your DIY felt daisy pin is now finished!


Care Instructions:
I recommend testing the garment you're wearing it on to make sure it doesn't get damaged by the pin. Do not get your brooch very wet, and spot clean if it gets dirty. Store in a dry place where it won't get flattened and it will look beautiful for many years to come!
Want More?
More fabric flowers you'll love >>>
What is your favorite flower?
Let us know in the comment section!
Read NextHow to Make a Lanyard
Your Recently Viewed Projects
Thanks for your comment. Don't forget to share!
KLC
Jun 17, 2019
I think ranunculus flowers are the prettiest but it's rare that there's a flower I don't like! Daisies are adorable and this pin is pretty.
Report Inappropriate Comment
Are you sure you would like to report this comment? It will be flagged for our moderators to take action.
Thank you for taking the time to improve the content on our site.