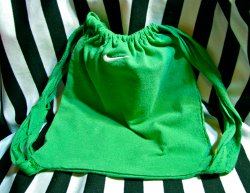
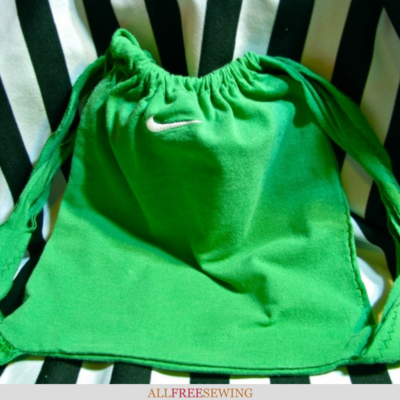
Upcycled Shirt DIY Drawstring Backpack
 Meet your new favorite bag: the Upcycled Shirt DIY Drawstring Backpack! Get creative by making a DIY drawstring backpack. This little pouch can be made from a regular t-shirt.
It could not be easier or a more exciting and simple upcycle. We all have tons of shirts taking up space and most of us can always use more bags in our lives. It's perfect!
If you love refashioning and recycling, take an old t-shirt and follow this tutorial for how to make a drawstring backpack. If you're a visual learner, then you're in luck. Find the video tutorial for this project at the bottom of the page.
Sign Up For More Free Patterns >>>
Materials:
- Old t-shirt
- Safety pin -or- bodkin
- Sewing machine & thread
- Ballpoint needle (recommended)
Instructions:
- Begin by removing the sleeves from the t-shirt. Then remove the shoulder and neck portion, cutting straight across right below the collar.
- Next cut the pieces to make the body of the backpack. You can cut either a square or rectangle; the dimensions are up to you. I’m making a child-sized bag. Cut through both layers of the t-shirt. Make sure the edges are straight. Set aside.
- Now use the remaining fabric to cut out straps. You will need two strips that are 1.5x the perimeter of your backpack for a child-sized bag, and 2x the perimeter for a large bag. The strips on my child sized bag are 1 inch wide, and straps for a large bag should be 1.5 inches wide.
- Remove the hem. You may find it’s faster to fold your fabric when you cut your strips. I’m using an extra large tee shirt. If you’re using a smaller shirt, you may find it necessary to sew two strips together to make them long enough. Your strips should be loops. Snip them once to create long strips.
- Set your machine to a lengthened zig-zag stitch. You may also want to switch to a ball point needle. Match up the two strips and sew together down the length of the strips, in the center. So now you have a single, long strap.
- Next we’ll work on the bag. Lay the two pieces right sides together. Pin the two sides, leaving the top and the bottom open. Stop pinning about two inches from the top.
- Once the sides are pinned, fold down the top about an inch for the child-size bag, or 1.5 inches for the large bag. This will form a casing for your strap to weave through. Don’t pin the front and back of the bag together, be sure you’re only pinning through the one folded layer.
- Flip the bag to the other side and repeat, folding down the top edge and pinning.
- With your machine on the same setting, sew the sides of the bag with a 5/8 inch seam. Stop right before the folded edge– you don’t want to sew your casing shut!
- Next we’ll sew the casing on each side. Be sure that you are not sewing the front and back together! Sew along the bottom of the folded edge. Do the same to the back casing as well.
- Now we’re ready to add the strap. Using a safety pin or bodkin, feed the strap through one of the casings. Then, feed it through the other casing, in a loop. Adjust the straps on each side so that they are even. On one side, you’ll have a loop. On the other, you’ll have the two cut ends of the strap. Remove the safety pin.
- With the bag still inside out, tuck the straps inside, close to the edges. Then reach up through the bottom of the sack to align them with the bottom edge. Make sure the straps are not twisted.
- Sew the bottom shut with a 5/8 inch seam, capturing the straps in your stitches.
- Turn the bag right side out. To work the drawstring closure, simply pull on the straps.
Video Tutorial:
Read NextHow to Make a Bag in One Hour
Your Recently Viewed Projects
Thanks for your comment. Don't forget to share!
flowergirl
Aug 27, 2018
Love video tutorials, th y make it easier to start a project and even complete one using the same video. A drawstring is a must have bag for your kid's gym and swimming pool needs. You can use waterproof material that way if you have wet clothes, they don't get your other books or laptop wet.
Weberme
Jun 11, 2016
This is a neat drawstring backpack and I love that it is made from a t-shirt to recycle. This is good when you do not want the big bulky backpacks and I like that it is a drawstring for a different look. Great for when you just want to carry a few things. This is a good project to work on with kids too. Anyone make and use this yet?
pgh phyl
Nov 05, 2011
Project was very nice. Instructions were simple and easy to understand; person had a very pleasant voice for instructing. The video itself was well done. Keep up the good work. You should teach sewing. Thanks for your time and project. Pgh. Phyl Sew long for now
Report Inappropriate Comment
Are you sure you would like to report this comment? It will be flagged for our moderators to take action.
Thank you for taking the time to improve the content on our site.