How to Sew a Drawstring Bag in Minutes
Learn how to sew a small drawstring pouch FAST with this full tutorial!

Drawstring bags are easy to sew and can be used for many purposes from storing jewelry to bags for birthdays and holidays.
One can be very imaginative in creating these bags, from all the different sizes you'll choose from to adding embellishments and one’s own style.
With this step-by-step tutorial, How To Sew a Drawstring Bag in Minutes, you'll see how easy it is! This DIY bag can be adjusted to any size needed. From small gift bags that can be reused after opening to large bags that will hold whatever you need, mastering DIY drawstring bags is a great skill to have.
Making drawstring bags yourself allows you to make it whatever size you need for holding office supplies, crafts, toys, or anything you'd put in a backpack.
It's also a fun and reusable gift wrap idea. This DIY bag can be sewn by machine or by hand, whichever you prefer. It's an excellent project for beginners but also fun for any skill-level sewist. That's the beauty of bags!
Sign Up For More Free Patterns >>
How To Sew a Drawstring Bag in Minutes
With this tutorial, you'll be able to see the versatility of drawstring bags and their various uses! Use your DIY bag for storing jewelry, serving as a gift bag for birthdays and holidays, or holding office supplies, crafts, and toys.
This beginner-friendly how-to encourages creativity, allowing you to choose your preferred size and what personal embellishments you want to showcase your style.
Overall, you'll learn how sewing a drawstring bag is a practical and enjoyable project that allows for customization and can be a reusable alternative to traditional gift wrapping.
Plus, scroll to the end of the tutorial for a PDF version that you can download and keep for next time!

Drawstring Bag Materials Needed:
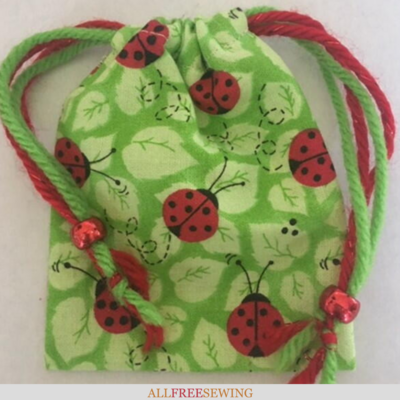
• Fabric of your choice – this bag was created from ladybug cotton material – Ladybugs are considered lucky! One piece of fabric measuring 10" x 4.25" creates a 4" x 3" bag.
• Yarn, ribbon, or cording – 12" in length (2 pieces)
• Scissors
• Matching thread
• Straight pins
• Large eye needle
• Fabric marking pen or pencil
• Sewing machine– or may be hand sewn
How to Make a Drawstring Bag:
- Cut a piece of fabric 10" x 4.25" – will make a 4" x 3" bag.
- Fold the length of the bag in half with wrong sides together.
- Measuring 1.58" from the top of the bag using a fabric pen or pencil, mark on both sides of the bag.
- Pin the wrong sides together.
- Starting at the 1.58" mark from the top, sew side seams together .125" down the sides of the bag.
- Turn the bag out so the right sides are facing each other.
- Press the bag with an iron and measure from the top of the bag and on both sides, mark 1.58" which will create the top casings.
- From the top mark, sew .25" down the side of the bags. – This will catch the inside .125" seam inside the .25" seam, so a French finished seam is made inside the bag and looks professional.
- Turn the bag right side out.

How to Make the Drawstring Bag Top Casing:
- At top of the bag, fold the fabric down to wrong side of fabric .25" and press.
- Turn top-side seams .25" into wrong side of the fabric and press.
- Fold both top seams down again so they meet each other to the 1.58” mark.

- Sew across horizontally each seam as close to the mark to finish the casings.
- Cut 2 - ribbon, cord, yarn, etc. x 12".
- Using a large eye needle, thread the cording through one casing seam and back through the opposite casing seam so that both ends of the cord are on the same side. Tie a knot at the end of the cord.
- Using the other cord, do the same threading at the opposite casing seam so the ends of the cord are on the other side of the bag. Tie a knot at the end of the cord.
- Embellish the bag as you please. I added two red pony beads on the cords prior to tying the knots on the end of the cords.


How to Sew a Drawstring Bag in Minutes Tutorial PDF
Want a PDF version of this tutorial? You're in luck.
Click to Download the DIY Drawstring Bag PDF
How to Adjust a Drawstring Bag Size:
To enlarge your bags, and have the dimensions accurate, increase the inches to the side and top of the bags equally. For example, if you want to make a bag that is 5" by 4" – the cut of the fabric will 11" x 5.25".
Have fun and enjoy making these fun drawstring bags!
Pin This DIY Drawstring Bag Tutorial for Later!

Want More?
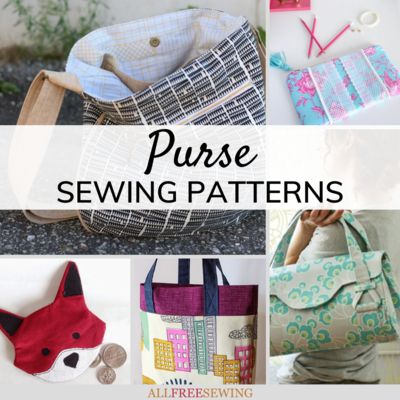
19+ Backpack Sewing Patterns >>
What's your favorite type of bag?
Let us know in the comments!
Read NextCarpetbag Tote