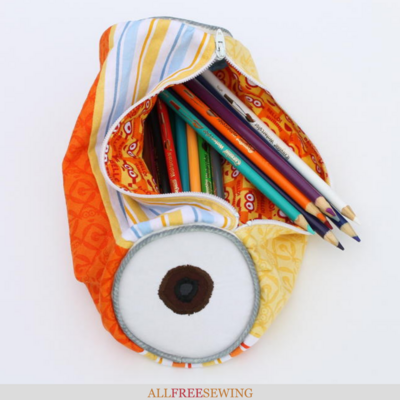
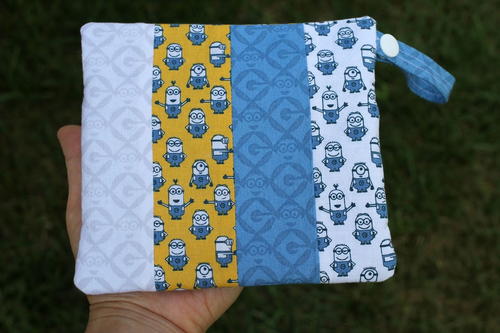
Mini Minion Zippered Pouch Sewing Pattern
This easy zipper pouch tutorial features everyone's favorite yellow movie stars, Minions!

The library is one of my favorite places to take my kids, but it can get a little chaotic trying to leave the play area, with a big stack of books, when they're both getting hungry and tired before lunch.
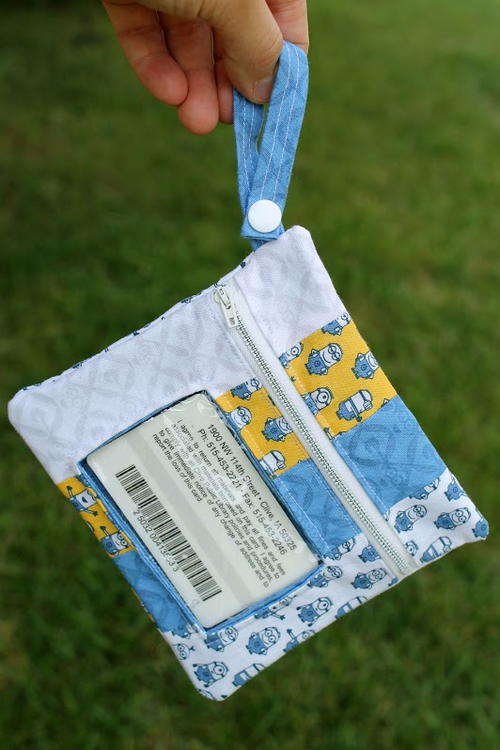
I often try to expedite the process by having my library card out and ready, but then it ends up in my pocket, and then my washing machine, or completely lost.
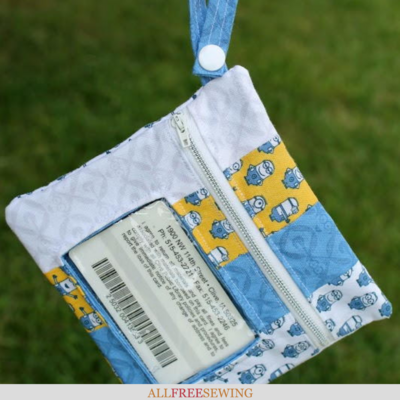
I decided to create a little pouch so my card was easy to grab and scan, without even taking it out! Even better, it's Minion-Themed. This Mini Minion Zippered Pouch Sewing Pattern is perfect. The zipper pouch has a little divider panel so you can slide your phone or car keys behind it if you're just running in quick.
You could also use this for a work badge or a college ID - anything that you need to scan! Using patchwork stripes make this easy zipper pouch tutorial a lot of fun to sew.
For this set, I used fat quarters from Quilting Treasures' Minion Fat Quarter Bundle.
Sign Up For More Free Patterns >>>
Project TypeMake a Project
Time to CompleteIn an evening
Sewn byMachine

Materials List
- 1 in a Minion fat quarter bundle
- 7-inch zipper
- Glue stick
- Clear piece of scrap vinyl scrap
- KAM Snap & setting tool
- Freezer paper
If you like this Minion project, then you are going to love this free tutorial for aMagnificent Minion Pencil Case Sewing Pattern
Minion Zipper Pouch Pattern (Free):
CLICK ANY IMAGE TO ENLARGE!
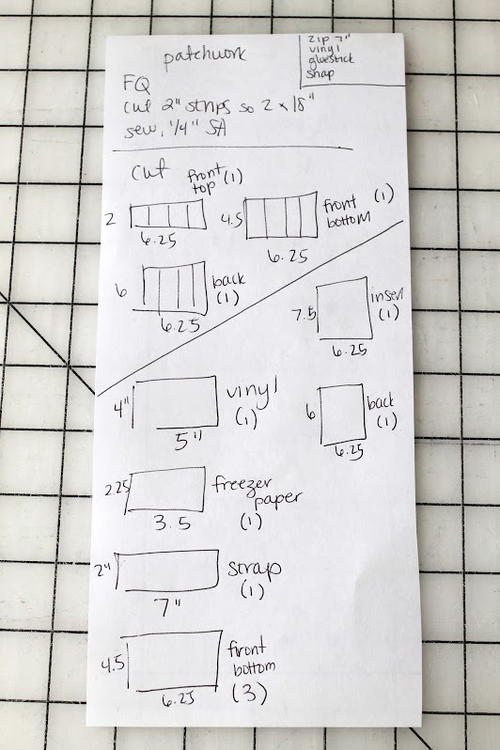
Prep: Cutting Instructions
-
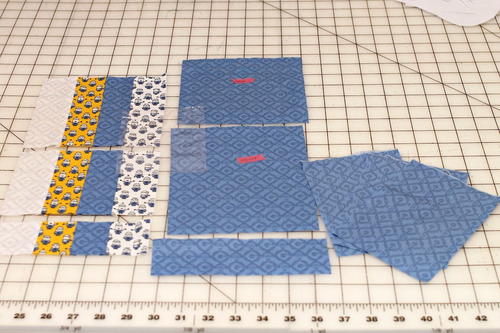
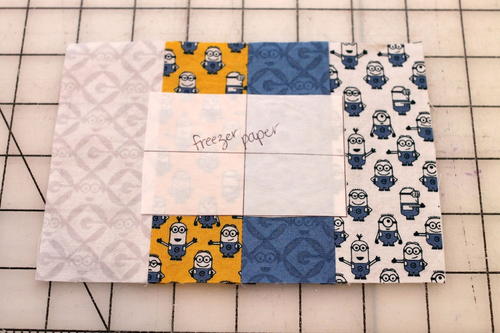
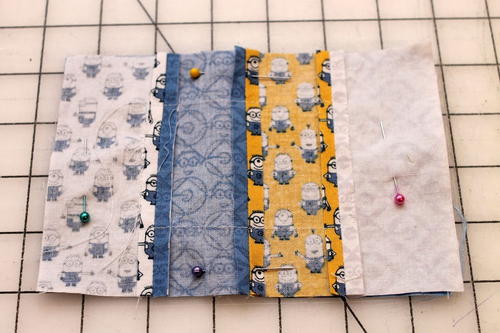
Cut first! Here is a visual of the supply list with the pieces and measurements and a picture of the different pieces cut - to make the patchwork 'fabric' to work from, first cut 2" strips (2" wide by 18" tall) from four different fat quarters and sew them together.
-
Patchwork Cuts:
- -Front top: 6.25" wide by 2" tall (1)
- -Front bottom: 6.25" wide by 4.5" tall (1)
- -Back: 6.25" wide by 6" tall (1)
-
Fabric Cuts:
- -Insert: 6.25" wide by 7.4" tall (1)
- -Back: 6.25" wide by 6" tall (1)
- -Strap: 7" wide by 2" tall (1)
- -Front bottom: 6.25" wide by 4.5" tall (3)
-
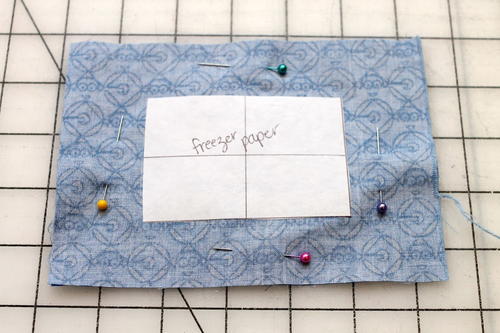
Freezer Paper Cut:
- -2.25" X 3.5" (1)
-
Vinyl Cut:
- -4" X 5" (1)
Pouch Sewing Pattern Instructions
Note: This entire tutorial is sewn with 1/4" seam allowance unless otherwise noted!
-
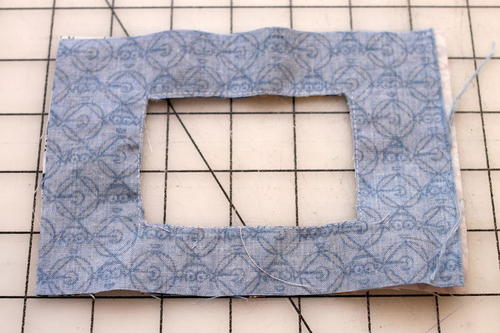
Center your freezer paper rectangle over your patchwork front bottom and iron the freezer paper shiny side down so it adheres. Sew right along the edge of the freezer paper, all the way around, and remove.
-
Layer your patchwork bottom & a front bottom right sides together (RST) and sew along the rectangle outline.
-
Cut out the rectangle you just created, just outside the stitching line (but don't cut through your stitches).
-
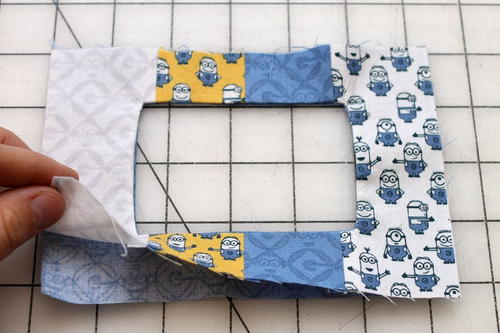
Pull one side through and press firmly.
-
Layer together the two remaining front bottom pieces together and repeat steps 1–4.
-
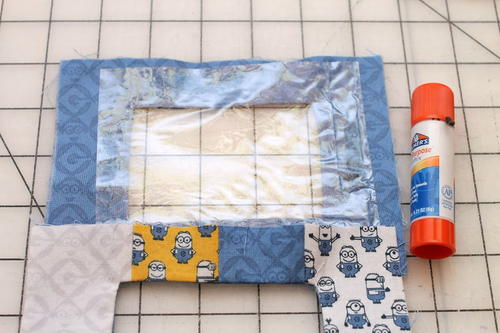
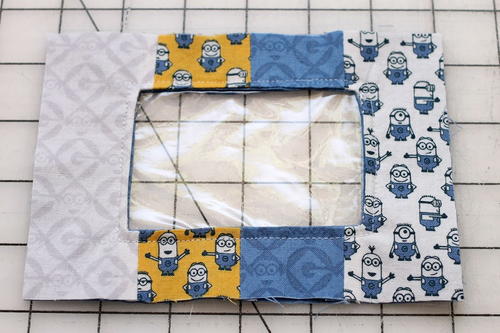
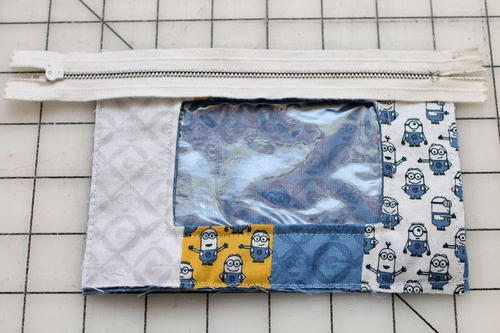
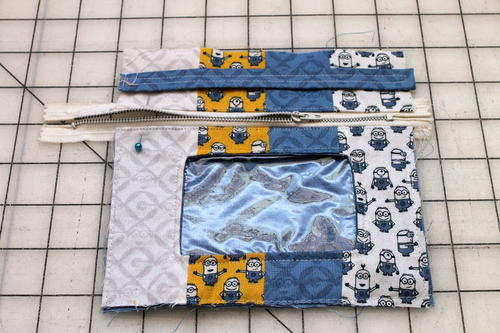
Slide your vinyl piece on top of the opening you've created and use a light strip of glue along each edge to hold in place. Layer the patchwork top over top of it.
-
Topstitch through all 3 layers, 1/8th of an inch from the edge.
-
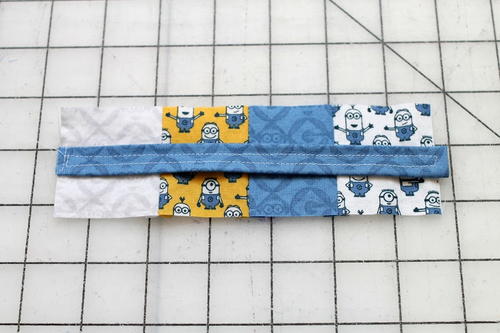
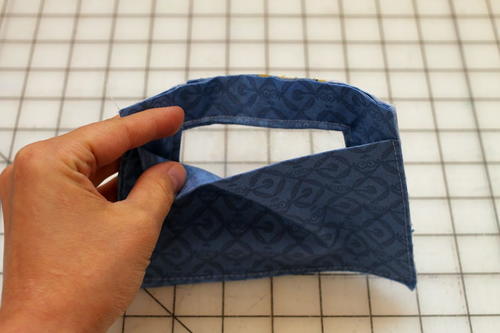
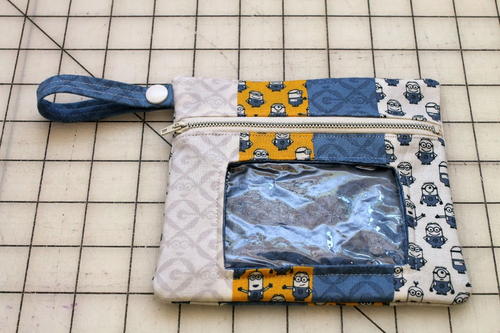
Time to make the strap - fold it in half lengthwise, press. Open, fold one short end 1/2" upwards with the wrong sides together (WST) as a hem and press. Open, press each long side to the middle crease you created first. Fold in half once more, sandwiching all the layers inside, press, and sew around all four edges.
-
Layer your strap on the patchwork front top piece, centered, and baste along one short end.
-
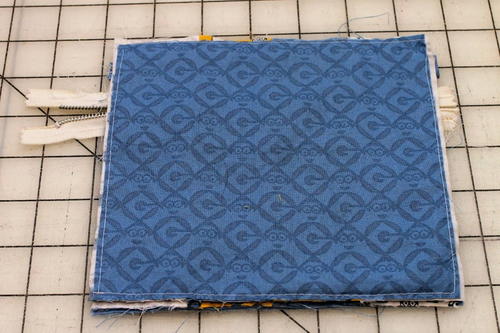
Take your back piece and layer it WST with your patchwork front bottom, baste around all 4 sides 1/8" from the edge.
-
Fold your insert piece in half, press, and layer on top of the patchwork front bottom, with the raw edges aligning with the patchwork front bottom's raw edges. Baste along all three raw edges.
-
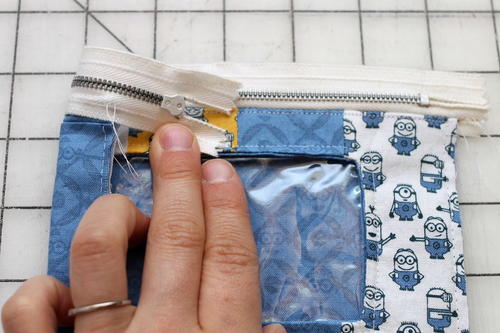
Layer your zipper RST on the patchwork front bottom, sew.
-
Press, topstitch.
-
Layer the other side of the zipper on the patchwork front top and sew.
-
Topstitch the zipper top side.
-
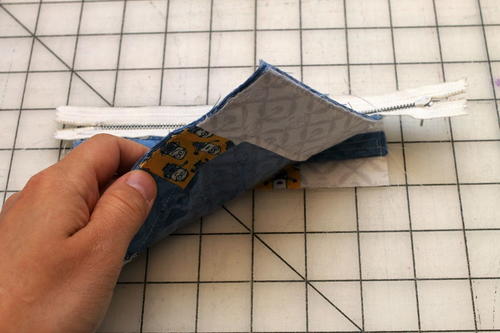
Make sure the zipper is half open and sew the patchwork piece and back piece, RST, around all four sides. Pull it through your zipper opening, check that everything is aligned, pull it back inside out. Trim all four corners and the zipper tails.
-
Pull right side out and insert the snap on the strap. Press all seams and you're done!


Read NextHow to Make a Bag in One Hour
Your Recently Viewed Projects
Thanks for your comment. Don't forget to share!
Tricia108
Aug 30, 2018
This is such a great idea. I have a bad habit as well for putting my card in my pocket, being the library card, credit card etc. This would help solve that. You do just have to scan the library card but in the case of the credit card, if it makes it easier to just slip it into the pouch. And I love the Minions! Of course you can other decoration as well. Good instructions. Thanks you.
KLC
Aug 24, 2018
This is cute. Less annoying than some Minion crafts. And I like that you can use other fabric coordinates to make the pouch too.
Report Inappropriate Comment
Are you sure you would like to report this comment? It will be flagged for our moderators to take action.
Thank you for taking the time to improve the content on our site.