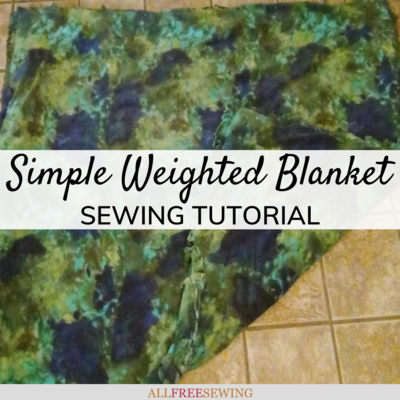
Simple DIY Weighted Blanket Tutorial

Design a sewing project that's practical and can help reduce stress with this full tutorial on how to sew a weighted blanket. Guest blogger Carolyn Wainscott shows you how to make a DIY weighted blanket that serves as a much-needed comfort object for adults and children.
This easy sewing project is designed to help relieve stress by creating a blanket that applies gentle pressure to the body, providing a calming effect that can help lessen anxiety.
In this weighted blanket tutorial, Carolyn covers the process of creating a simple weighted blanket, from weighing the pellets to adding the finishing stitches to your fleece blanket.
She also discusses the benefits of using these blankets as a form of therapy and has a linked YouTube video for visual learners. If you've been looking for budget-friendly ways to design a weighted blanket, then you don't want to miss this sewing tutorial.
Searching for even more sewing and quilting tutorials? Be sure to visit Carolyn's blog, Carolyn's Canvas!
Sign Up For More Free Patterns >>>
Why Make a DIY Weighted Blanket?
Just as I was going to pull this article up to finish it, my granddaughter, Angie, messaged me to tell me how much she liked her weighted blanket and offered to pay for it but was afraid it would cost “gold”. I asked her to give me a comment and she sent this:
'I love this weighted blanket! It does seem to be helping with my anxiety and allows me to sleep more peacefully. I currently weigh 130 lbs, so I don't mind the extra warmth this blanket has brought me during the night. For someone who is fighting anxiety daily, this blanket has helped to calm my sensory responses shortly after getting into bed, as well as helped me to receive a better night's sleep.'
A weighted blanket wasn't on my bucket list until Angie developed anxiety from the extreme pain and all that goes with having two surgical procedures on her spine that weren't successful. She thought a weighted blanket might help but an almost $300 price tag made it prohibitive.
That's when a weighted blanket was added to my bucket list, with research on the whys and hows of the way weighted blankets work.
Why Weighted Blankets are Beneficial
The “whys” were interesting:
The underlying science on weighted blankets is called deep touch pressure (DTP). DTP is about gently applying pressure to the body to increase the release of serotonin, as gently applying pressure to the body releases a chemical that promotes relaxation. Weighted blankets may help those who have the following:
• Sensory disorders of any kind: Weighted therapy can help increase serotonin and melatonin levels overnight.
• Sleep disorders of any kind: Weighted therapy can help increase the levels of serotonin and melatonin overnight.
• Insomnia: Falling asleep and staying asleep.
• ADD/ADHD Spectrum Disorder: Many ADHD kids use blankets to calm down after school or during therapy sessions, or to relax and fall asleep.
• Asperger’s and Autism Spectrum Disorder: Many of these kids use blankets to calm down after school or during therapy sessions.
• Restless Leg Syndrome (RLS) and fidgeting legs due to chemotherapy treatments or menopause
• Anxious feelings and panic symptoms, stress and tension, cancer
How to Select the Appropriate Weight for Your Blanket
The “hows” were informative but more involved than I thought I wanted. (Sewing 100 5” x 5” bean bags is not my cup of tea.) A weighted blanket is to be 10% of the body weight. Since Angie weighs 130 lbs., her blanket needed to be appoximately 13 lbs. A weighted blanket needs to cover the person, not the whole bed. Here is a suggested weight guide:

Materials Needed:
For Angie's adult weighted blanket:
* 4 yards of fleece (60” wide). 2 yards are for the front, 2 yards for the back.
* 13 lbs (10% of her weight) of plastic pellets
* 12 fabric strips (11” x 60”). An old sheet can work for these fabric strips, although I used fabric from an 11” wide roll of muslin I've had for years.
**Note: The most economical plastic pellets I found were from: Boardz N Bagz, 528 E. 10th Street, Jeffersonville, IN 47130
I ordered a 25 lb bag and with shipping, this was still less than other vendors. Besides, there are other uses for the pellets and there may be another weighted blanket or two in the future. The order came very timely so I could get the blanket done.
Constructing Your DIY Weighted Blanket
** Note: For visual learners, there is a link to a video tutorial on YouTube on constructing this weighted blanket. Click Here for the Weighted Blanket Video Tutorial!
1. Weigh pellets.

2. The 60” strips were marked into 5” segments and folded in half length-wise. Sew segments together.
3. Chain sew strips into 5” segments. Cut apart strips (not segments).

4. Sew across tops of 5” segments, leaving space on each for filling with pellets.
5. Fill 2 strips with batting for top and bottom rows - no pellets. Sew across tops to close.

6. 10 strips - Stuff outside segments with batting, and the inside segments with pellets. Sew across tops, closing openings - outside border rows (top, bottom, sides) - will be filled with batting.

7. Sew strips to blanket back.

8. Place top onto back with strips facing up. Sew blanket front onto back, leaving 2” border all around.
9. Cut fringe all around.

10. Your weighted blanket is finished!

You can find more of Carolyn's sewing and quilting projects on her blog, Carolyn's Canvas!
Follow Carolyn's Canvas on Facebook here!
Want More?
12 Tag Blankets for Babies Patterns >>
What kind of full tutorials would you like to see on AllFreeSewing?
Let us know below in the comments!
Read NextHow to Sew a Button on Pants
Your Recently Viewed Projects
Thanks for your comment. Don't forget to share!
beckyampuero 70816 20
Nov 22, 2018
I would love to have one of these, but I have allergy issues along with everything else and I would like to know how to clean it before I go to the trouble of making it. You have made the construction understandable for which I am very grateful. $300 is out of my budget too. Thanks!!
Report Inappropriate Comment
Are you sure you would like to report this comment? It will be flagged for our moderators to take action.
Thank you for taking the time to improve the content on our site.