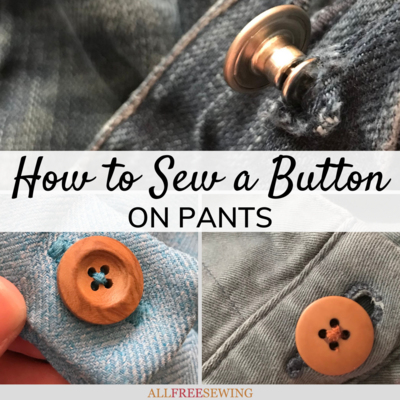
How to Sew a Button on Pants
Learn how to fix a button on pants when it has fallen off or when you're sewing a brand new pair with this tutorial.

Attaching buttons onto pants is a sewing skill that will always be useful. Buttons are a common closure on many kinds of trousers, from denim jeans to pajamas to dress pants.
Despite being small in size, buttons can be intimidating if you haven’t worked with them before.
Whether you are creating a new pair of trousers with buttons or repairing a button that’s fallen off, this How to Sew a Button on Pants tutorial and the following tips will surely help!
First, learn the types of buttons you'd find on pants, then how to sew certain types of buttons on pants. This is particularly helpful for when you want to add a new button.
Finally, a button repair tutorial for when your button has fallen off your existing pair of pants. It's all here and ready for you to master all buttons.
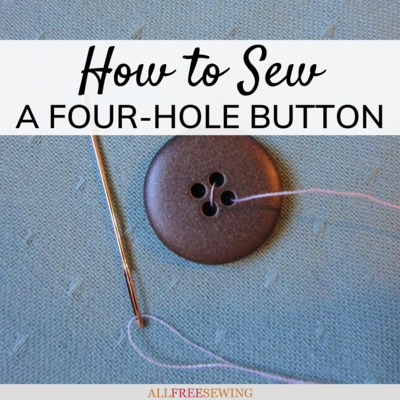
For general button tutorials, please visit the following pages: How to Sew a One-Hole Button, How to Sew a Two-Hole Button, and How to Sew a Four-Hole Button.
Are you curious about pants/jean repairs that don't involve sewing? Check out How to Fix a Hole in Pants Without Sewing.
Types of Buttons Used on Pants
So, what kinds of buttons are commonly found on pants? It actually depends on the type or kind of pattern you’re making! Most pants sewn at home (that have buttons) will be trouser-style or pajamas.
The buttons are typically found at the top of the fly and occasionally at the side or back pockets. Fly top buttons on trousers tend to be medium in size (about 3/4–1 inch across), relatively thick, and can occasionally be adorned or statement-making.
They can have a flat top with a loop for sewing on (shown below), or have two or four holes so the thread is visible. Pajama buttons are often decorative only, so those can just be sewn right on.

Denim jeans almost always have a button at the top of the fly waist. Additionally, many have a “button fly” closure that extends the length of the fly instead of a short zipper.
These usually have about four or five metal buttons that go through buttonholes hidden by a flap.
Sometimes these buttons are sewn on like a regular loop-back button, but often they consist of two pieces that snap together through a hole in the fabric (almost like a grommet).
The latter are commercially available, though they may be slightly harder to install than a regular button.
How to Sew Waistband Buttons
Most buttons on the waistband of pants can be sewn on by hand with a needle and thread. Some machines are capable of connecting buttons to fabric- but this is primarily used in mass production of clothing.
To sew on a waistband button by hand:
1. Decide on the correct button size, type, and material. If you’re using a pre-made pattern a button size will be recommended, as well as where to mark the fabric and sew it on.
When creating a pants pattern (or just sewing a button on a one-of-a-kind garment) the button choice is more flexible. The mark showing where to attach the button can be made with a washable fabric pen or even a quick stitch.

2. Pick a matching thread and get your hand-sewing needle ready. Knot the thread at the end.

3. Start from the hidden (wrong) side of the garment so the knot is less visible. Sew the button on by stitching through the hole multiple times.
If the fabric the button will pass through is thick, leave a little space between the button and this material. This can be accomplished by holding the button with one hand and winding the thread around the base several times.
4. Secure the thread, knot it, and cut it off when the button is fully attached.

5. Trim off any remaining extra threads and double-check that the button is fastened well!
Creating Buttonholes
Making buttonholes is another important aspect of attaching buttons. Most buttons will go through a reinforced hole in the fabric (unless it closes with a loop or a snap). The hole should be in a coordinating thread color to blend in, or a contrasting color to add a fun element.
It should also be just larger than the button so it can connect snugly but also allow for some stretching over time. If you’re using a pattern the buttonhole spacing should be pre-marked at the beginning, end, and center.
Buttonholes can be hard to get perfect the first few times, so it’s recommended to practice on some scrap material. Almost all sewing machines can create a buttonhole with a specific setting, which is then carefully snipped open to allow the button to pass through.
Garment manufacturers even have machines that only create buttonholes (these are rare for home use due to the cost and complicated nature of the machines).

Buttons on Pants Pockets
Smaller buttons are often used as closures on the back pockets of pants. This is more common on men’s trousers (and they are often sewn closed by manufacturers), but not totally unheard of on women’s pants.
Pocket buttons are smaller across (about 1/2 - 3/4 inch across) and lighter, otherwise they might be felt by the wearer when sitting down. They often close with a tiny folded-fabric loop that slips over the button.
Back pants pocket closures are helpful for keeping items secure, preventing them from falling out during wear.

How to Fix a Button on Pants / Repair Buttons
Lastly, a sewist should learn how to repair buttons that have ripped or fallen off of a pair of pants.
This is most common with those found on waistbands, but any kind of button can come loose. If this happens, there are a few simple steps to reattach the button:
1. Clean up and dispose of any remaining threads on both the button and the pants. A pair of fabric scissors and a seam ripper are the most helpful, especially if the fabric is thick. If the fabric is delicate be very careful not to rip a hole.
In this case, it might be best to leave some of the old thread on the material for stability unless it will look unsightly.

2. Select a thread type and color that matches the fabric, button, or the prior thread used. It should coordinate with the garment, not clash with it. A color that is the same as that of the button will help the thread blend in more.
3. Sew the button onto the pants as we discussed earlier for newly-made trousers. If the fabric is damaged where the button ripped off, a small bit of interfacing can be added in between the layers for more stability.

4. Clip up any loose threads and check the security of the button. If it’s possibly going to come off, reinforce it until it’s strong.
No matter which button you are using, you should be able to use these quick tutorials and tips for adding or repairing pants with new buttons.


Want More?
Types of Clothing Closures >>
Have you ever sewn a button onto a pair of pants? Have any tips to share?
Read NextWhat is a Serger?