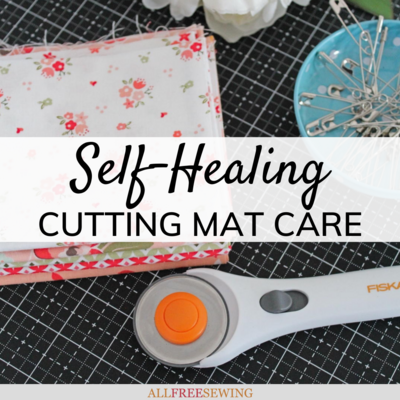
Self-Healing Cutting Mat Care
Learn the best ways for cleaning self healing cutting mat and general care for this important sewing tool.

Self-healing cutting mats are an important tool for any modern quilter but how do they actually work? They are made from tiny independent pieces compressed together to create a solid cutting surface.
The blade of your rotary cutter goes between the pieces as you cut, separating them so you’re not cutting on the surface, and their “memory” closes them back together – hence, self-healing. Cutting a mat that's self-healing can be a little unnerving at first but you'll soon get used to it.
This page, Self-Healing Cutting Mat Care, is all about caring for your sewing companion. As with all of your quilting tools, regular maintenance will ensure your cutting mat stays in tip-top condition and that you're getting the most for your hard-earned dollar.
Sign Up For More Free Patterns >>>
Below, you will find a few tips for caring for your self-healing cutting mat from Rose at Threadbare Creations.
1. Remove Loose Threads and Fibers
A self-healing cutting mat will heal from the cuts we make with our rotary cutters, but loose threads and fibers get caught in the cuts and prevent the mat from healing as it should. We need to remove these threads etc. on a regular basis to allow the mat to do its thing.
Start with a scrap piece of wadding - the loose threads will stick to the wadding making them easy to remove. Use an eraser, or a soft dish scrubber or soft toothbrush dipped in room temperature water, to lift out the fuzz or fibers left behind but remember to be gentle. Harsh scrubbing will scratch and damage the surface of the mat and it will also scrub away your grid lines.
A pair of tweezers will help remove any stubborn threads or fibers stuck in your mat but again use a gentle hand and be careful not to stab or pierce the cutting mat.

2. Treat Stains Quickly
Make sure you clean up any spills immediately - we all have the occasional coffee or tea spill, and this will stain your mat. Dampen a soft cloth with cool water and wipe the spill clean. Ensure your mat is completely dry before storing.
Scuff marks or pen and marker marks can be removed with a magic eraser dipped in a little room temperature water and a splash of dishwashing liquid. Treat these marks quickly and gently as those that have been left too long will only fade, not disappear completely. This also works for printer ink - don't ask me how I know ;)
The best way to treat any stains on your cutting mat is to act quickly and be gentle. Prevention is the key but no matter how careful we are, stains will happen. As long as you avoid harsh chemicals and you wipe gently not scrub, you should be fine.

3. Warp Prevention
Your cutting mat should be stored flat at all times. Leave your cutting mat on your cutting table, under a bed or the couch and ensure its lying flat and not leaning or standing on its edge.
Never roll your mat - if you're traveling to a retreat or a sewing class, consider purchasing a smaller-sized cutting mat that can be laid flat in the boot of your car, and pack it last don't load everything on top of it.
Ironing on your cutting mat is a definite no-no, the heat will warp the mat and once it's warped there's no magic solution to straighten or flatten your mat. This also applies to a cup of hot tea or coffee - keep you cup away from your cutting area to prevent accidental spills or heat damage (you'll protect your fabric as well).
Keep your mat away from direct sunlight or heating vents and never leave your mat in a hot car because it will warp.
Basically, think of any heat source as your cutting mats worst enemy, and keep them separated at all times!
4. Move It, Move It!
Now this one is the one I'm the most guilty of - I cut in the same spot every time! I have this huge mat with all this space and I continually cut in the same 6" square section. It’s a bad habit I'm trying to break but I basically stand and cut in the same spot every time I sew!
Try to use as much of your cutting mat as you can when cutting, and alternate where you position yourself to work on a regular basis or turn your mat around. You'll still be able to use the grid lines and because you're using a cutting square it shouldn't matter which solid line you chose to line up your first cut.

5. Rotary Blades Only!
A self-healing cutting mat is designed for rotary blades only so don't stab it with pins or tacks, or cut it with scissors - they're designed to take abuse but not that kind of abuse!
A well-maintained cutting mat will increase the life span of your rotary blade but a dull blade will ruin your mat. When your blade is dull you tend to saw back and forth to make your cut and this causes damage that won’t heal.
Make sure you change your blades at the first signs of dullness to prevent making unhealable grooves in your cutting mat. Learn more with these tips for your cutters.
6. Moisturize and Condition
Self-healing cutting mats need moisture. The constant use of fabric will draw moisture from the mat and shorten its life expectancy, plus your blades will become dull faster.
It is recommended to regularly soak your mat in the bath, in a solution of cool water and 1/4 cup white vinegar for every gallon of water for 15 - 20 minutes, cleaning away stains and fibers at the same time.
Rinse and allow the mat to air dry (not in direct sunlight) and store when completely dry - this will also help remove odors if your mat is smelly. {source - National Quilting Circle}
A self-healing cutting mat is a big investment but with proper care, your mat should last for years. Make sure you clean it regularly, keep it away from heat sources and store it flat, and your mat will stay in tip-top condition making you one very happy quilter.

BONUS! How to Use a Rotary Cutter and Mat
If you're a beginner and haven't yet mastered operating a rotary cutter and self-healing mat, then be sure to watch this video on how to use a rotary cutter and mat.
Plus, get the latest sewing patterns and tutorials by signing up for our Sewing it Up newsletter!
What size of self-healing cutting mat do you prefer?
Let us know in the comment section.