Insulated Casserole Carrier Pattern
Keep hot dishes hot and cool dishes cool no matter the distance with this free printable casserole carrier pattern.

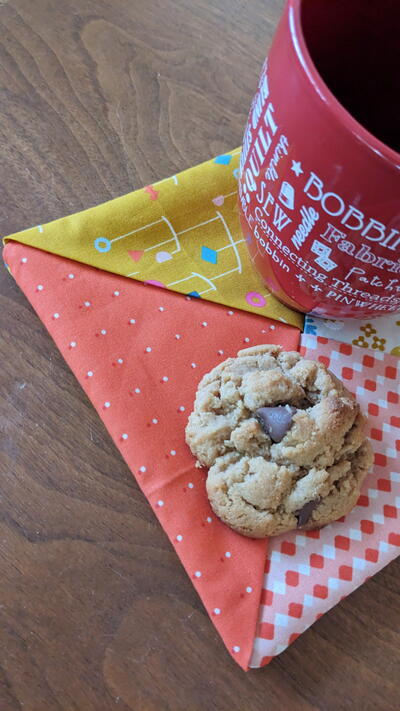
When potluck season rolls around, it's important to be prepared. If you've ever wondered how to get a steamy pan of lasagna to a potluck without it becoming tepid, then this Insulated Casserole Carrier Pattern is for you! This clever homemade casserole carrier has thick interfacing-enforced handles for easy transport and an insulated lining to keep hot dishes piping hot and cold dishes snow-cool. You can even monogram this handy casserole tote pattern so that everyone will know who the 5-star chef of the party is! With a kitchen caddy as handy as this, you'll never carry your kitchen masterpieces with your hands again.
Project TypeMake a Project
Time to CompleteIn an evening
Sewn byMachine

Materials List
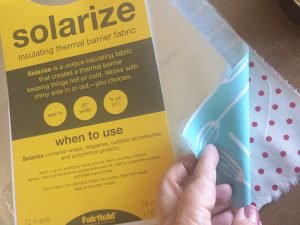
- 40" x 12" piece of Solarize
- 40" x 12" piece of fabric for interior of the carrier
- 40" x 12" piece of fabric for exterior of the carrier
- 30" x 17" piece of fabric for interior of the carrier
- 30" x 17" piece of fabric for exterior of the carrier
- 2 4" x 40" pieces of fabric for the handles
- 1 4" x 40" piece of interfacing for the handle
- Thread to match fabrics
- JOY monogrammed letters (optional)
- 4 pieces of sew-on hook and loop tape measuring 5-1/2'' long
- Sewing machine
- Basic sewing kit
Instructions
-
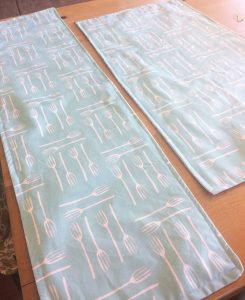
To create the carrier, layer the 40″ x 12″ interior and exterior fabrics with the Solarize down to create a “sandwich” in this order:
- Interior fabric, right side up
- Exterior fabric, right side down (facing interior fabric)
- Solarize, shiny side up. It’s important that you place the shiny side as up as this will ensure that the reflective material will be on the inside of the casserole carrier, which will help keep your dish warm or cool.
-
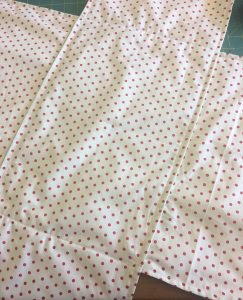
Sew around the edges of your sandwiches, using a 5/8″ seam allowance. Be sure to leave 2-3 inches open so you can turn out the fabric. Once sewn, turn the fabric so right sides are facing out. Press the opening you left, then top stitch around the rectangles.
-
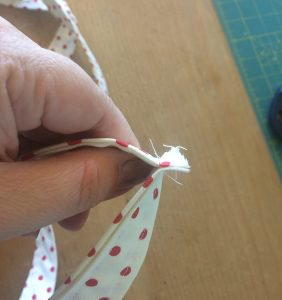
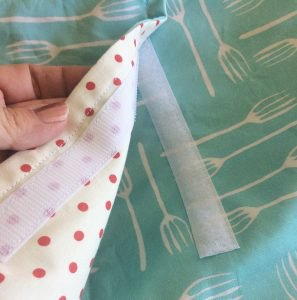
Using the fabric and interfacing you cut for the handles, make two handles. Iron the interfacing and fabric for the handles together. Fold in half, and then reopen. Fold long edges towards the center and press. Fold in half again and press. Stitch along the long edge.
-
Now sew the two handles together, end to end to create a loop. Make sure the loop isn’t twisted!
-
Lay the large rectangle, face up on your work surface. Lay the handle loop over the top lengthwise. Make sure straps are lined up 4″ from each long side and make sure the straps are evenly centered in the middle. Pin in place. The strips will only be sewn down to the bottom piece of the casserole carrier, so begin stitching the straps in place 9 inches from the short edge of the rectangle and stop after you sew for 10 inches.
-
Now lay the smaller rectangle down on your work surface, with the outside fabric down. Then lay the larger rectangle over it, again with the outside fabric down, centered perpendicular to the smaller fabric. Stitch the rectangles together along the center as shown. Making sure you do not catch the handles while you are sewing.
-
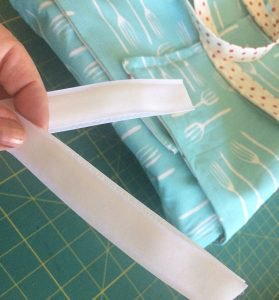
Lay carrier open on the work surface, open. Place your favorite 9″ x 13″ casserole dish in the center. Fold short ends in towards the center of the dish. Mark where the edges overlap. Then fold the long ends over and mark the overlap. Pin the hook and loop tape, centered, where you marked the overlap. For the short pieces, one side of the hook and loop tape should be on the inside of the carrier and one on the outside. Repeat for the long pieces.
Tip: It helps to pin the hook and loop tape in place and try to open and close the carrier with the casserole dish inside to make sure you have put the tape in the right spot.
Once you are happy with the placement, stitch in place. -
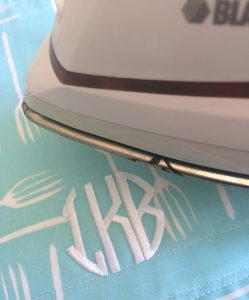
If you want to place a monogram on your carrier (which will help your host know who left their carrier/casserole!) iron on your JOY Monogram letters to the edge of one of the long pieces.

Read NextAmazing Amish DIY Dish Towel