This project was submitted by one of our readers, just like you.
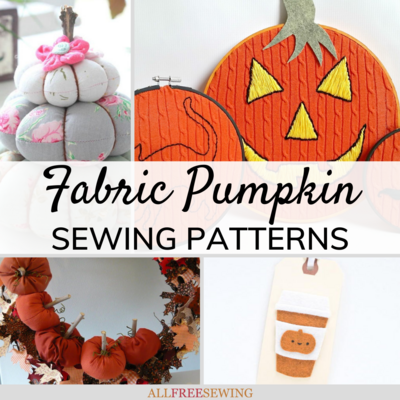
The Patchwork Pumpkin

The Patchwork Pumpkin
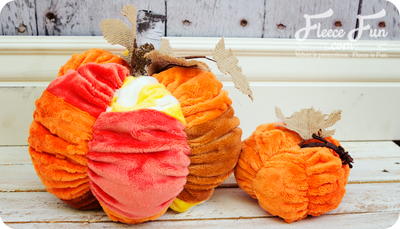
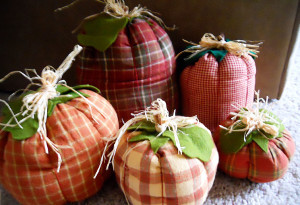
"Pumpkins are a fall decorating staple. This cute pumpkin is designed to be made from several different fabric scraps (hello scrap buster!) patchwork. It’s a simple pattern with adorable results! One of my favorite things about this piece – if my two year old get his hands on it, it’ll be fine. In the example I used cuddle fabric, but any number of fabrics will work with this free pattern. Cotton, burlap, felt and yes even velvet."
Project TypeMake a Project
Time to CompleteIn an evening
Sewn byHand

Materials List
- Fleece Fun’s Patchwork Pumpkin Pattern
-
1/4 yard fleece, cuddle or minky fabric
- Thread
-
Needle
-
Scissors
- Stick (bark like paper can be found in the floral section of a hobby store) burlap leaves (floral section of hobby store) batting/ beans or other filling
Instructions
-
Print up and cut out pattern pieces. In the pattern example I used 4 different fabrics, a minimum of 3 is suggested. Cut 6 of each pattern pieces 1, 2, and 3 from different fabrics. You will make a total. Note that wedge of the pumpkin is not symmetrical – be sure to mark the top with a pin.
-
Layout each wedge, alternating the fabrics in a pleasing manner. Then using a half in seam allowance sew pieces 1 to 2 and 2 to 3 to form a wedge. Continue until you have made all 6 wedges.
-
To give the fabric pumpkin that nice ribbed look, we’re going to ruche the sides of each wedge. Sew a basting stitch along each side of the wedge, then gather. Repeat on all wedges. Note: Be sure to leave a pin at the top of each wedge to you know which is the top (piece 1).
-
Pin and sew the wedges together, using a half inch seam allowance. Be sure to pin the tops ( the end marked with a pin) together. Pin along the side and sew. Continue to build the pumpkin all the way around. When you sew the last wedge to the first wedge, leave a 2 to three inch gap at the top for turning.
-
Turn pumpkin right side out. Stuff to desired firmness. place stem in the top and hand stitch the gap shut and secure the stem. Add leaves if desired. You’re finished!

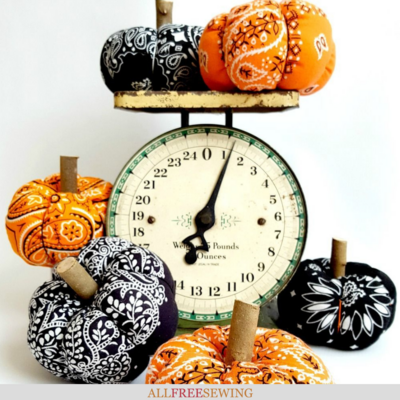
Read NextHalloween Bandana Pumpkins