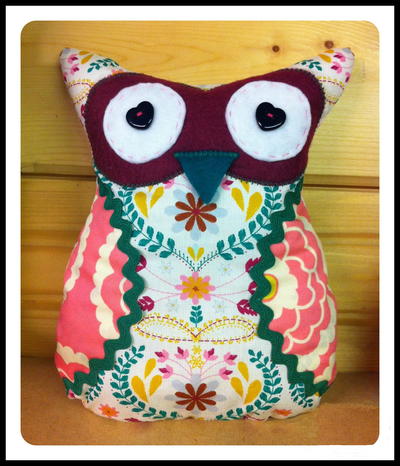
Miss Muffet’s Round Tuffet Pattern
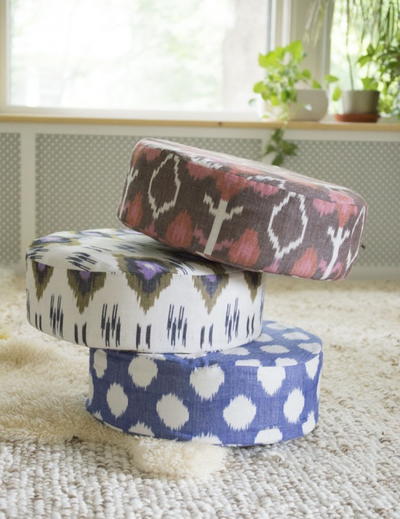
You won't believe how casual, cozy, and hip your room will look after following this boho tuffet tutorial.

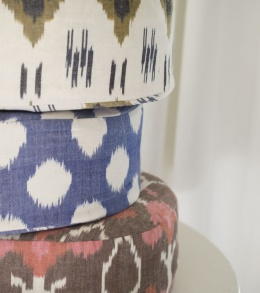
You know the story of Little Miss Muffet, but did you know just how stylish her tuffet was? With Miss Muffet's Round Tuffet Pattern, you can give your living space a casual, boho vibe with or without any curds and whey. After following this unbelievably simple tuffet tutorial, everyone will be able to lounge around in the same room with equal comfort. Batting and a foam tuffet support make this free round tuffet pattern especially squishy so that you can sit on these pieces for hours without getting sore. The best part? An easy zipper attachment makes these removable tuffet covers washable!
Project TypeMake a Project
Time to CompleteIn an evening
Sewn byMachine

Materials List
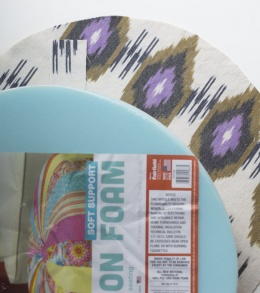
- Soft Support Foam Tuffet
- Low-Loft Batting
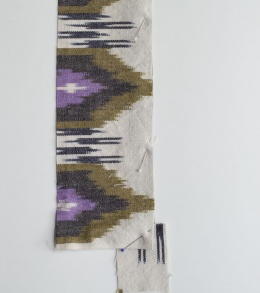
- 1 Yard of fabric
- 1 18'' Metal zipper
- Standard sewing supplies including a zipper foot
Instructions
-
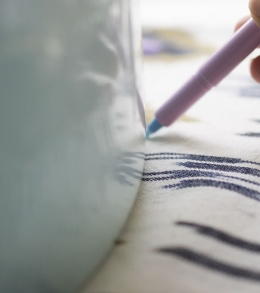
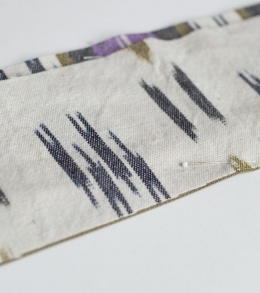
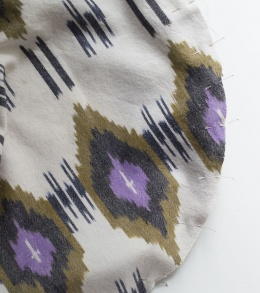
Fold your fabric in half so that the selvedges meet. Trace an outline of the foam tuffet onto your fabric with a marking tool.
-
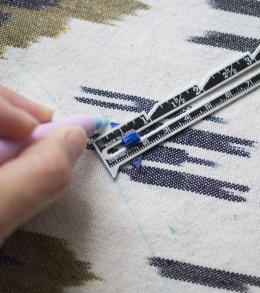
Remove the foam tuffet and use a sewing gauge to add 3/8″ all along the circumference of the circle you drew.
-
Cut the following from your fabric:
- Cut out the circle shape you just traced, this will cut two because you folded your fabric.
- Cut one rectangle of fabric sized 40″ by 6.5″.
- Cut two rectangles sized 19″ by 3.75″ for sides of the zipper.
- Cut two strips of fabric sized 1.5″ by 2″ as zipper tabs.
- Set the fabric and zipper aside.
-
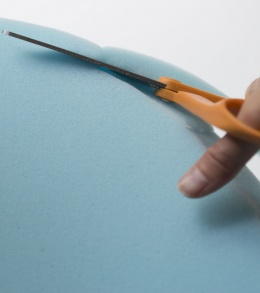
Prepare your foam tuffet but shaping it a little bit:
- Cut a bevelled edge around the top of the foam tuffet by cutting at a slight angle with scissors.
- If you want even more shape, cut even more with the scissors at the top edge.
-
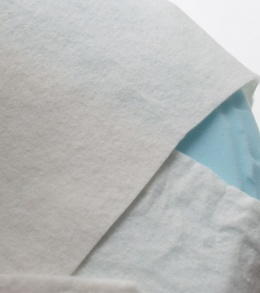
Wrap strips of quilt batting about 6.5″ wide around the foam tuffet such that the ends meet at the bottom. Add a bit of glue to hold them in place. Set it aside to dry.
-
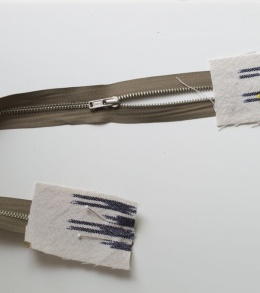
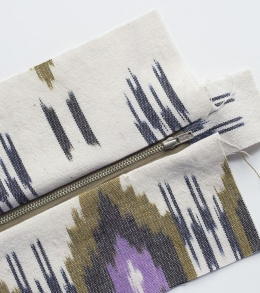
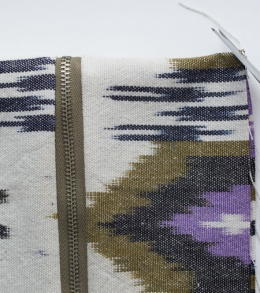
Attach the zipper foot to your sewing machine. Pin the small zipper tab fabric to each end of the zipper. Sew, with a 3/8″ seam allowance. Press the fabric, once sewn, away from the zipper.
-
Pin the 3.75″ by 19″ rectangle of fabric over the zipper, right sides together, so the right side of the fabric aligns with the twill tape edge of the zipper. The zipper should be centered in the middle of this fabric. Do not worry if the zipper tab fabric sticks out; we will be cutting it away later. Sew just to the right of the zipper.
-
Repeat the same thing for the other side of the zipper tape.
-
Press all fabric away from the zipper.
-
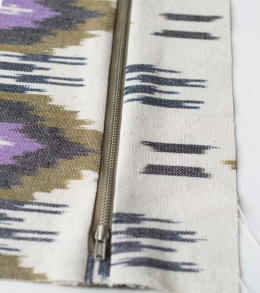
Trim away edges of your zipper pieces so that it measures a clean 6.5″ by 19″.
-
Now we are at the final step in creating the sides of our foam tuffet. Pin each short end of the 40″ by 6.” rectangle of fabric, right sides together, with the short end of the zipper portion. Sew each side with a 1/4″ seam allowance. Press with an iron. You should now have a circle of fabric with a zipper on one side. This constitutes the perimeter of the circular pouf.
-
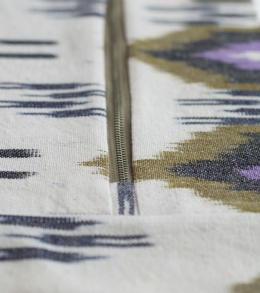
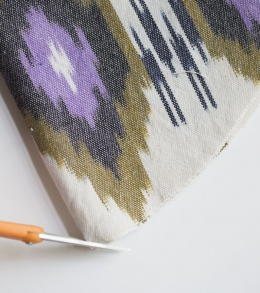
In order to later attach the top and bottom to our perimeter, we need to make notches that mark each quadrant of the perimeter on both the pouf sides and circular top and bottom. To do this, fold the perimeter fabric such that each end of the zipper meets each other and make a small snip marking the halfway point. Make another small snip at the other side of the perimeter. Fold again, so that each notch mark meets itself and create notches in the sides. This will create a notch mark in every quarter of the perimeter piece.
-
Repeat the same thing with the circular cuts of fabric. First fold the circle in half, and snip at each end. Then fold again and snip notches in the remaining sides.
-
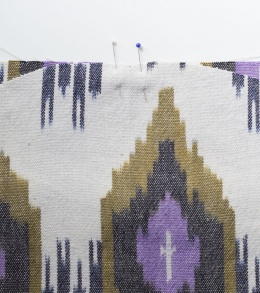
Using one of the circular cuts of fabric, align a notch with one of the notches on your perimeter piece, right sides together.
-
Continue to match notches on the perimeter with those on the circular piece. Once you have matched up all quadrants with each other, begin to pin all along the raw edges.
-
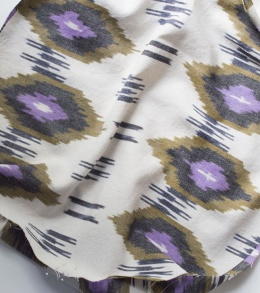
Sew along the pinned edge with a 3/8″ seam allowance. Open up the zipper and repeat with the other circular cut of fabric. Pin and sew in place, just as you did before.
-
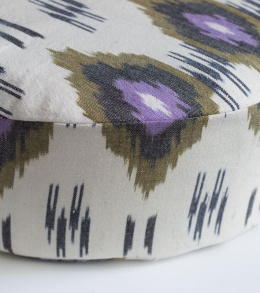
Turn your pouf right sides out! Now you can insert your re-shaped foam tuffet. To do this squish it and gently insert it as you squish so you don’t put too much pressure on the zipper. It should fit nice and snug.
-
Admire your beautiful creation, bring out the olives, and invite over some friends!
Read NextEmbroidered Word Art
Your Recently Viewed Projects
Thanks for your comment. Don't forget to share!
Seth
Nov 30, 2018
I always admire good ideas that are also useful and these round 'tuffets' are exactly that. In our home they will provide handy extra seating when the house is full of family and friends or when the kids have sleepovers. I love switching up the decor in a room with a few cushions and here's an ideal opportunity!
KLC
Jul 27, 2018
These are not only cute but super useful! When people come over, I sometimes don't have enough chairs. These will be a nice substitute for the hard floor. Plus, they look good when not in use.
Report Inappropriate Comment
Are you sure you would like to report this comment? It will be flagged for our moderators to take action.
Thank you for taking the time to improve the content on our site.