Great Outdoor Baby Blanket
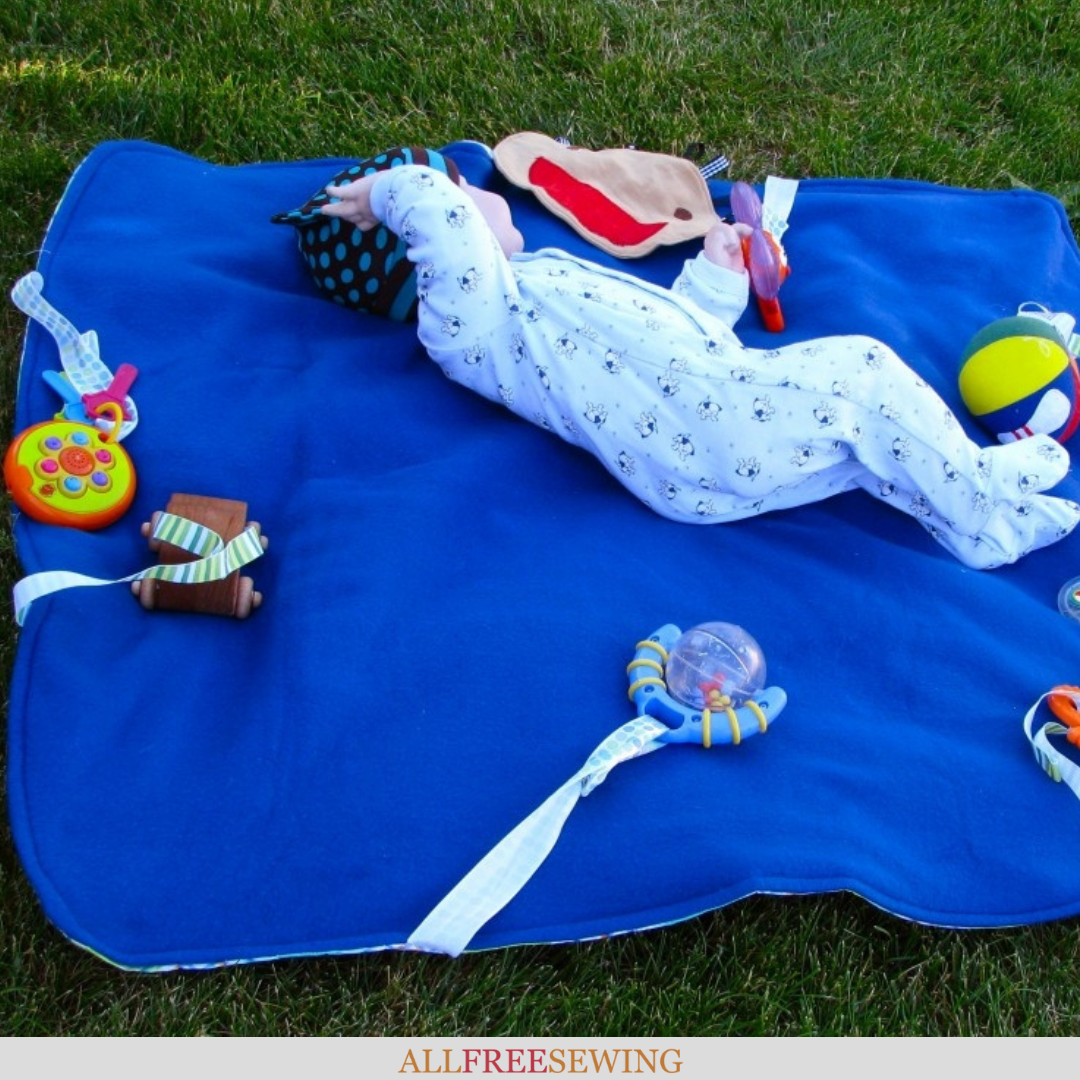 Learning how to make a baby blanket does not have to be restricted to cuddly, indoor ideas. Babies go everywhere with you and it stands to reason that you will need a blanket for all kinds of situations.
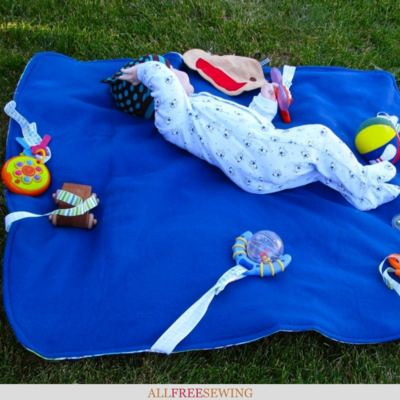
The Great Outdoors Baby Blanket makes playing outside with baby a safe and fun activity. With vinyl backing, this blanket is sure to keep the baby dry even on damp grass.
The best thing about this DIY baby blanket includes instructions on how to add toys to the blanket, making it a fabulous way to keep baby busy, too!
Not only is there a written tutorial but visual learners can rejoice because there is a video at the bottom of this page as well. No matter how you learn, there's no way you'll be confused when you go to make your own fabulous outdoor DIY baby blanket!
Sign Up For More Free Patterns >>>
For more cozy project ideas, see our 15 House Slipper Sewing Patterns & Comfy Sewing Ideas collection.
Materials:
- Vinyl flannel-backed tablecloth
- Fleece
- Ribbon
- Sew-on snaps
- Lighter
- Sewing machine, needle, thread
- Baby toys
Instructions:
- This is part three in my upcycled tablecloth series, so I’ll be using the remnants from my previous projects. I have a large, long rectangle that I’m going to turn into a square by cutting it in half and layering the pieces right sides together, and sewing a 1/2 inch seam to attach them.
- If you are starting with a new tablecloth, there’s no need for a center seam. You can make your blanket as large or as small as you’d like. Mine is about one square yard.
- You’ll need to cut 8 segments of ribbon that are about 14 inches long. You don’t want to cut them too long, because then they could pose a strangulation hazard. Select ribbon that is one to two inches wide. Don’t use wired ribbon, because that could work itself free and poke baby.
- Now you need to pin the ribbon to the printed side of the tablecloth. Extend the ribbon slightly past the edge so you’ll be able to see it when you’re sewing. Add two ribbons to each side, spaced evenly.
- Lay your tablecloth piece face up. Make sure all the ribbons are pointing inward towards the center.
- Cut your fleece to the same size as your tablecloth piece, then lay it on top. Pin together at the sides, making sure that the ribbons remain pointing toward the middle.
- Then sew the fabrics together with a half-inch seam. Whenever you come to a ribbon, backstitch for durability. Remember to leave a hole at least three inches wide for turning. Remove the pins.
- My tablecloth came with curved edges, so I’m going to trim the corner of my fleece to match. If your tablecloth came with straight corners, you can skip this step.
- Turn the blanket right side out. Turn in the edges by the hole and pin shut. Sew shut with a quarter inch seam, then continue topstitching all the way around to give the blanket a nice edge.
- Pay attention to the ribbons as you sew. Make sure they are out of the way of your needle.
- Remove the corner pins. Then use a lighter to carefully singe the ends of your ribbons to prevent fraying.
- Finally, we’ll add the snaps to the ribbon. I’m using very small sew-on snaps, the kind you see on Barbie clothes. Fold down the top edge of the ribbon a half inch. Sew on one half of the snap. Be sure to sew it very securely!
- Then sew on the other half of the snap, about 5 inches up from the blanket. This creates a large loop to attach toys.
- Add the toys and you're finished. To clean, remove the toys and wash on the gentle cycle. Lay flat or hang to dry.
Watch the video tutorial here:
Read NextOh Deer Washable Baby Bib
Your Recently Viewed Projects
Weberme
May 03, 2017
WOW! This is one super great video and so simple and easy. You start with a purchased vinyl tablecloth and add some ribbon and snaps for holding toys and a piece of fabric to sew for front and you have a super looking fleece blanket that you can even lay on grass because the vinyl will keep it from getting damp. Great for a baby shower gift. You can take the toys off to wash or change them out. Great idea.
sandyjdodd 1749079
Jan 05, 2012
This is adorable. I will make it this week for my first granddaughter who will be born in March. Great idea!
bfcozine 4896770
Sep 18, 2011
This was a very informative video. The instructions were clear and concise and the video presentation of each of the steps was wonderful. Great idea - would make a wonderful gift for a grandchild.
victorianrosebud 3 204122
Aug 04, 2011
Hi! This looks really easy and fun to do! What a great idea!
Report Inappropriate Comment
Are you sure you would like to report this comment? It will be flagged for our moderators to take action.
Thank you for taking the time to improve the content on our site.

