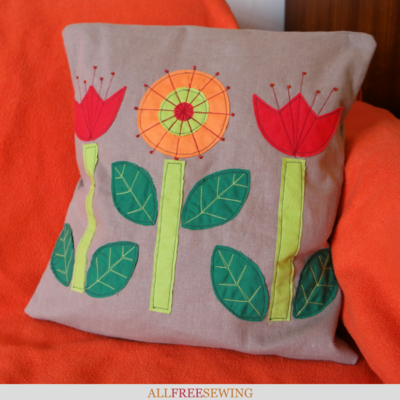
Scandinavian Flowers Cushion Pattern
Make Scandinavian-inspired flower pattern throw pillows for your home with this simple tutorial.

Changing your cushion covers is an easy way to change things up a bit at home. It's a lot less messy than redecorating and a lot cheaper than replacing your furniture!
With this folk-art style Scandinavian Flowers Cushion Pattern, you can make a simple but effective embroidered cushion cover that will work in any room you want to add it to.
If you have a hoard of fabric leftover from other projects, you might well find that you don't even need to buy anything. I actually can't remember the last time I bought fabric to make a cushion!
Cushion pads can be reused too, especially if you make new covers to fit your existing cushions.
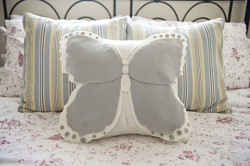
Old pillows can be recycled in the same way. If you want to find out more about this, read this post: How to Upcycle an Old Pillow into a Cushion.
If the pads are a bit tired, it's easy enough to revive them. Sometimes a wash in the washing machine is enough. If you use a tumble dryer, that often fluffs them up some more. If you don’t have a tumble dryer, or if the cushion pad is still flat, you can open up the pad and pull the filling apart with your hands.
Sign Up For More Free Patterns >>>
Plus, if you love this pattern, be sure to visit Anna's blog, Tea and a Sewing Machine, for more beautiful tutorials, resources, and patterns for sewing.
Instructions For Making a Scandi Flower Cushion:
Supplies:
- Flower templates
- Cotton fabric for the cover in a neutral color.
- Scraps of fabric in red, orange, a bright yellowy-green, and a darker green (although you could use different colors depending on what you prefer and on what you have)
- Fusible interfacing for the flowers (optional)
- Interfacing for the cushion cover
- Beads
- Usual sewing supplies
Notes: To make this cushion, I used a cotton-linen blend and scraps of cotton fabric for the applique. I appliqued the flowers, stems, and leaves to the cover then added some machine embroidery to the flowers. The beads were sewn by hand to embellish the flowers.
The cushion has an envelope back. I make all my cushions this way because it’s easiest!
Click to download the templates for the flowers
How to Cut Out Flowers:
- For the cover, cut a square 38 cm x 38 cm (15 inches x 15 inches) and 2 rectangles 38 cm x 30 cm (15 inches x 12 inches) . If you are making the cover for a pad you already have, measure the pad then add a couple of cm (an inch) for the seam allowance.
Note: If you’re using fusible interfacing with your fabric scraps, fuse it to the fabric before cutting out.
- Cut 2 flowers from the red fabric.
- Cut a larger circle from orange, the medium circle from light green and the smallest circle from red.
- Cut 3 stems from the lighter green.
- Cut 6 leaves from the darker green.
How to Applique Flowers to the Cushion:
If you’re using fusible interfacing with the cushion cover, you will need to fuse it now. If you’re using the sew-in kind, pin it underneath the cushion front piece.
- Place all the pieces on the cushion to work out where they need to go. PIn the red flowers to the cover front and applique them in place.

- For the circular flower, applique the smallest circle to the center of the middle-sized one. Then applique these to the largest circle before sewing it to the cushion front.

- Applique the stems next, then the leaves.


How to Embroider the Flowers:
- You can do this either with the sewing machine or by hand if you prefer. If you’re using the sewing machine, I’d recommend drawing the lines on first before you start sewing! A white pencil or a fabric pen with disappearing ink won’t leave lasting marks.

- The red flowers have 5 lines starting at the bottom center of the flower going upwards.

- The circular flower has 12 lines radiating out from the center. I used dark red thread for all the flowers.

- The veins on the leaves are sewn in a light green.

How to Sew the Beads to the Flowers:
- For the red flowers, sew a bead at the top end of each line.

- For the circular flower, sew beads around the outside at the end of each line.

Instructions for Finishing the Flower Cushion:
- Take one of the rectangles and hem one of the long edges. Do the same with the other rectangle.
- With the right sides together, pin the top back piece over the front so that the top edges are aligned, and the bottom piece so that the bottom edges are aligned.


- Sew all the way around the outside edge.
- Trim the seams and cut across the corners. Turn the cushion out.
- Pop the pad inside and enjoy your new cushion!


Want More?
Sign up for more free sewing patterns!
What is your favorite type of flower?
Let us know in the comment section below!
Read NextPetal Pillow