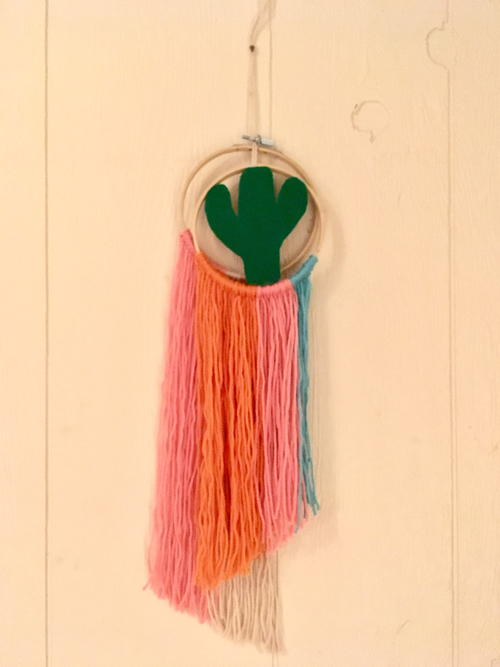
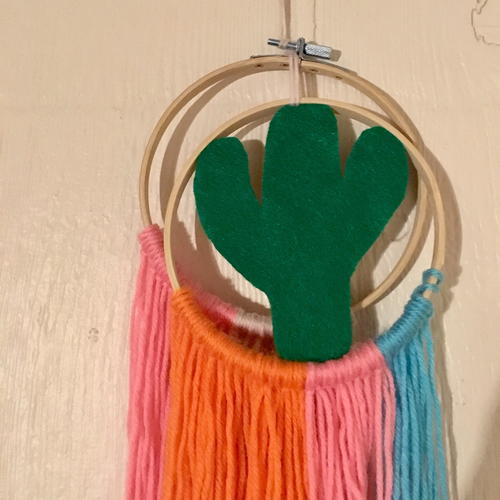
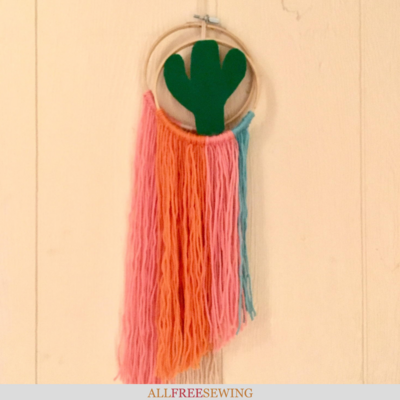
Felt Cactus Embroidery Hoop Wall Art
Cactus crafts are all the rage! Make a felt cactus wall decor piece that has a retro flair.

Creating your own embroidery hoop wall art is an inexpensive and fun way to decorate your space while expressing your artistic side.
With this exclusive free tutorial, learn how to make your own Felt Cactus Embroidery Hoop Wall Art that you'll love displaying in any room of your home.
Embroidery hoop art is easy to make, works well in small spaces, and can utilize the supplies you have in your studio. Our cactus embroidery pattern can be as involved or quick to make as you want it.
This tutorial uses three simple materials- felt, yarn, and wooden hoops- to make a cool hippie-style yarn art piece that's full of retro fun.
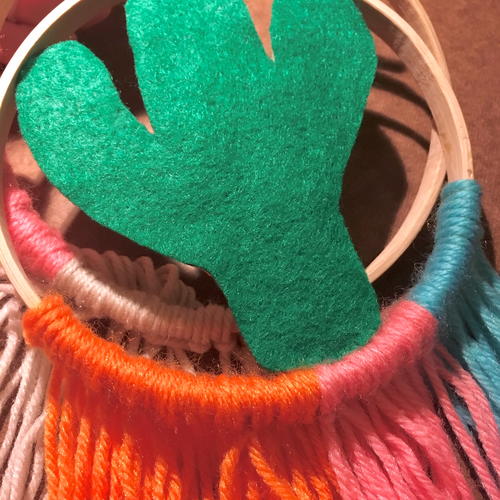
Inspired by the colors of a desert sunset, the green felt cactus is accompanied by yarn in pinks and oranges with a touch of sky blue (but you can make it any colors).
Both yarn crafts and felt crafts are ideal for kids, too. This DIY art style is something everyone will enjoy, whether it's made by kids or adults.
The cactus design is simple but spot-on for the latest trends, so it's a great project to make now. It's even no-sew unless you choose to add sewn embellishments.
Sign Up For More Free Patterns >>>
Below, find the step-by-step instructions to make your own embroidery hoop cactus wall art.
Project TypeMake a Project
Time to CompleteIn an evening
Sewn byHand

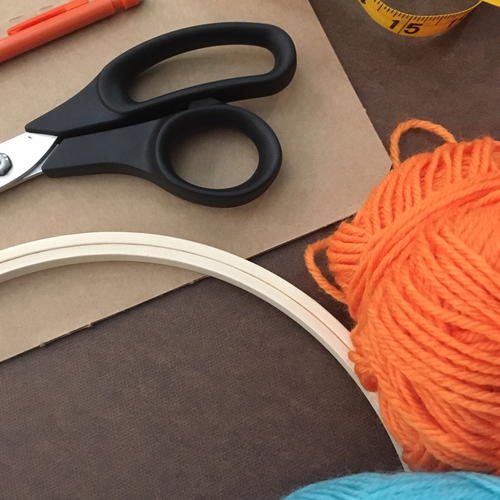
Materials List
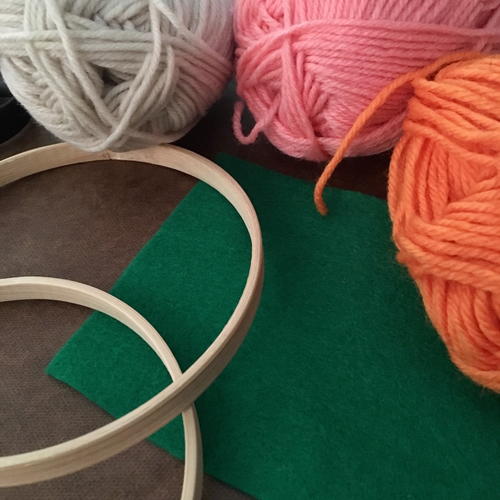
- 2 wooden embroidery hoops (I used 5" wide hoops)
- Yarn: I used a turquoise blue, orange, pinkish-orange, and cream (about 1/2 a small skein per color)
- Green felt sheet (at least the length of your hoop)
- Fabric scissors
- Paper scissors
- Craft or fabric glue
- Thin cardboard or foam board
- Measuring tape or ruler
- Pencil
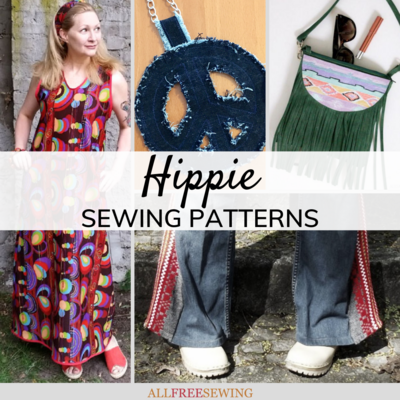
If you like this project, then be sure to check out our collection of retro patterns inspired by hippie culture. Find it here:30+ Hippie Sewing Patterns (Free!)
Felt Cactus Embroidery Hoop Wall Art
How to Make Embroidery Hoop Wall Art:
Click on any image to enlarge.
-
Gather supplies and materials.
-
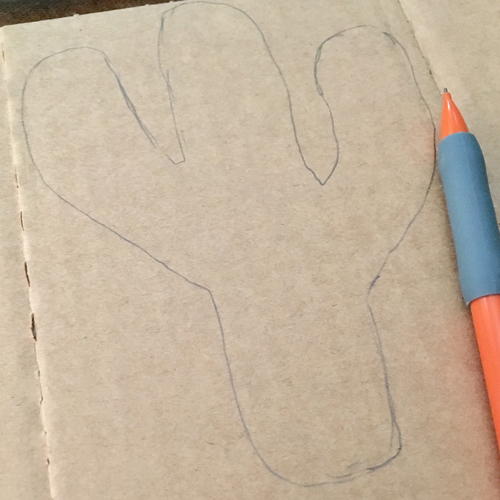
Measure across the inner ring of your embroidery hoop to get the approximate size needed for your cactus shape.
-
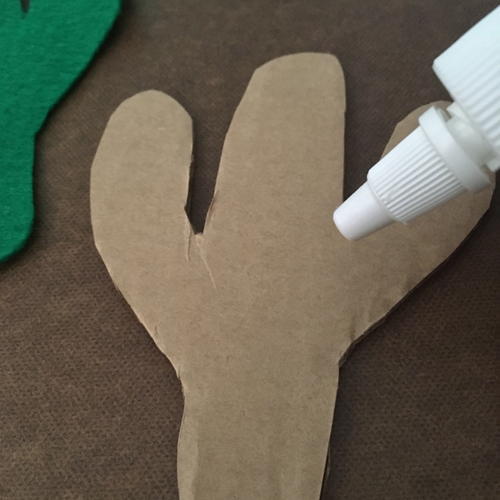
Draw a saguaro cactus (the kind with the large arms) on your cardboard (or foam board). This will become the centerpiece of a hoop, so make sure you're happy with the shape and it's within the hoop measurement from the first step. The pencil marks will be covered by felt (or you can erase them), so re-draw your cactus if it isn't exactly right.
-
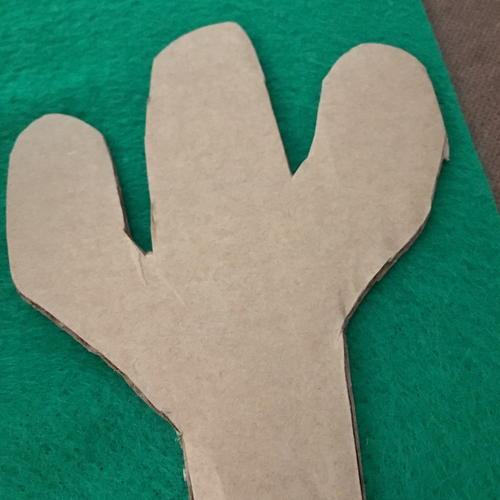
Cut out the cactus shape with your paper scissors, or carefully use a craft knife if the board is really thick.
-
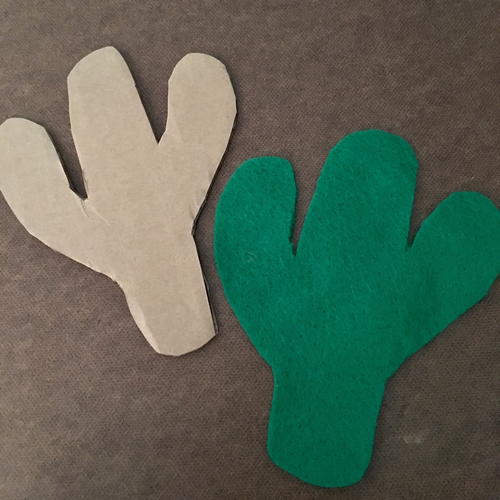
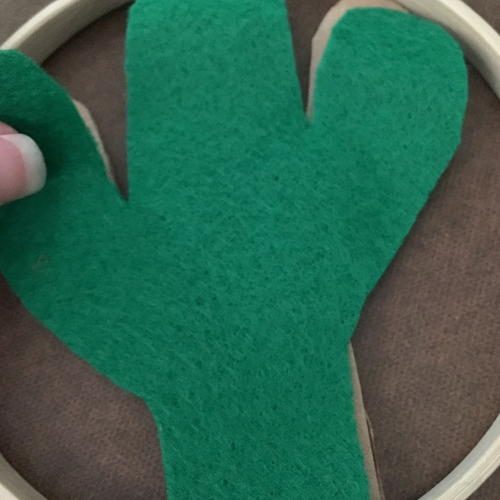
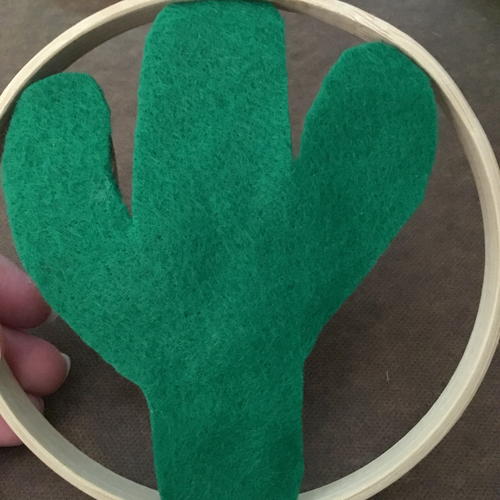
Next, cut out the felt in the same shape of the cardboard cactus (using it as a template)- only a tiny bit larger. You don't want to be able to see the cardboard sticking out from behind the felt. Make sure the cactus shapes fit exactly into the inner embroidery hoop ring.
Optional: If you want to make your cactus shine and sparkle, sew beads or sequins to the felt during this step. -
Place some glue on the cardboard cactus, then place the felt on top, flattening any wrinkles or bubbles. Then set the cactus to the side and allow it to dry.
-
Now let's add the yarn fringe! For this project, I chose yarn in dusty pink, cream, turquoise blue, and orange hues to contrast the green color of the cactus shape. Pick any colors you would like to match your center design!
-
Next, it's time to cut all the strands in the various colors. Mine were approximately 47" long (each piece total), and I had about 68 total strands (the amounts of each color varied a bit). The number of strands of yarn you will need depends on the thickness of your particular materials. If you're not sure how long you'd like the strands to be in the finished look, make them a little longer to be on the safe side. They will be trimmed in a later step.
-
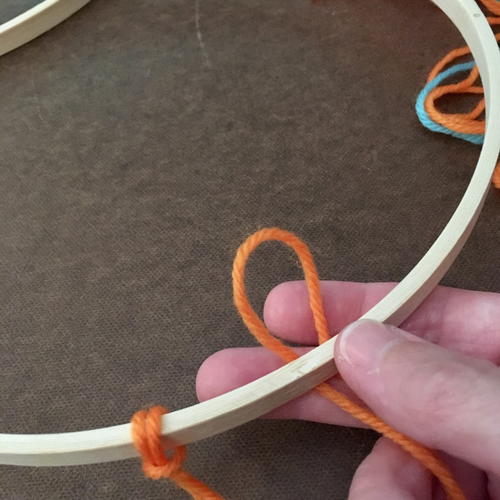
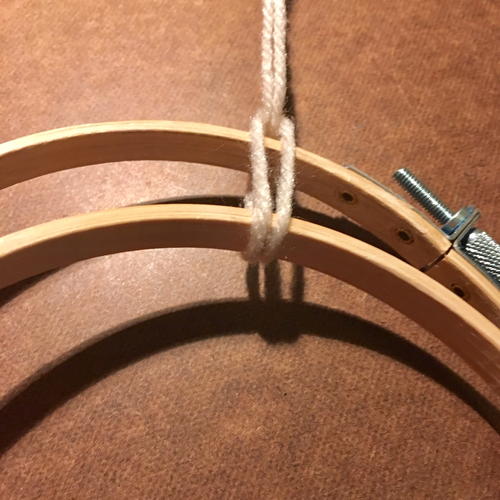
Separate the embroidery hoop into two parts. One ring will have the screw, and the other will be just solid wood.
-
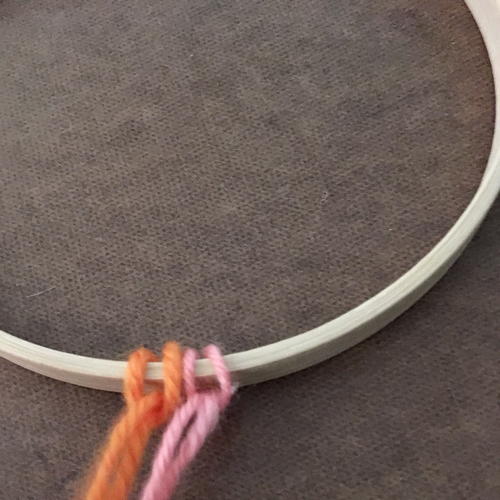
Start with whichever hoop you'd like to, and place the other nearby. Fold each yarn strand in half, form a loop and put the ends through, and then tighten (see photos).
-
Continue looping your yarn through the hoops, grouping colors together. It looks best to use two to three colorblocks per hoop.
-
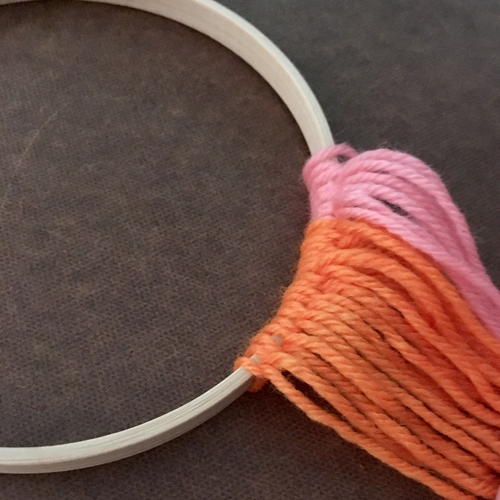
Tighten and straighten the yarn strands to make them all uniform and facing the same way.
-
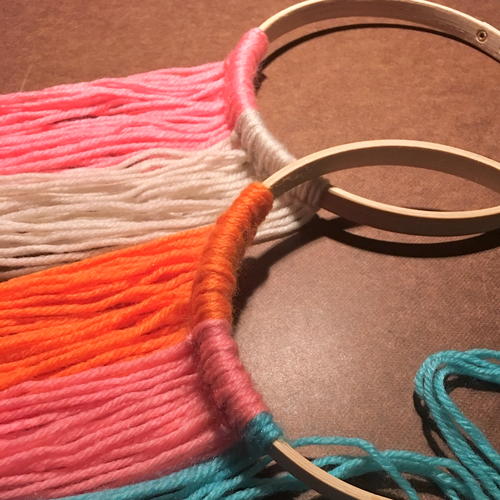
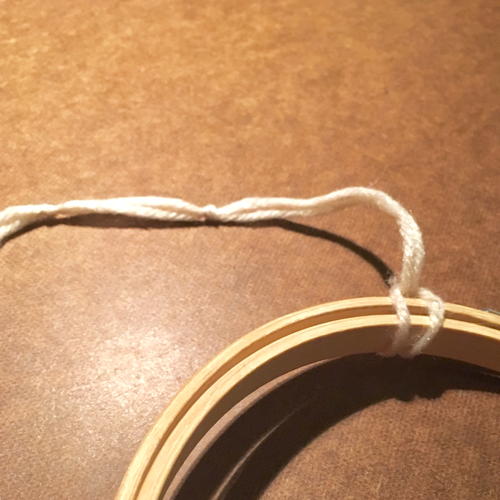
Layer the smaller hoop (with the cactus) over the larger hoop. Once you have them arranged in a way that looks good to you, take another piece of yarn and loop it at the top to connect the hoops. I used the cream color so it would blend into the wall.
-
Place the felt and cardboard cactus inside the smaller embroidery hoop shape. It should rest comfortably but not fall out.
-
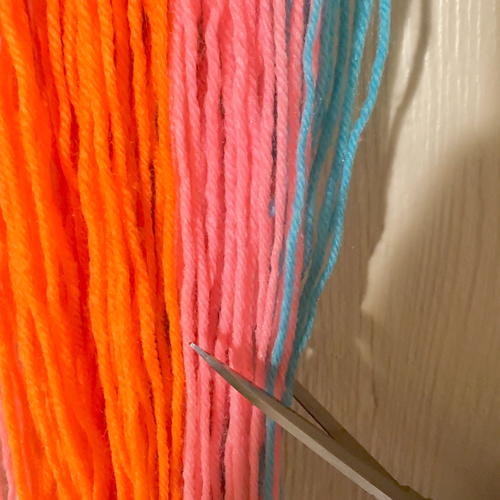
Put your attached hoops on the wall (I placed mine on a nail). Using your fabric scissors, trim the yarn ends to the length you’d like them. I went for an asymmetrical look, but it’s really whatever you prefer. Some of the layers should be left longer to peek out at the bottom. Go slowly and take a little off and then check. You can always take more yarn length off, but not add it back on!


Tips for Displaying Your Embroidery Hoop Wall Art:
- Attach to a simple nail in the wall (or even use a zig-zag picture frame hook on the back).
- Stagger the placement of hoops to add visual interest.
Up Next
How to Cut Felt Patterns >>
What do you like best about this cactus embroidery pattern?
Let us know in the comment section.
Read NextScrap Fabric Wall Art
Your Recently Viewed Projects
Thanks for your comment. Don't forget to share!
Report Inappropriate Comment
Are you sure you would like to report this comment? It will be flagged for our moderators to take action.
Thank you for taking the time to improve the content on our site.