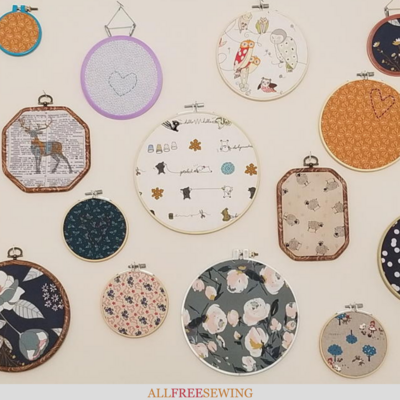
Easiest Ever Embroidery Hoop Wall Art
Learn how to make embroidery hoop wall art that's cute and easy. This hoop wall hanging DIY project is a must-make!

If you're looking for things to do with embroidery hoops, then check out this fun project. This tutorial is the Easiest Ever Embroidery Hoop Wall Art that can be used anywhere in your house.
I recently moved and found that my bed was against a section of the wall that was about the width of a headboard. But it was barren and I thought it needed some sort of art.
That's when I looked at my collection of craft supplies and thought of a simple decorative idea. I also didn't want to spend a lot of time, money, or resources on this project.
Since I sew, I have a lot of fabric and several embroidery hoops. What could be easier than showing off some of the cute fabric I've acquired than putting it in embroidery hoops and hanging it up?
Below, I'll go over the process from start to finish so that you can use this fun hoop art idea for your own place. It can involve as little or as much sewing as you'd like to incorporate, too.
Since embroidery hoops are used, you can sew in the hoop and then leave it as art. That's why they are such versatile sewing tools.
Sign Up For More Free Patterns >>>

Easiest Ever Embroidery Hoop Wall Art
With no or minimal sewing, this embroidery hoop art is ideal for anyone and any wall. To make it even easier, we're providing lots of tips and ideas to customize your own wall art, along with teaching you how to hang embroidery hoops on a wall, and more for planning and executing your design.
Project Type: Make a Project
Time to Complete: Under an hour
Sewn by: Hand (or no sewing)
Skill Level: Beginner
Materials Needed:
- Variety of embroidery hoops, ranging in size, type, and style
- Complementary fabrics (as many as needed for the number of embroidery hoops)
- Wall nails
- Hammer
- Scissors
- Measuring tape
- Sewing needle and thread (optional)
Tips:
- New to hand sewing? Learn how to start a hand stitch.
- For a set of fabric that goes together, look for fat quarter, charm, or jelly roll packs.
DIY Hoop Art Instructions
Planning and Preparing Your Embroidery Hoop Art Design:
Determining the Space Size
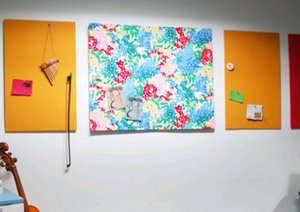
I knew I had a space that was 46" across with a pale yellowish paint color background. I considered filling the entire space but the height from the bed to the ceiling was so substantial that I thought I would stick to the middle section and work horizontally across. That way, I could measure the center and start there, then go outward.
I also wanted the option to add more to the DIY hoop art piece if I found additional fabric to use later. I also didn't want it to be so close to the bed that I couldn't sit up or add extra pillow height.
Another consideration was it being too busy since I wanted to include several different hoop sizes and fabrics.
Choosing a Theme / Fabrics to Use
This is a personal decision based on the style of the room you are decorating.
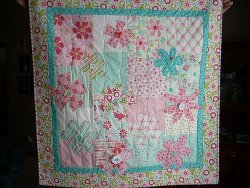
I honestly didn't have any theme in mind for this project, so I took out all of my favorite fabrics and tried to find common traits. I had some pretty leftover Art Gallery Fabrics from my Simple No-Sew Quilted Ornaments project and those were the fabrics that stood out.
Since there were several fabric pieces from the same brand collection, they shared colors and styles. Soft colors, florals, and both vintage and modern themes worked well.
I had a few other pieces of fabric that fit that theme as well, so I started narrowing down my selection. I felt like I didn't have enough. When I saw my sister, I mentioned this project idea and she opened up her tubs of fabric and let me at a few of them!
So, that's another resource I would suggest in order to make this thrifty. Before you buy, ask around and see if any of your family or friends would like to donate their scraps to you.
You can also hit the thrift shops, remnants sections of your local sewing/craft store, or search online for deals once you know what you're looking for.
I thought about whether I wanted to use each fabric pattern once or if I thought it would work to use a few twice. Since some of the fabric pieces had several different elements, I chose a couple that I would like to use twice. It also allowed me to use what I had and not buy any more fabric.
This project used 14 different fabric patterns, with 4 of them being used twice.
Choosing Embroidery Hoops
I had a selection of round embroidery hoops but I wanted to include a variety. Since they aren't that expensive, I ordered a mix of wood, plastic, and rubber.
- I used 4.2", 6.2", and 8" unfinished wood hoops.
- I used a 5.7" circle, 5.47" octagon, and 4.4" x 5.9 " rectangle of imitation wood rubber hoop.
- I used 3", 4", 5", 6", 7", and 8" colorful plastic hoops.
- I used a 4" and 6" spring hoop.
Depending on your fabric sizes and the number you have and want, you may have more or fewer hoops. I didn't want anything bigger than 10" but knew I would need at least 15 hoops for the fabric I had.
This project used 18 different embroidery hoops.
How to Make Embroidery Hoop Wall Art:
- Pair fabric with embroidery hoops. Because I had unfinished wood, colorful plastic, and faux wood finish hoops, I tried to complement the colors. I also considered how much fabric I had and wanted to use to determine the sizes.
- Put the fabric in the embroidery hoops.
Note: If you need to learn how to put the fabric in embroidery hoops, check out this tutorial: How to Use an Embroidery Hoop.
- Remove the excess fabric around the frame. There are several ways to do this:
- Cut the fabric as close as possible to the back of the frame.
- Cut the excess, leaving about 1/2", and glue the fabric to the back of the frame.
- Cut the excess, leaving about 3-4" around, and then add a running stitch all the way around. Tighten the stitch. You can watch a video on how to do this here.
- Add any embroidery you'd like to any of the framed art. I stitched a few hearts on the simpler embroidery hoop fabrics to add a "handmade" element and give them some extra texture.

- Measure the wall and mark the center you would like to be the focal point. For me, I wanted the largest embroidery hoop in the middle. It was also above my bed, so I used a fabric pattern that said, "go to bed" in the center of that focal embroidery hoop.
Nail that embroidery hoop (or use some other holder if desired) to the center part.

- Add each additional embroidery hoop one at a time, step back, and determine the next. Once I had a few on either side, I measured the distance from the ends to the walls to see if it was still equidistant on either side. Step back and admire your new artwork!


Want More?
200+ Sewing Projects for Beginners >>>
Which room do you want to decorate next?
Read NextScrap Fabric Wall Art
Your Recently Viewed Projects
Thanks for your comment. Don't forget to share!
Lynn K
Nov 18, 2018
What a practical, economical and EASY way to brighten up a dull wall! Our teenage son just walked past, saw the image on my screen and said "hey, Mom, could you do that with the front of my T-shirt?" (his favorite that is now really worn out). Such a good idea!
KLC
Dec 04, 2018
Love that idea! I actually thought of doing that instead of turning my old shirts into a quilt. Still trying to decide which would make more sense.
Report Inappropriate Comment
Are you sure you would like to report this comment? It will be flagged for our moderators to take action.
Thank you for taking the time to improve the content on our site.