One Hour DIY Kimono Wrap Tutorial
Learn how to make a kimono style wrap with this simple tutorial! It only takes an hour and uses under two yards of fabric.

This One-Hour DIY Kimono Wrap Tutorial will help you add the finishing touch to any outfit. This tutorial is quick and simple, using less than two yards of fabric!
Sew this DIY wrap with a brightly-printed floral material for a cheery splash of color that will complete your look.
Because this simple wrap tutorial is made with a knit, lightweight fabric, this project will be a wonderful addition to your spring wardrobe!
This isn't a traditional kimono but it's a similar style that's much easier to learn to make than learning how to make a kimono from scratch. It's casual, cool, and flattering on everyone. That's why we love it for spring, but also year-round for effortless layering.
Emma from Fiskars is the designer of this creative kimono cardigan tutorial. She says: Bring bright color trends to your spring closet with this DIY wrap. It's a simple sewing project that makes a bold statement.
Sign Up For More Free Patterns
One Hour DIY Kimono Wrap
Materials List:
• Self Healing Cutting Mat: Large (24" x 36")
• Acrylic Ruler (6" x 24")
• Adjustable Three-Position Rotary Cutter (45 mm)
• Amplify® RazorEdge™ Fabric Cutting Scissors (8")
• 1-1/2 yards 58” wide floral print knit fabric
• Sewing machine and thread
• Pins
• Iron and ironing board
Skill Level: Beginner
Project Type: Make a Project
Time to Complete: Under an Hour
Sewn By: Machine
DIY Kimono Wrap Instructions:
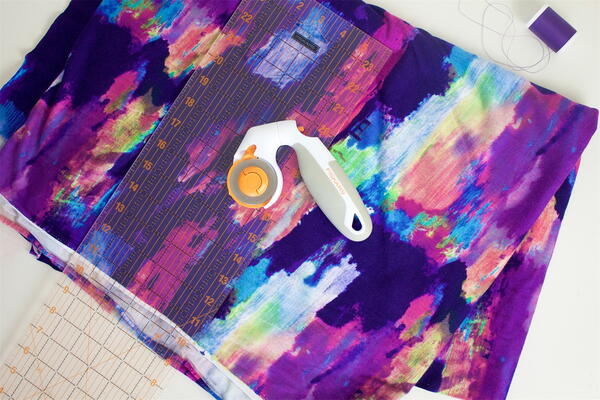
- Cut two pieces of fabric measuring 58" x 27" using the Adjustable Three-Position Rotary Cutter and Acrylic Ruler.
Note: When working with large pieces of fabric, I often fold the fabric in half to make cutting long pieces more manageable. The rotary cutter is designed to power through multiple layers, giving you clean, straight cuts each time.
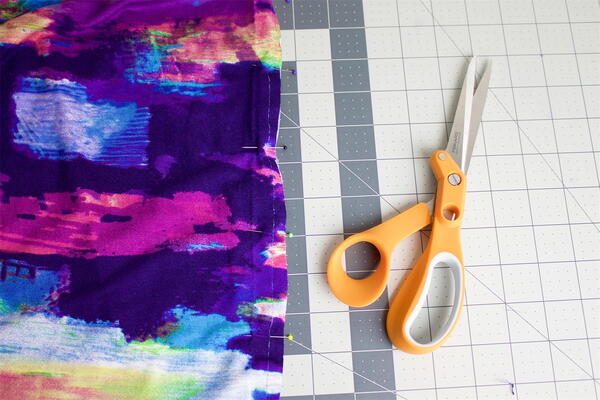
- To create the back seam of the kimono, lay the two pieces of fabric on your work surface with the wrong sides of the fabric facing each other. Pin down one long side of the two pieces of fabric starting at the top edge and stopping halfway down the side.
Sew along the pinned line, leaving the remaining half unsewn. The unsewn half forms the kimono front opening. Trim away the seam allowance to 1/4" using the 8" Amplify® RazorEdge™ Fabric Shears.
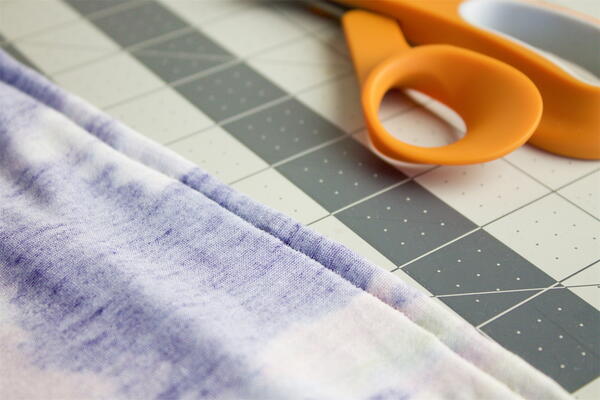
- Fold the fabric back over so that the right sides of the fabric are facing each other. Sew the seam once more, with a 1/2" seam allowance. This French seam completes the back seam of the kimono.
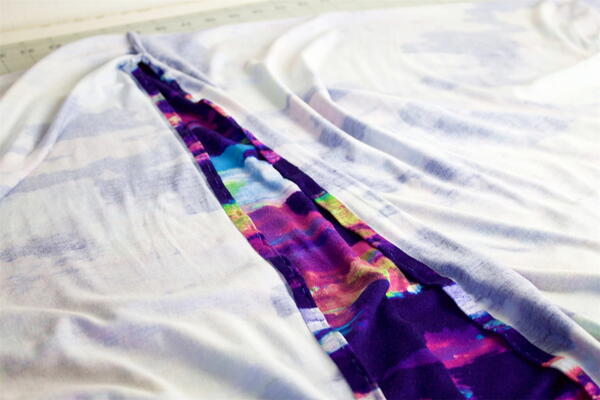
- Open out the fabric so that the back seam you stitched in steps 2 and 3 is facing up, and the kimono's opening edges are on top. Fold the opening edges over and press with an iron. Pin the fold and stitch down, to finish the opening neatly.
- Now create the armholes. Place a pin 10" down from the folded edge on both sides of the kimono. Pin all the way down to the bottom edges of the fabric then stitch. Trim any loose threads then turn your kimono to the right sides.

You're done! This simple DIY piece will add a bold flare to any outfit.

Want More?
Spring Fashion: 8 DIY Sewing Projects eBook >>
What's your favorite fabric for blankets?
Let us know in the comments!
Read NextPeasant Top
Your Recently Viewed Projects

Thanks for your comment. Don't forget to share!
Marilyn B
Sep 28, 2017
Thank you for the great instructions...I love the fabric used in this tutorial and could see making these as gifts because the size is versatile and could be a great fit for many ladies, and it would go well with jeans, slacks, or a dress! This would be a fun,project for beginners and even for a fun project during a ladies night! I could also see this made from terry cloth or fleece as a bed jacket or for the hospital as a comfy top to feel better! Great idea!
Report Inappropriate Comment
Are you sure you would like to report this comment? It will be flagged for our moderators to take action.
Thank you for taking the time to improve the content on our site.