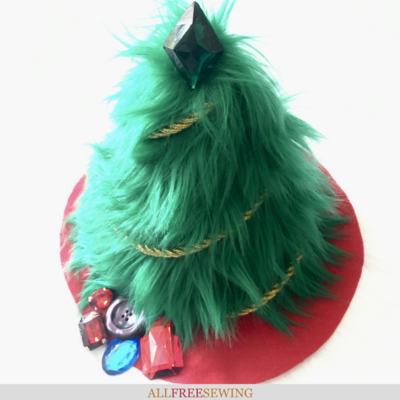
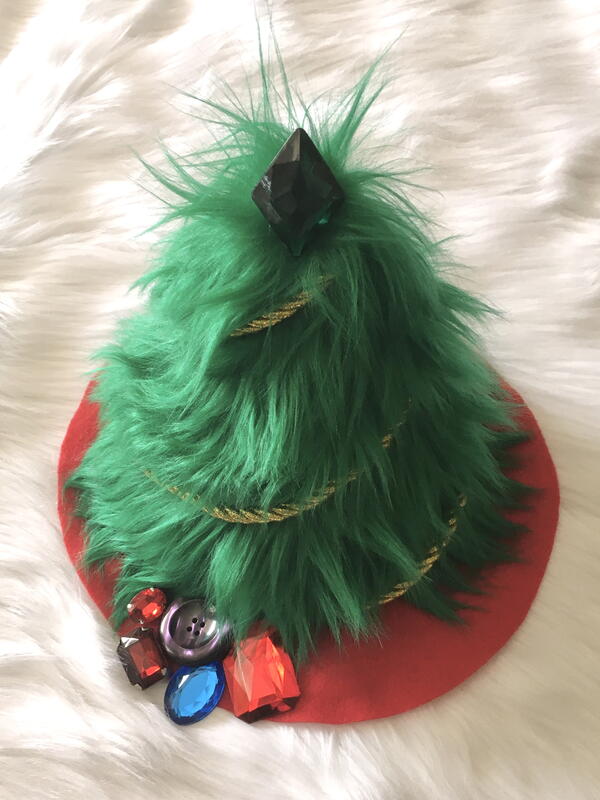
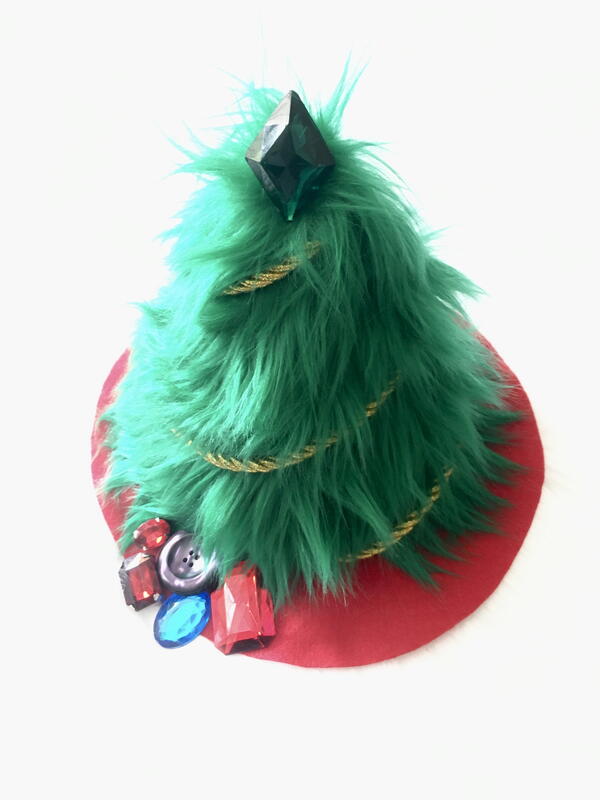
Faux Fur Tabletop Christmas Tree
This DIY tabletop tree is a unique piece that will garner lots of attention at your holiday party!

As autumn approaches, it's the perfect time of year to start creating winter holiday decor! In this tutorial, we will use an unconventional and unexpected material, faux fur, to make a tabletop Christmas tree.
This Faux Fur Tabletop Christmas Tree will look beautiful on any coffee or side table during the holidays. It also looks fantastic in windowsills or on the mantel. It's small and festive, so anywhere you want to put it is up to you.
Plus, it doesn't require a sewing machine to make, just a needle and thread. It's possible to make it no-sew, too. It is customizable with whatever colors and adornments you'd like, and it can be reused year after year.
The beauty of a thrifty project like this is that you can use nearly whatever you have on-hand in your craft stash. Let's go through the steps to make this festive holiday tree!
Tabletop Tree Materials Needed:
- green (or any other color) faux fur fabric (approximately 12" (inches) square in size minimum will make the 7" tall tree in this tutorial)
- adornments for the top of the tree and the "presents" (these can be novelty craft jewels or whatever you’d like to use!)
- a red (or any other color) craft felt sheet for the tree’s "skirt"
- braided cording or tinsel to decorate (about 2' (feet) long)
- thick paper or card stock about 12" square (needs to be bendable)
- fabric or craft glue (optional)
- fabric scissors
- paper scissors
- measuring tape or ruler
- clear tape
- stapler (regular size so it can reach far up on the paper, so not a mini stapler)
- hand-sewing needle
- thread in a color that matches the faux fur

DIY Tabletop Christmas Tree Instructions:
Skill Level: Easy
Approximate Time to Complete: 1 hour
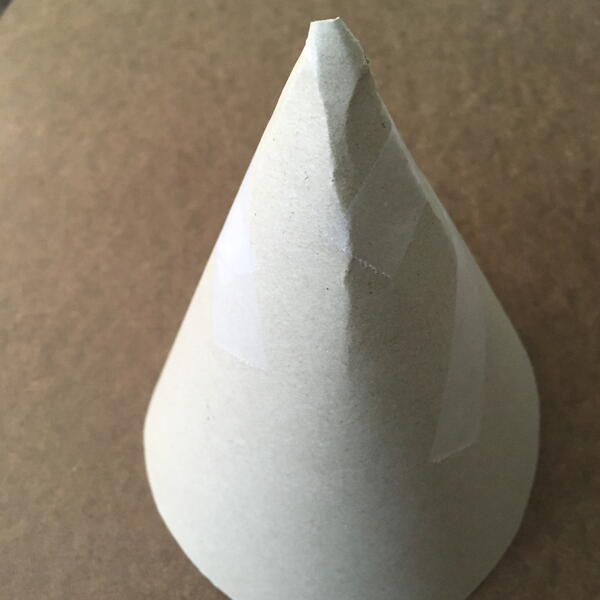
- Start by creating the shape of your tree in the card stock or thick paper. The paper should be bendable so it can form a cone in order to support the tree. It may require two sheets if the paper is small in size. The cone should be similar in shape to a paper party hat.
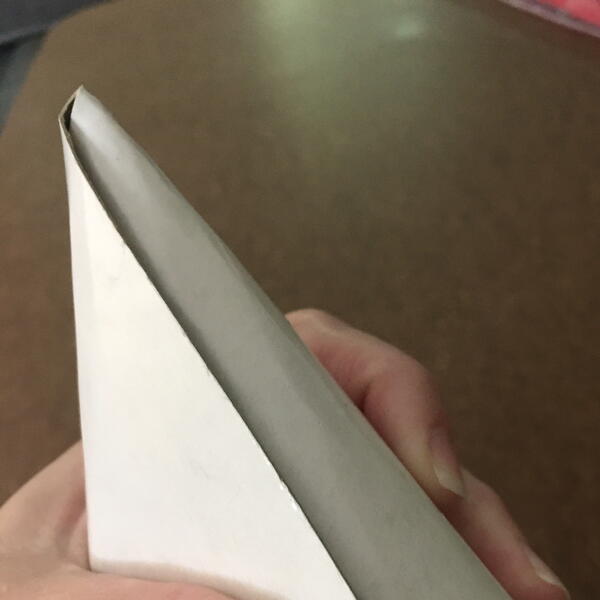
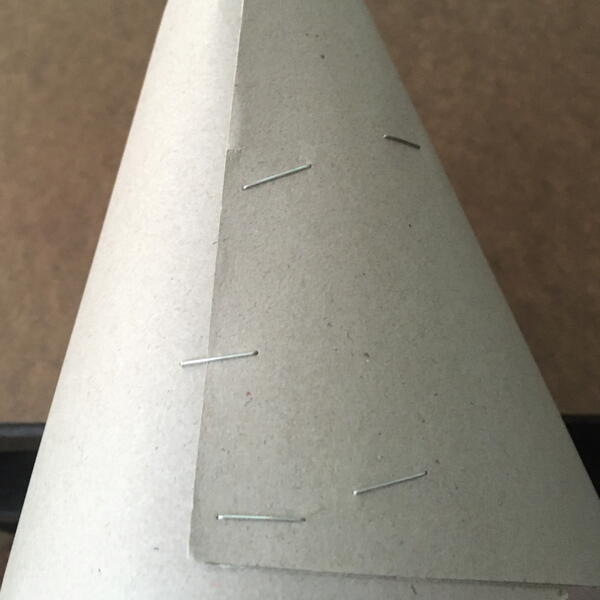
- Once it becomes a cone shape, staple it at the bottom, middle, and top (as high as you can go). You can also use clear tape to hold the shape together more securely.
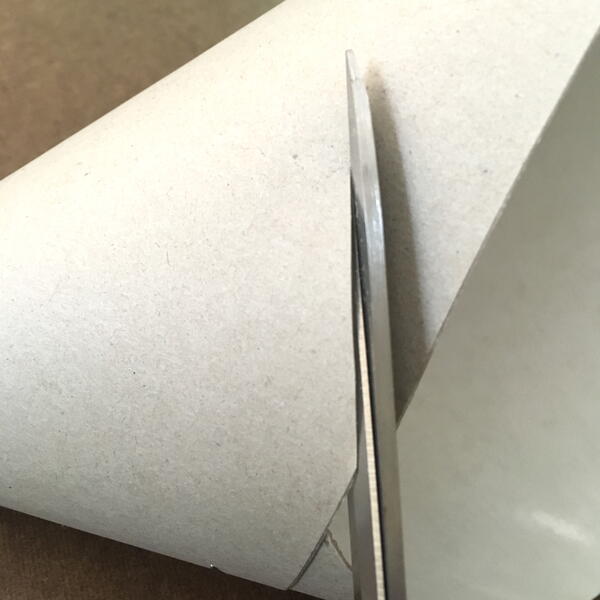
- Using paper scissors, trim off any excess paper that extends past the cone shape. It should have a flat base after trimming and be able to rest on a table upright.
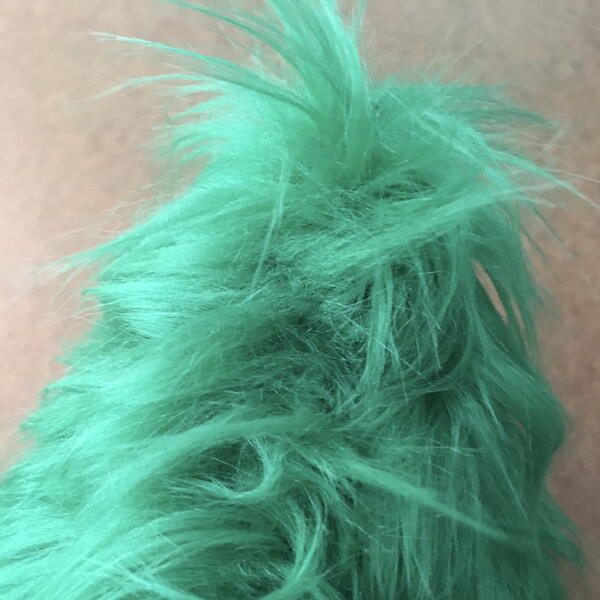
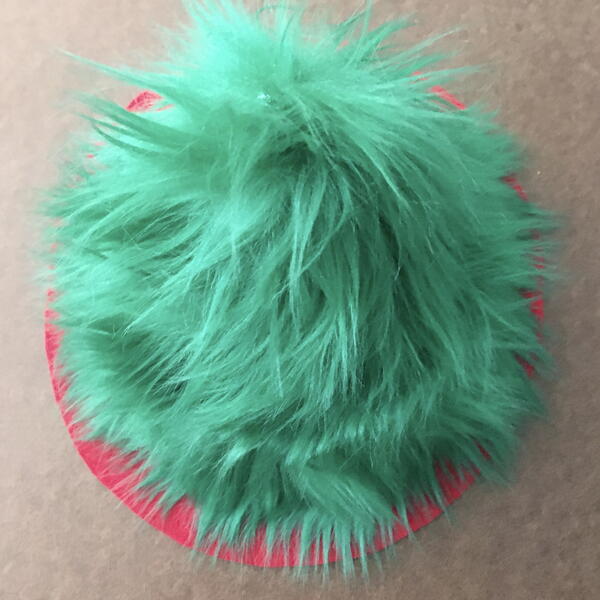
- Now it's time to add the fake fur! I used green fabric for this tutorial, but your tree can be any color you choose. Lay out your piece of faux fur on your workspace, fur side down. Take your paper cone shape and place it on the fabric's edge, then wrap the fur around to approximate the size you will need to cover it. The fur should be large enough to overlap the cut edges. Staple the first raw edge to the cone in order to hold it in place.
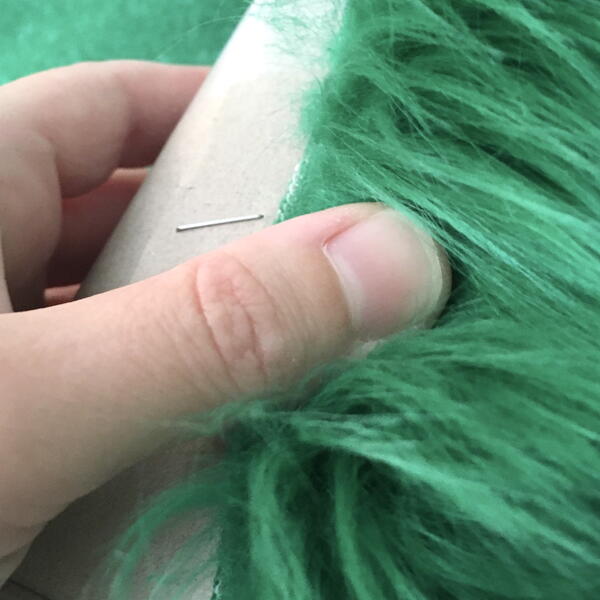
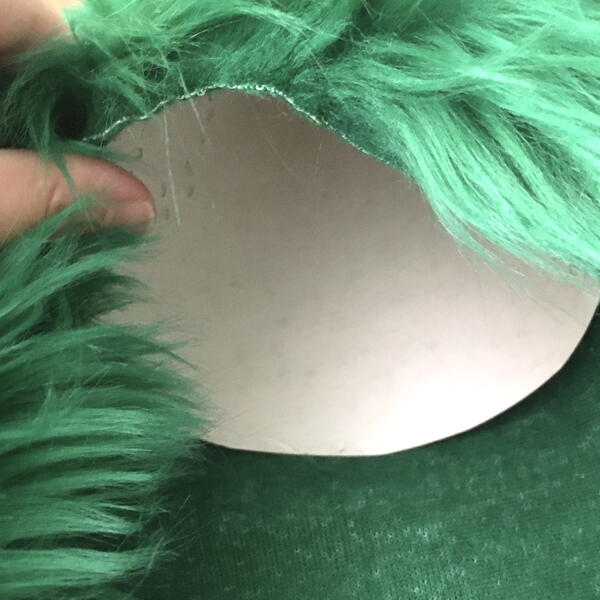
- Double check that the fur is the correct size to cover the paper shape. No paper should be visible on the outside, and the fur should overlap the other cut edge without being too bulky. Trim excess if needed.
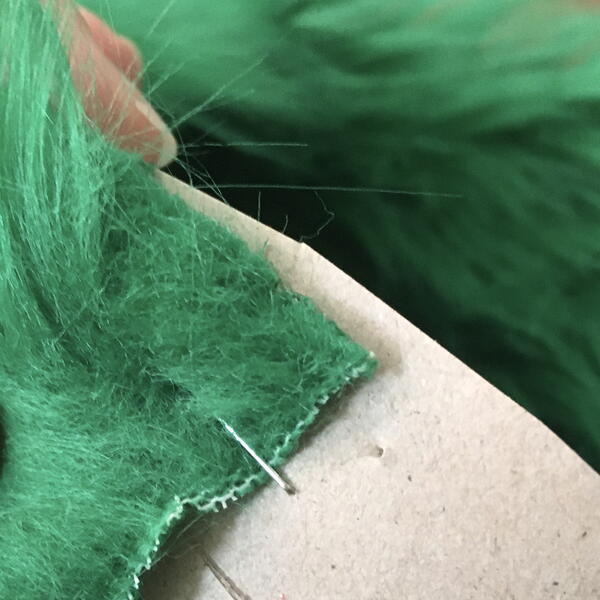
- The fake fur now has to be attached to the cone shape. Using your hand sewing needle and thread, start at the top and connect the fur with the cut end folded under to hide it. It should be snug but not bending the paper shape. If the strands of fur get caught in the tread, use your needle to carefully pull them out and fluff them back up.
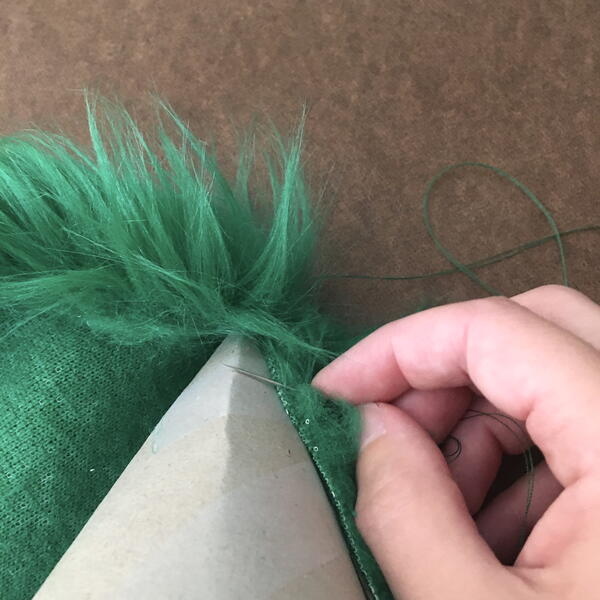
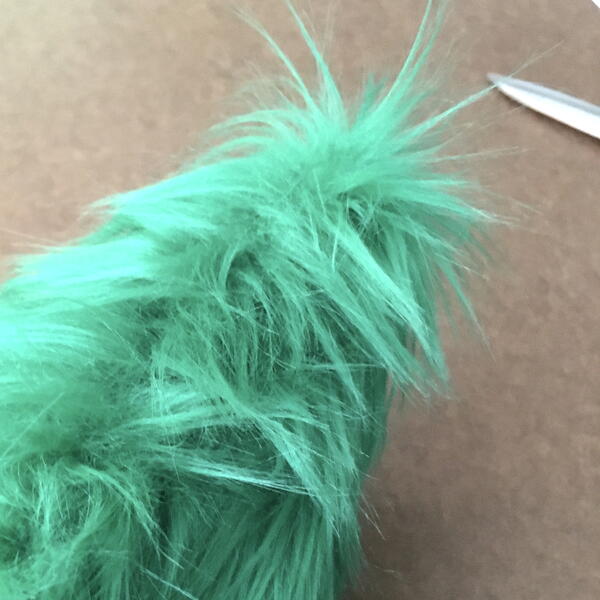
- Using a pair of fabric scissors, cut off the excess faux fur at the base. When cutting fake fur be sure to only cut the base layer and not the long strands of fur. If you aren't used to working with faux fur, practice cutting it on a scrap piece before cutting the fabric on the tree.
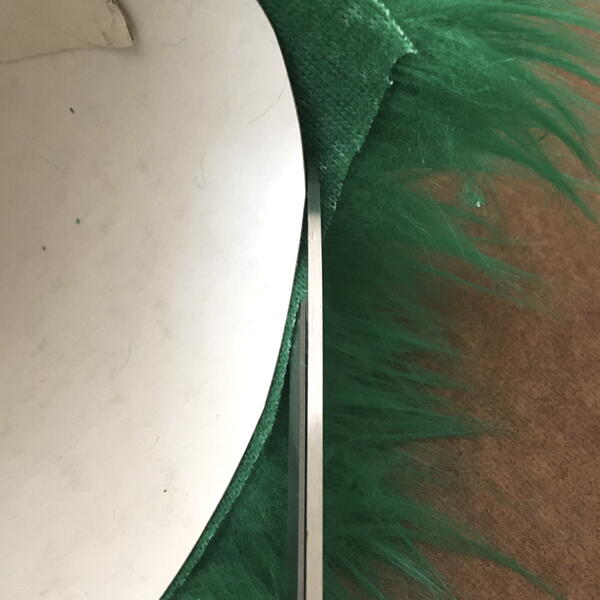
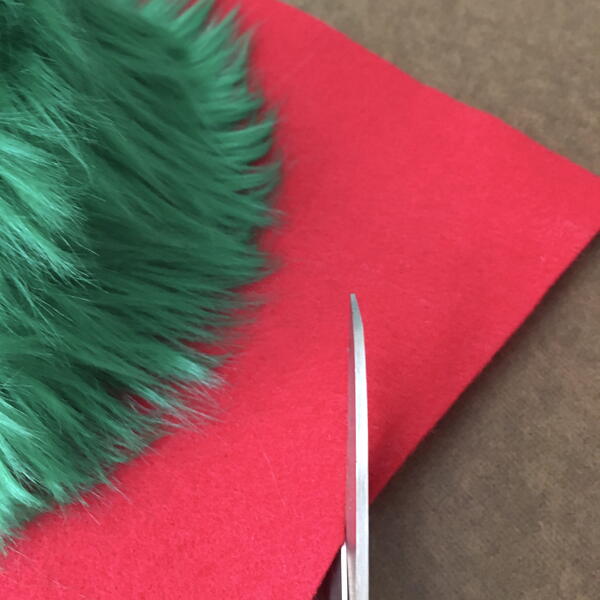
- Now that your tree shape is complete, the skirt it sits on can be added. I used a simple piece of red craft felt to create this base, but it can be made in whatever color or fabric you'd like to match your style. In this tutorial, a 9.5" wide circle was cut out and the tree placed on top. I didn't attach the tree to the base for the time being in case I still need to reach the inside of the cone shape, but if you'd like to it can be glued or even safety pinned into place.
- The tinsel or cording can now be attached! I used a thick golden braided cord for my decoration. Starting at the top of the tree, sew the end of the cord on and then wrap it around diagonally until it reaches the base. Then it can be tucked under and either stapled, sewn, or glued on to secure it.
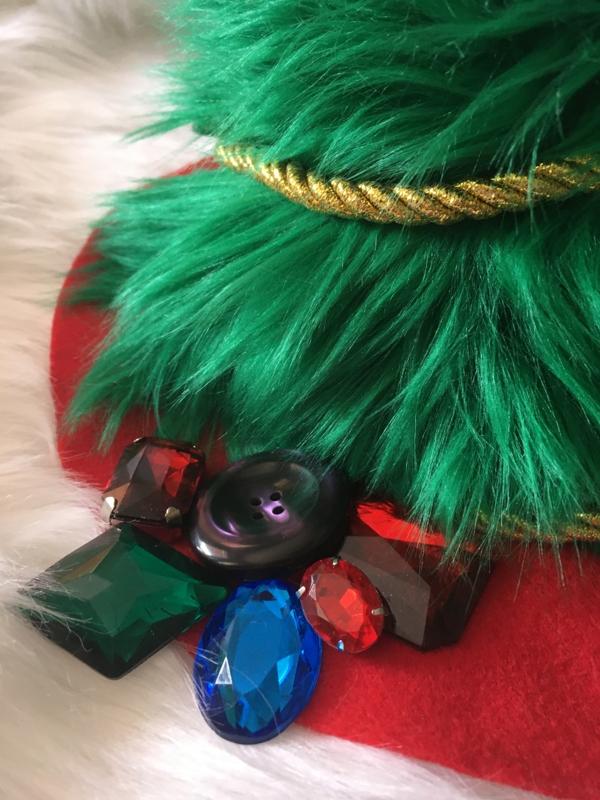
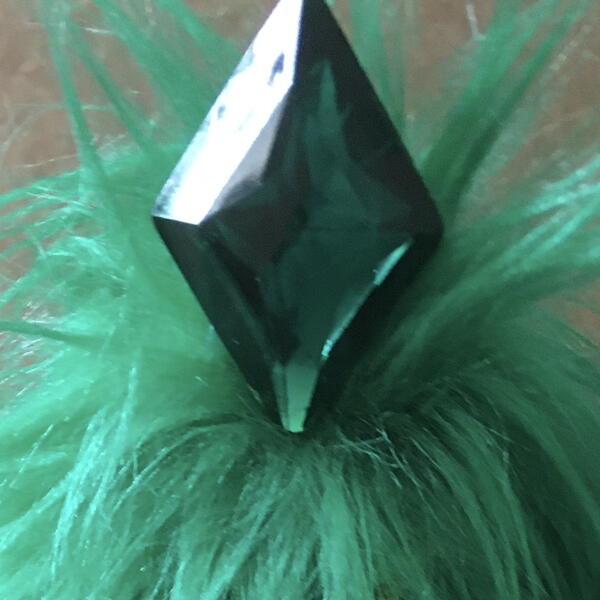
- Almost done! A Christmas tree needs a topper, so a novelty jewel is the perfect shiny adornment. It can be simply glued on or even hand-sewn on if it has holes.
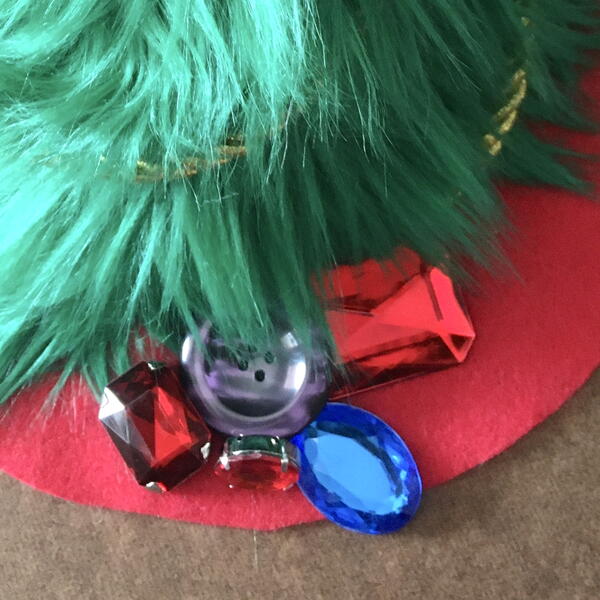
- Next, let's add some more sparkle! The tree's "presents" at the base can be random single earrings you’ve been holding on to, buttons, novelty gems, pom poms, or whatever else you have in your craft room! Arrange them on the base of the tree, and glue them on once you're happy with the placement.
- Trim or touch up any uneven parts of the tree and skirt. Your tabletop decoration is now ready for the season! Just make sure to check that everything is properly attached and that it is out of reach of children and pets.
Up Next
No-Sew Fabric Christmas Gift Tag Ornaments >>
How will you decorate your faux fur tabletop Christmas tree?
Read NextStars of Wonder Christmas Mug Rug