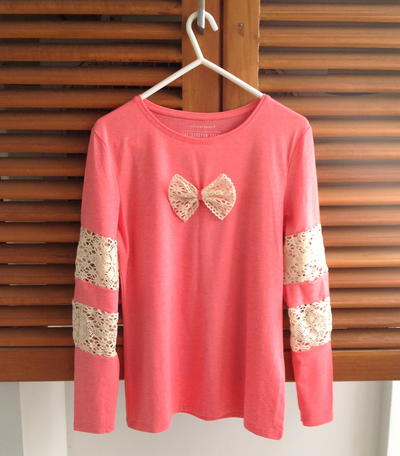
How to Refashion a Shirt with Lace
Turn any old shirt into a chic statement piece with this tutorial!

Looking to reinvigorate your old wardrobe with sexy flair without breaking the bank? This step-by-step tutorial will show you How to Refashion a Shirt with Lace so that you can give any drab shirt a youthful makeover in five simple steps. Never wonder again how to upcycle old clothes! This DIY shirt refashion guide will teach you how to add sensual embellishment to any blouse, jacket, or long sleeve dress. All you need is some lace and thread, and your hot new closet is ready for anything from a night on the town to a fancy dinner party!
Project TypeMake a Project
Time to CompleteIn an evening
Sewn byHand

Materials List
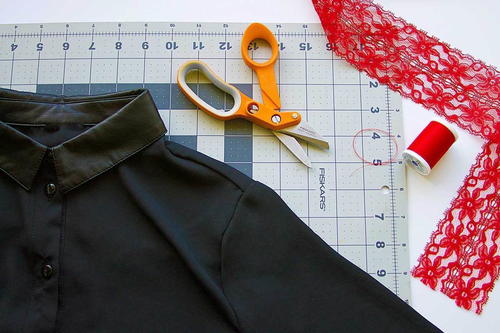
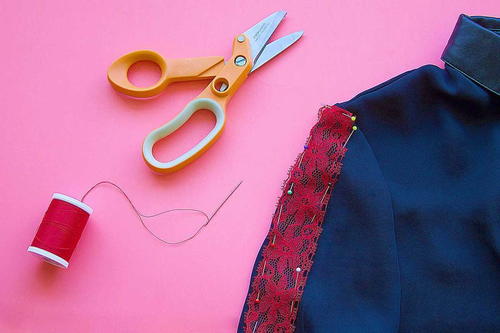
- Blouse suitable for repurposing
- Lace
- Needle and thread
- Iron and ironing board
- 6'' Fabric shears
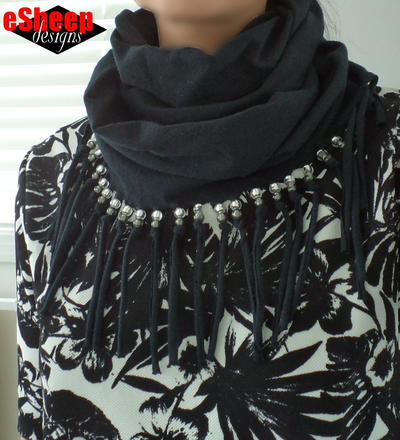
Looking for other easy ways to refashion your wardrobe? Give your accessories a trendy update with this Blinged Up T-Shirt Infinity Scarf Upcycle!Blinged Up T-Shirt Infinity Scarf Upcycle
Instructions
-
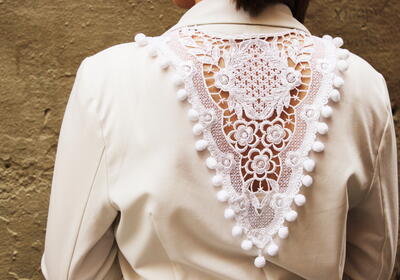
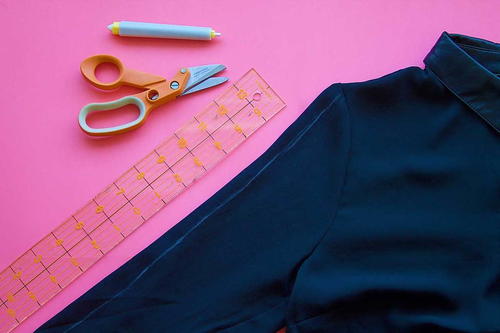
Gently press your blouse and create a crisp center fold in each of the sleeves.
-
Lay the blouse flat on your work surface and take a piece of chalk to mark a line just less than half the width of the lace that will be used. This piece of lace was trimmed to 1¼” wide, so the chalked line was ½” from the ironed fold. Start the chalk line from the top of the shoulder seam and finish above the cuff.
-
Use the 6” fabric shears to cut along the chalk line through both layers of sleeve fabric. Be sure to start your cut just below the shoulder seam and to stop the cut just before you get to the cuff as you will want to keep the seams intact. When finished, you will have a cut out channel, running the entire length of the center of the sleeve. Repeat step 1 and 2 for the second sleeve.
-
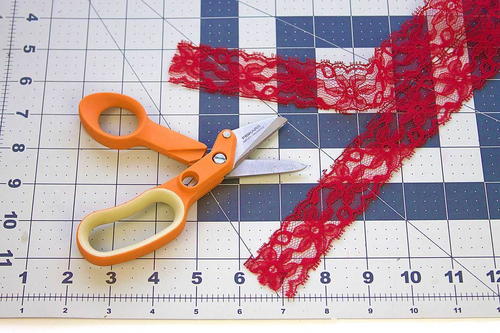
Cut a piece of lace to the length of your sleeve.
-
Pin both sides of the lace to the opening in your sleeve. With small stitches, hand sew both sides of the lace to the sleeve so that it covers the area that has been cut out. Fold under the top and bottom ends to create a neat finish at the shoulder and cuff. Continue this process on the other sleeve to complete the blouse.
Read NextGirly T-Shirt Refashion